We’re fixin’ to show you a quick, crispy weeknight winner. This little recipe makes a crunchy crust fast — no dough mess, no fuss. Preheat to 400°F for that perfect crisp base.
First things first: brush one side of the flatbread with softened butter or olive oil and pre-bake 2–3 minutes, flipping halfway. That step keeps the crust from going soggy when you add sauce and cheese.
Add a thin layer of sauce, keep it off the edge, pile on mozzarella and cooked meats like mini pepperoni, ham, or bacon. Pop it back in and air fry another 2–3 minutes until cheese melts and edges brown. Use tongs to pull it out and let it rest a moment before slicing.
We’ll walk you through safe cooking, timing tips, and how to keep the basket tidy. Grab your basket, tongs, and a smile — this easy air fryer treat is about to become a go-to.
Key Takeaways
- Preheat to 400°F and pre-bake the flatbread 2–3 minutes for a crisp crust.
- Brush with butter or olive oil to prevent soggy bottoms.
- Use cooked meats and keep sauce away from the edge to avoid mess.
- Air fry 2–3 more minutes until cheese melts; check early since units vary.
- Use tongs to remove and let rest briefly before slicing.
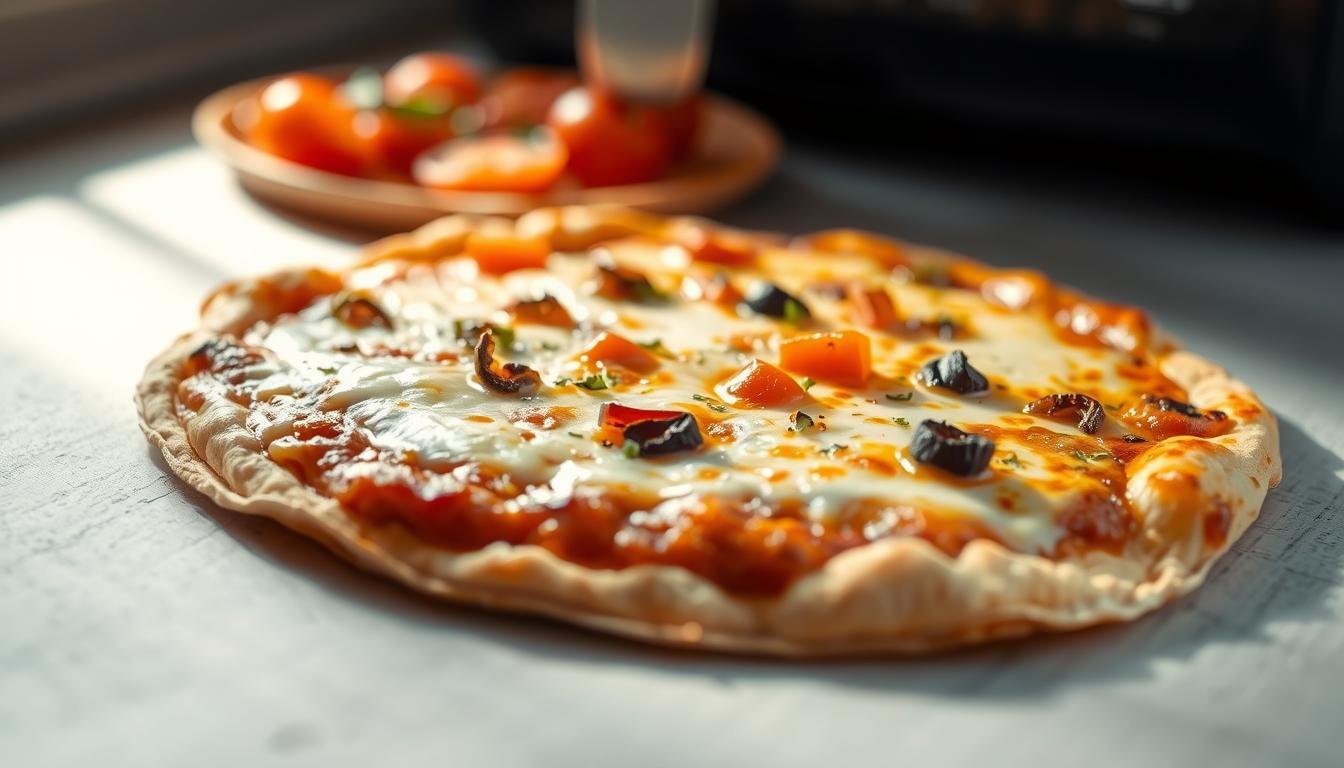
Why You’ll Love This Easy Air Fryer Tortilla Pizza
This single-serve flatbread treat gives you crisp crust and big flavor in about five minutes. We preheat air for that quick snap so the base won’t go floppy. That little step makes a huge difference.
It’s wildly customizable. Pick your favorite toppings, swap cheeses, or use a dairy-free shredded option. Gluten-free lovers can use alternate wraps and still get the crunch.
Speed matters. At 400°F you’re looking at about five minutes total, though some units get there closer to four. Keep an eye the first time you try a new model.
- Single-serve — everyone builds their own.
- Pantry-friendly — sauce, cheese, and whatever cooked bits you have.
- Less heat in the kitchen — great for hot days.
| Benefit | What It Means | Quick Tip |
|---|---|---|
| Fast | Ready in about 4–5 minutes | Preheat air for crisp results |
| Custom | Individual toppings for every eater | Use pre-cooked proteins |
| Flexible | Gluten-free and dairy-free options work | Try whole-wheat or GF wraps |
| Budget-friendly | Uses pantry staples | Stretch ingredients across multiple pies |
Ingredients & Tools You’ll Need
Let’s round up the simple stuff first — the handful of ingredients and tools that make this quick snack sing. We keep it pantry-friendly so you can toss one together anytime.
Core ingredients
What to grab: 1 flour tortilla (soft taco/fajita size), 1 tsp olive oil or softened butter, 1–4 Tbsp pizza sauce, and 3 Tbsp–¼ cup shredded mozzarella cheese. The mozzarella cheese melts best, but any shredded cheese you love will do.
Optional toppings
- Mini pepperoni, cooked breakfast sausage, bacon, cooked hamburger, or ham — already cooked is key.
- Veggies: mushrooms, peppers, onions, olives, or a handful of spinach.
- Seasoning: a pinch of Italian seasoning or red pepper flakes for kick.

Tools & pantry hacks
Tools are simple — an air fryer with basket or a small baking pan, a spoon to spread sauce, measuring spoons, and tongs to lift the hot crust. A light brush of oil helps crisp the base.
Pantry hack: Mix canned tomato sauce with 1 tsp Italian seasoning, ½ tsp garlic salt, and ½ tsp sugar for a quick pizza sauce. If you prefer the oven later, this recipe adapts — but we love the speed of the fryer.
How to Make Tortilla Pizza in the Air Fryer (Step-by-Step)
Let’s build this simple flatbread one quick step at a time for the best crisp and melt. These steps keep things tidy and fast — perfect for weeknight supper.
- Preheat the unit to 400°F — this is the golden rule for crispness. Give it a few minutes to come up to temp.
- Lightly brush the flatbread with butter or oil and spray the basket or bottom pan. Pre-bake 2–3 minutes, flipping halfway so the base firms up.
- Spread pizza sauce leaving a clean 1-inch border. Less sauce means less soggy crust and fewer spills in the basket.
- Sprinkle shredded mozzarella and add only cooked toppings so everything heats evenly.
- Slide the built flatbread onto the basket or pan and cook at fryer 400 for 3–6 minutes. Peek at the 4-minute mark — every fryer runs a bit different.
- Let it sit 1–2 minutes in the basket to set. Use tongs or a spatula to lift it out carefully and slice.
Tip: If your basket sticks, spray the bottom first. Note the exact time for your unit so the next go-round is perfect.
| Step | What to Do | Why It Matters |
|---|---|---|
| Preheat to 400°F | Warm unit fully before cooking | Ensures a crisp base in minutes |
| Pre-bake 2–3 minutes | Brush with oil/butter and flip once | Prevents soggy bottoms |
| Top & cook 3–6 minutes | Use mozzarella and cooked toppings | Melts cheese and browns edges |
| Rest 1–2 minutes | Let set in the basket | Makes slicing cleaner and safer |
Pro Tips for a Crispy Crust—No Soggy Tortillas
We want your crust to snap, not flop. Start by heating both the unit and the basket until they’re hot. That quick sear gives the base instant structure and keeps toppings from dragging it down.

Preheat the unit and the basket
Preheat air well so the metal is hot when the wrap hits it. Hot metal equals instant crisp — and fewer soggy bites.
Brush and pre-bake for a firmer base
Give the base a light brush of butter or olive oil, then pre-bake 2–3 minutes. That short step turns flimsy into firm and ready for toppings.
Keep toppings and sauce light
Easy on sauce and cheese — too much will weigh the crust down. Keep a small border around the edge to avoid drips and burned bits.
Use cooked proteins and veggies
Only add pre-cooked meats and sauté watery veggies first. Your pie only spends a few minutes in the unit, so everything should be ready to heat, not to cook.
- Preheat the basket — hot metal makes a difference.
- Brush with oil and pre-bake for 2–3 minutes.
- Don’t overload sauce, cheese, or toppings; leave a border.
- Watch the minutes — these little pies go from perfect to toasty fast.
Toppings & Flavor Ideas to Try Tonight
We love playing matchmaker with toppings — pick a base sauce, add a couple of favorites, and watch dinner happen. Keep things light so the crust stays crisp and slices clean.
Classics
Go simple and satisfying. Add mini pepperoni, cooked ground beef, ham, bacon, or chicken sausage for crowd-pleasing pies.
Veg-forward
Sauté mushrooms, peppers, and onions first. Then add olives, spinach, cherry tomatoes, banana peppers, or pineapple for bright texture.
Sauce swaps
Try marinara, vodka, or arrabbiata for a red base. Use alfredo for a white option or pesto for instant herb richness.
Finishing touches
Mozzarella plus a sprinkle of parmesan is a no-fail combo. Add red pepper flakes, a drizzle of hot honey, fresh basil, or a pinch of italian seasoning to wake things up.
- Keep toppings modest so your tortilla pizzas stay crisp.
- Mix cooked meats like shredded chicken or ground beef with veggies for balance.
- Swap sauces to change the whole mood — instant variety for movie night.
Choose Your Tortilla & Cheese
Pick a sturdy wrap and a melty cheese so your slice holds together when you lift it. We want a base that crisps fast and a cheese that melts like a dream.
Flour options: an 8-inch flour tortilla (fajita/soft taco size) fits most baskets and crisps up sturdy. Low-carb flour wraps, like Mission Carb Balance, work great when preheated and pre-baked.
Almond flour varieties brown quicker. Start checking at 3–4 minutes so they don’t overdo it. Corn tortillas are smaller — use two side-by-side if your basket allows.
- Thickness matters: thinner wraps brown faster — reduce time accordingly.
- Cheese picks: mozzarella for stretch, provolone for smooth melt, cheddar for sharp bite, or blends for balance.
- Pro tip: a little shredded mozzarella and a dusting of parm gives that pizzeria vibe.
If you plan heavier toppings, choose a sturdy wrap and pre-bake it a touch longer. That keeps each slice from flopping and makes your quick pizza feel like a proper meal.
Time & Temperature: Make Sure Your Air Fryer Is Dialed In
Dialing in temperature and time makes a big difference. Crank the unit to 400°F and let it fully preheat so the basket is hot. Hot metal plus hot air equals that snap we crave.
Typical cook time runs 4–6 minutes—peek at 4 minutes. Lighter wraps, like almond flour, finish in 3–4 minutes. Corn tortillas are smaller and thinner; watch them closely so they don’t over-brown.
- Preheat air fryer to 400°F—this is your baseline.
- Standard timing: 4–6 minutes; check early and adjust a minute at a time.
- Let rest 1–2 minutes in the basket so the cheese sets and slices clean.
- Basket placement matters—too close to the top element can over-brown the cheese.
- If your fryer runs hot, drop the time; if it runs cool, add a minute.
Make sure to jot down your sweet spot for your specific unit. We promise—you’ll thank yourself next time.
Safety, Cleanup & Basket Handling
Let’s talk safety and cleanup so your little weeknight pies don’t turn into a sticky chore. A few simple habits make cooking faster and safer — and keep you smiling while you cook.

Use the air fryer basket or a solid baking pan whenever possible. Thin racks let soft wraps sag and can drop cheese right into the element. If your fryer basket sits too close to the top element, slide a pan down a level so the crust won’t burn.

Quick cleanup & safety tips
- Use foil or a liner under the base to catch drips — cleanup’s a breeze.
- Keep sauce and toppings away from edges. Spills burn fast and stick to the basket.
- Lightly spray with oil or brush with olive oil to prevent sticking — don’t overdo it.
- Use tongs to lift hot pies. Never pick up metal parts without protection.
- Don’t wander off — these little pies cook quick and can go from perfect to charred in a blink.
- If you reheat later in the oven, place the slice on a sheet pan for steadiness.
- Make sure to let metal parts cool before cleaning — safety first.
We’ve got your back: follow these few steps and your fryer basket will stay tidy, your fingers will stay safe, and your next bite will be pure joy.
Serving Ideas & Pairings
We like to turn one quick pie into a little feast. Add a few simple sides and you’ve got dinner, snack time, or a movie spread in no time.
Quick sides: salads, fruit, roasted veggies
Build a crisp cucumber–carrot salad or an orzo pesto bowl for fresh contrast. Fruit salad brightens the plate.
Roast broccoli, cauliflower, or baby carrots right alongside for warm, tender veg. These pair perfectly with cheesy slices.
Dips & sauces: marinara, pesto, ranch, Caesar, garlic aioli
Keep a few bowls ready. Marinara and pesto are great for dunking. Ranch or Caesar add creamy tang. Garlic aioli is a tasty upgrade.
Snack boards for movie night or after-school
Set out mix-and-match toppings and let everyone build their own. Cut pizzas into quarters for easy sharing. Pepperoni lovers can add a few extra slices after cooking for a fresh pop.
- Weekday lunch hack: one pie, a salad, and you’re out the door in minutes.
- Scale up the recipe and cook in batches to keep the party rolling.
Nutrition Notes & Lighten-It-Up Swaps
For a slimmer, brighter bite, choose whole wheat and top with more veggies and less cheese. We want flavor without the heaviness — and it’s easy to do.
Go lighter fast: swap in whole wheat tortillas and pile on roasted peppers, mushrooms, spinach, and tomatoes. Use part-skim mozzarella cheese or cut the total amount of cheese in half. Little changes add up.

Gluten-free & dairy-free options
Gluten-free eats? Grab GF or almond flour wraps — they crisp nicely, though timing may vary. Dairy-free? Use a trusted vegan shredded cheese and finish with a drizzle of olive oil for richness.
“A pinch of italian seasoning lifts lighter sauces—big flavor, low calories.”
- Lighten up with whole wheat tortillas and a generous pile of veggies.
- Go easy on cheese or choose part-skim mozzarella cheese to trim calories.
- Gluten-free? Try GF or almond flour tortillas — watch cook time.
- Dairy-free works: vegan shredded cheese + a brush of olive oil.
- Low-carb wraps brown beautifully — same pre-bake trick applies.
| Swap | Why | Quick Tip |
|---|---|---|
| Whole wheat | More fiber, fuller feel | Pre-bake 2–3 minutes for crispness |
| Part-skim mozzarella | Lower fat, still melty | Use sparingly — less melts the same |
| GF or almond flour | Gluten-free friendly | Check at 3–4 minutes — they brown fast |
| Vegan shredded cheese | Dairy-free option | Finish with a light brush of olive oil |
Storage & Reheating
A fresh slice is the best slice — that crisp edge and melty cheese are at their peak right out of the basket. But if you’ve got extras, we’ve got a simple plan to keep them tasting great.
Best made to order: Enjoy your pies hot and fresh for peak crunch and flavor. Leftovers won’t be far behind if you store and reheat them right.
Refrigerate & Reheat
Short-term storage: Place cooled slices in a sealed container and refrigerate for 3–5 days. This keeps moisture in check and flavors safe.
Reheating in the air fryer: Heat at 400°F for a few minutes until the crust crisps up and cheese melts again. Check early — thin wraps re-crisp fast.
- Skip the microwave if you want that crunch — it softens the base.
- Oven option: Warm at 425°F for 5–7 minutes on a lined pan until the cheese bubbles.
- Make sure to warm on a liner or pan to keep the basket tidy during reheats.
- If toppings were heavy, give a little extra time to drive off excess moisture.
Quick tips: Note the cooking time that works for your unit. A few minutes is usually all it takes to bring leftovers back to life — good as new and ready to share.
Conclusion
Bottom line — a hot basket and a quick pre-bake give you crisp, cheesy success every time.
We’ve shown the simple path to crunchy, single-serve fryer tortilla pizza — fast, fun, and foolproof. Preheat, pre-bake the buttered or oiled wrap, then top and fry. Keep meats cooked and toppings modest so the crust stays snappy.
Pro tip: jot your sweet spot for time and temp. That tiny note makes future recipe nights easy. Store extras briefly and reheat in the air fryer to bring back the crunch — no soggy slices here.
Now grab your wraps, call the crew, and enjoy a weeknight winner that’s customizable, affordable, and downright tasty.