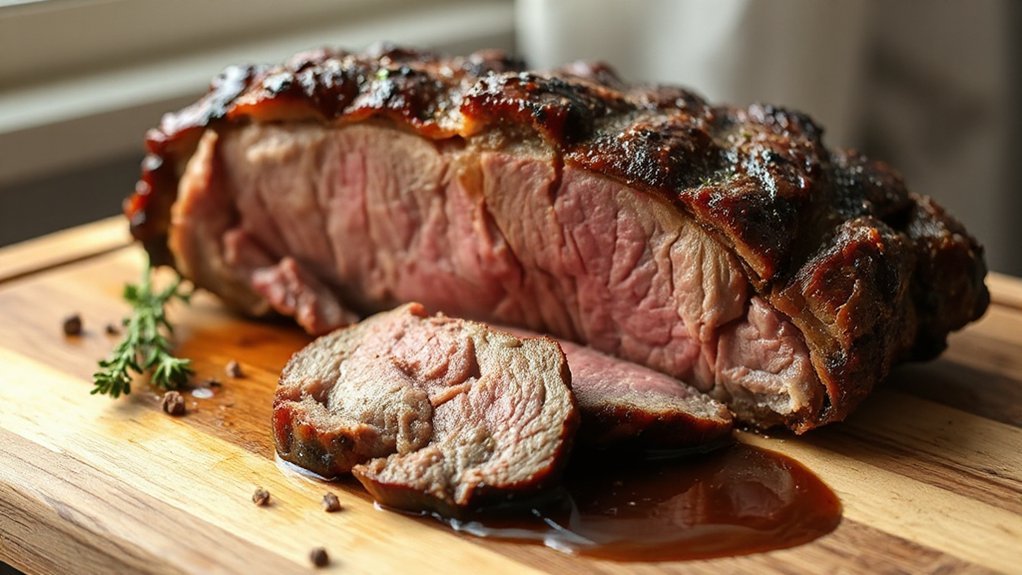
You’ll turn a modest 2 to 3 lb chuck roast into a Sunday-worthy deeply browned centerpiece in your air fryer that’s crispy and tender. Pat dry and rub with oil, 1 tsp kosher salt per pound, pepper, garlic and onion powders, smoked paprika plus brown sugar. Sear at 400°F, roast at 325–350°F while monitoring temp. Rest 10–15 minutes, slice against the grain, and you’ll get juicy beef—keep going for timing, tools, and simple storage tips.
Why Choose the Air Fryer for a Chuck Roast
Because it traps intense hot air and cooks fast, the air fryer gives a chuck roast a deeply browned, crispy crust while keeping the inside tender and juicy. You’ll love how it shortens cook time without sacrificing depth of flavor, and its compact chamber delivers consistent browning across the roast’s surface. You don’t need to babysit huge ovens or wait for long preheats; the appliance heats quickly, so you get a roast sooner. It’s also surprisingly energy efficient compared with conventional ovens, cutting wasted heat and power use on smaller meals. You’ll appreciate the hands-off confidence—set temperature and time, and the air circulation does the rest, producing a sturdy crust and even interior doneness. Cleanup’s easier too, since splatters stay contained. If you want an efficient, reliable method that gives restaurant-style crust and moist slices, the air fryer’s a smart, modern choice for chuck roast every single time.
Ingredients and Simple Rub

Now that you know why the air fryer gives a chuck roast that restaurant-worthy crust and juicy interior, let’s talk about what you’ll need to make it sing. You’ll want a 2–3 lb chuck roast, kosher salt, coarse black pepper, garlic powder, onion powder, smoked paprika, and a touch of brown sugar to balance. Use 1 tsp salt per pound, 1 tsp pepper total, 1 tsp each of garlic and onion powders, 1/2 tsp paprika, and 1 tsp brown sugar—mix into a uniform rub.
For best results, prioritize spice freshness and consider local sourcing for beef and herbs; fresher spices and locally raised meat make a noticeable difference. Pat the roast dry, massage the rub into all sides, and let it rest at room temperature 30–60 minutes if you can. That’s it—simple, bold, and ready for the air fryer to work its magic. You’ll love the results, truly.
Air Fryer and Tool Checklist

Before you fire up the roast, make sure your air fryer is the right size and working properly—capacity, temperature control, and a sturdy basket matter. You’ll also want a reliable meat thermometer, tongs, and an oven-safe pan or rack for even browning. With those essentials on hand, you’ll cook confidently and get great results every time.
Air Fryer Essentials
Gather the right gear and your air fryer roast will come out perfect—this checklist covers the compact essentials you’ll want on hand: a properly sized air fryer (with a roomy basket or rack), a reliable instant-read meat thermometer, long tongs, heatproof silicone or wooden spatulas, oven mitts, and a small roasting pan or foil tray for drippings; optional but helpful extras include a silicone liner or perforated parchment, a basting brush, and a sturdy cutting board for resting and carving.
Mind cleaning basics and safety precautions: wipe the basket, drain drippings, and use mitts. Keep tools handy and carve safely.
| Item | Purpose | Tip |
|---|---|---|
| Thermometer | Doneness | Insert centrally |
| Tongs | Flip | Long handles |
Must-Have Tools
While a good recipe matters, the right tools make the difference between an OK roast and a showstopper—so outfit your kitchen with a properly sized air fryer (roomy basket or rack), an instant-read meat thermometer, long tongs, heatproof spatulas, oven mitts, and a small roasting pan or foil tray for drippings; optional but handy extras include a silicone liner or perforated parchment, a basting brush, and a sturdy cutting board for resting and carving.
- Preheat and space meat properly
- Use thermometer and tongs
- Catch drippings for gravy
You’ll follow simple tool maintenance to prolong gear life, and practice safety protocols every time you cook. Keep items clean, store thoughtfully, and you’ll carve a perfect roast with confidence and speed every single weekend without fail.
Preparing and Seasoning the Roast
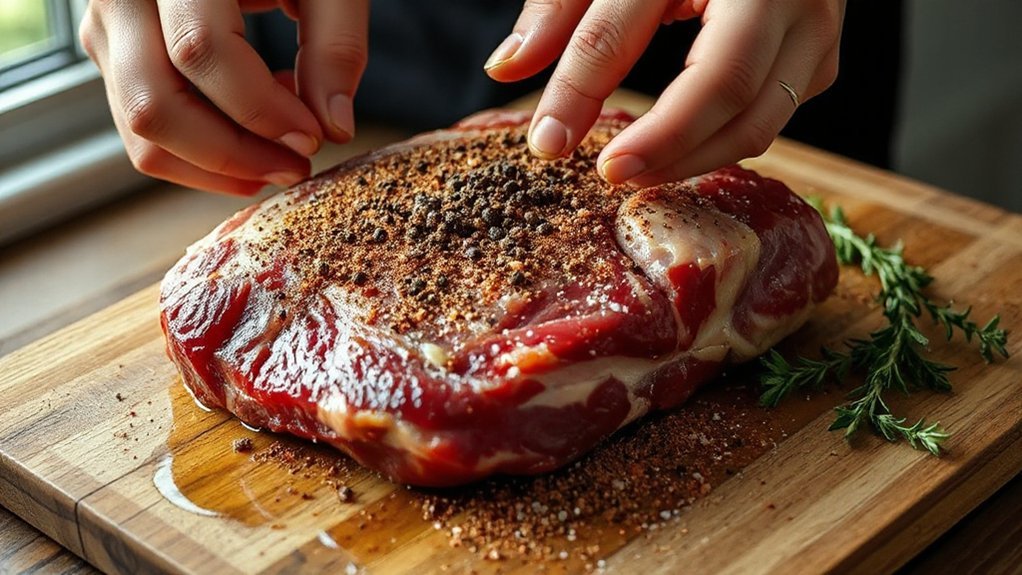
Patting the roast dry helps the seasonings stick and gives you a better crust. Before you season, do quick fat trimming, leave a thin cap for flavor but remove excess that’ll flare or weigh the roast down. Use surface scoring on that fat layer so salt and herbs penetrate and the roast renders evenly. Rub the beef with oil, then hit it with coarse salt, cracked black pepper, garlic powder, and a touch of smoked paprika for depth. Press the rub into crevices so it bonds; you’ll notice the aroma. If you want herbs, tuck some rosemary or thyme into the scores and under the roast. Let the seasoned beef rest at room temperature for 20 to 30 minutes; this helps the flavors settle and promotes even cooking later. Don’t skip a light final pat to remove loose bits before you transfer it to the air fryer.
Air Fryer Cooking Process and Timing
Often you’ll start by preheating the air fryer so the chamber is hot and the air is already moving when the roast goes in — this gives you better browning and a crisper exterior. Set a high initial temperature to kick-start the Maillard reaction, then drop to a moderate setting for gentle cooking; that temperature ramping gives you a browned crust without overcooking the center. Use probe monitoring to track internal temp, aiming for your target at the thickest point. Check early and often through the cook to avoid overshoot.
Preheat the air fryer, sear at high heat, then lower temperature and probe until desired doneness.
- Sear phase: 400°F for ten to twelve minutes
- Roast phase: 325 to 350°F until target temp
- Probe checkpoints: at 120°F, 130°F, then final target
You’ll flip or rotate once during the roast for even color, and you’ll rely on the probe for precision rather than guessing by time alone. Adjust times for roast size and your air fryer.
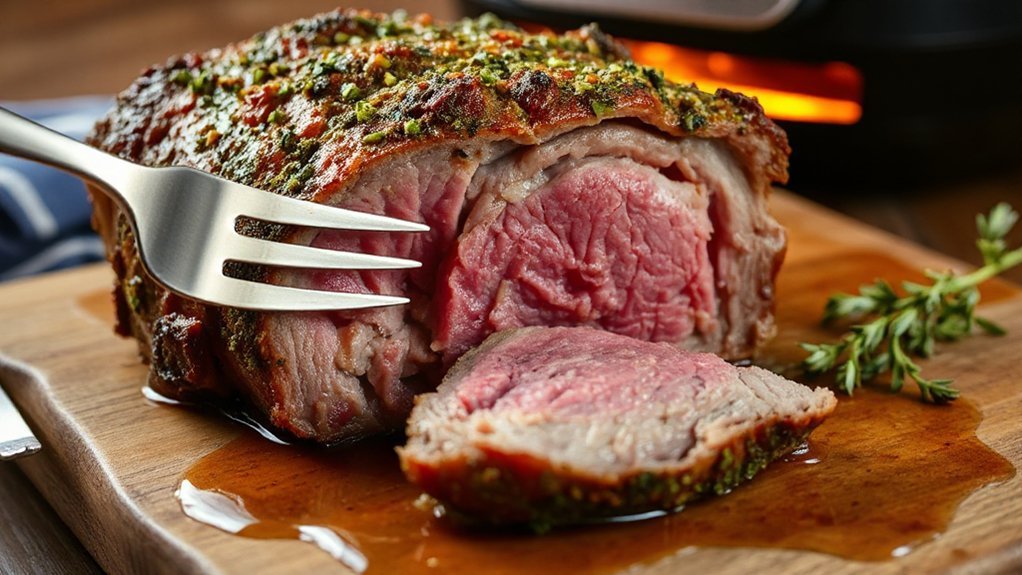
Resting, Slicing, and Serving Tips
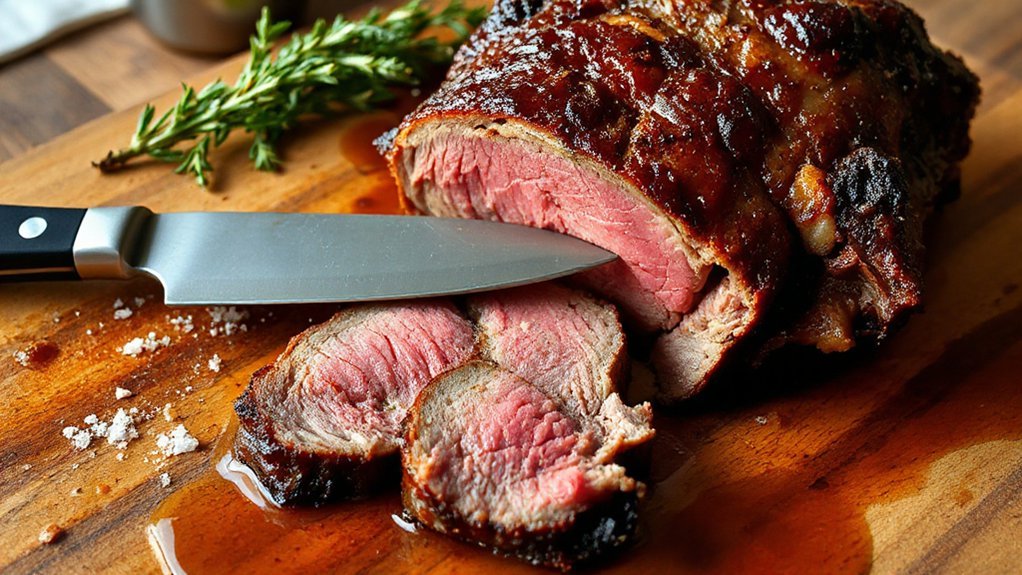
Let the roast rest so the juices redistribute—you’ll get juicier, easier-to-carve meat. Slice against the grain to keep every bite tender and satisfying. Warm your serving platter so the slices stay hot and look irresistible.
Let Roast Rest
After you pull the roast from the air fryer, don’t cut into it right away—resting lets the juices redistribute and keeps the meat juicy. Give the chuck roast 10–15 minutes on a warm plate or cutting board tented loosely with foil so carryover cooking finishes the internal temperature and juice redistribution settles. This pause improves texture and flavor; you’ll slice cleaner and serve juicier portions.
- Tent loosely with foil to retain heat without steaming.
- Wait 10–15 minutes for carryover cooking and settled juices.
- Use a meat thermometer to confirm desired doneness.
When you serve, spoon accumulated juices over slices and present confidently — a rested roast tastes noticeably better and feels effortless to carve. Let it rest; your guests will truly appreciate it indeed.
Slice Against Grain
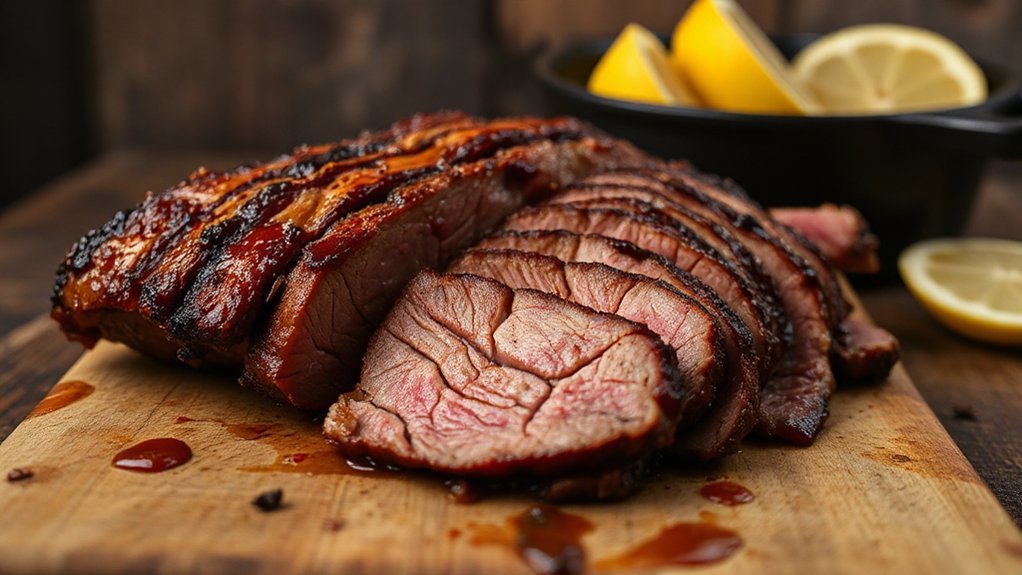
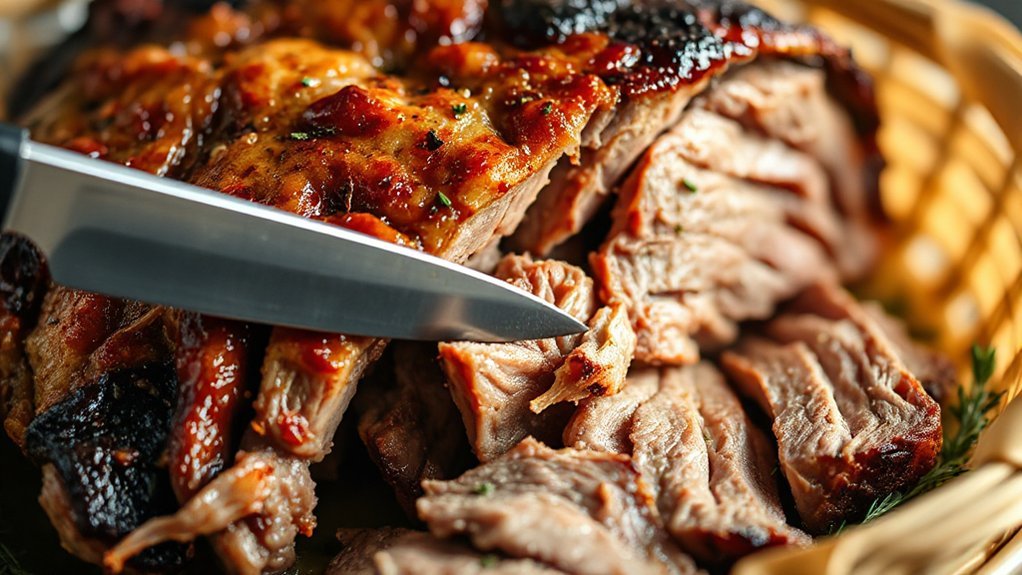
Now that the roast has rested and the juices have settled, you’ll want to slice against the grain to keep each bite tender and easy to chew. Look closely for fiber identification: the long muscle lines point the grain’s direction. Position your knife perpendicular to those fibers and make confident, smooth strokes. Aim for consistent slice thickness—about 1/4 inch for sandwiches, 1/2 inch for hearty plates—so every piece cooks evenly and feels uniform. Use a sharp carving knife and let the blade do the work; sawing tears fibers. Remove any tough connective bits as you go. Arrange slices so the cut faces show the short fibers; that visual cue tells you you sliced correctly. Taste a test piece and adjust slice thickness if needed.
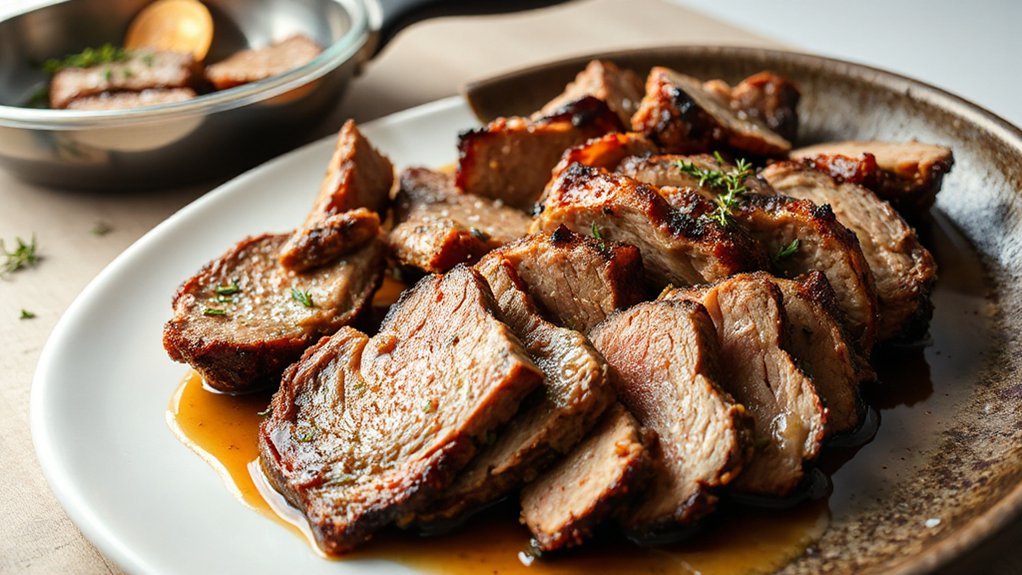
Warm Serving Platters
Warming your serving platters keeps the roast hot and the juices where they belong, so they don’t cool the meat the moment you slice. Let the roast rest under tented foil while you prep warmed platters—this preserves temperature and makes serving slick. Consider plate aesthetics: warm ceramic shows juices nicely, stainless looks modern, wooden boards add rustic charm. Do a quick material comparison to match vibe and function.
- Warm ceramic for heat retention and glossy presentation.
- Stainless steel for sleek look and easy cleaning.
- Wooden board for rustic appeal; use sparingly with hot juices.
Slice and transfer with tongs or a carving fork; serve promptly so every guest gets tender, juicy bites. Keep sauces warm separately and offer carving tips for ideal portions today.
Leftovers, Reheating, and Make-Ahead Ideas
If you cook a roast especially for leftovers, you’ll want to cool it quickly, slice or shred to your preferred size, and stash it in airtight containers so it stays juicy and safe—store in the fridge for 3–4 days or freeze up to 3 months. Pack easy Sandwich Fillings in single-serve containers for lunches and portion out Freezer Portions labeled with dates. When reheating, thaw overnight in the fridge or use the defrost setting, then warm gently in a covered skillet with a splash of broth to revive moisture. For oven reheating, cover with foil at 300°F until heated through. Avoid high heat that dries the meat.
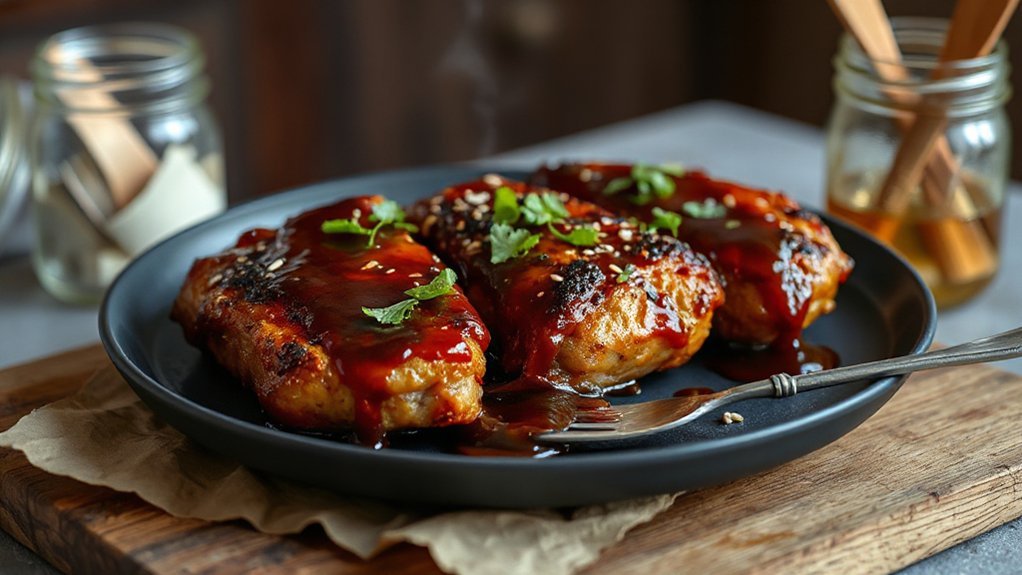
Make-ahead ideas: turn shredded roast into tacos, pasta sauce, beef hash, or a savory pot pie. You can also quick-sear slices and glaze with BBQ sauce for a speedy dinner. Keep condiments and fresh herbs on hand to brighten leftovers often.
Conclusion
You’ll love how the air fryer turns a humble chuck roast into a fork-tender, flavor packed centerpiece in less time than you think. Follow the simple rub, pop it in, and let hot air do the work like a golden oven hug that seals the juices. Rest it, slice against the grain, and watch juices map the plate. Serve immediately; leftovers reheat beautifully. Dinner feels effortless, truly. You’ll get compliments and plate-licking smiles every time.