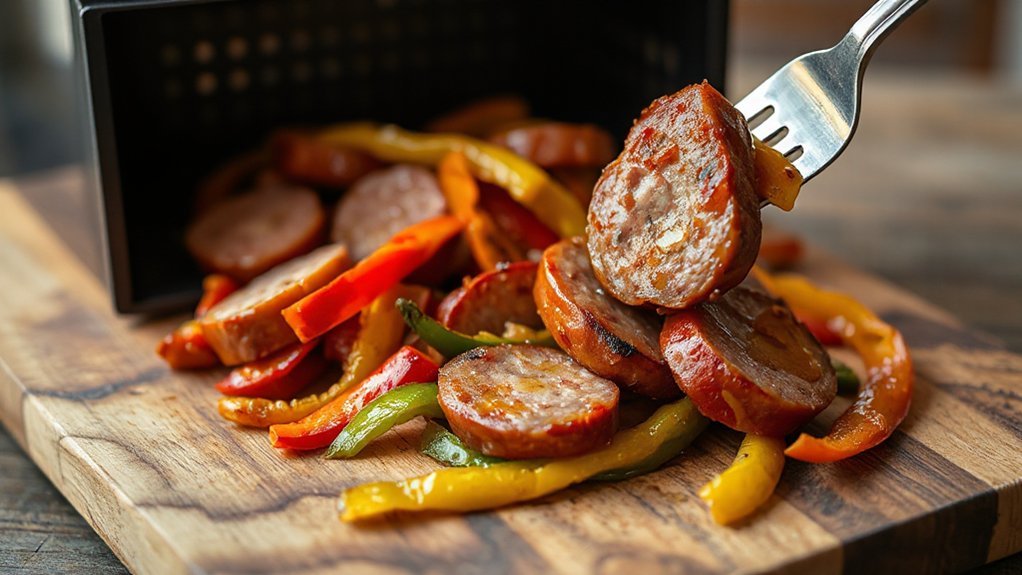
You can have smoky, crisp kielbasa with blistered peppers ready in about 15 minutes using your air fryer. Slice 1 lb smoked kielbasa and 2–3 bell peppers into 1/2‑inch pieces, toss with a little oil, smoked paprika, garlic powder and salt, then air fry at 400°F for 10 minutes, shaking once. It’s fast, forgiving, and great for sandwiches or bowls, and if you stick around you’ll get simple tips for timing, swaps and serving ideas.
Why This Recipe Works
Because the air fryer circulates hot air fast, it gives kielbasa a crisp, browned exterior while keeping the inside juicy, and it chars the peppers just enough to bring out their sweetness. You’ll notice how quick high heat triggers Maillard reactions — that’s the flavor chemistry turning simple proteins and sugars into toasty, savory notes. At the same time, peppers blister and soften, releasing bright, caramelized juices that balance the sausage’s richness. You get immediate Texture contrast: crisp edges, tender centers, and a slight snap when you bite in. That contrast makes each forkful interesting and keeps the meal from feeling heavy. You don’t need complicated technique: a single basket, a toss of oil, and staggered timing deliver consistent results. It’s efficient, forgiving, and scalable, so you can cook for one or a crowd without losing that homemade, roasted flavor. You’ll finish faster and eat better today too.
Ingredients You’ll Need
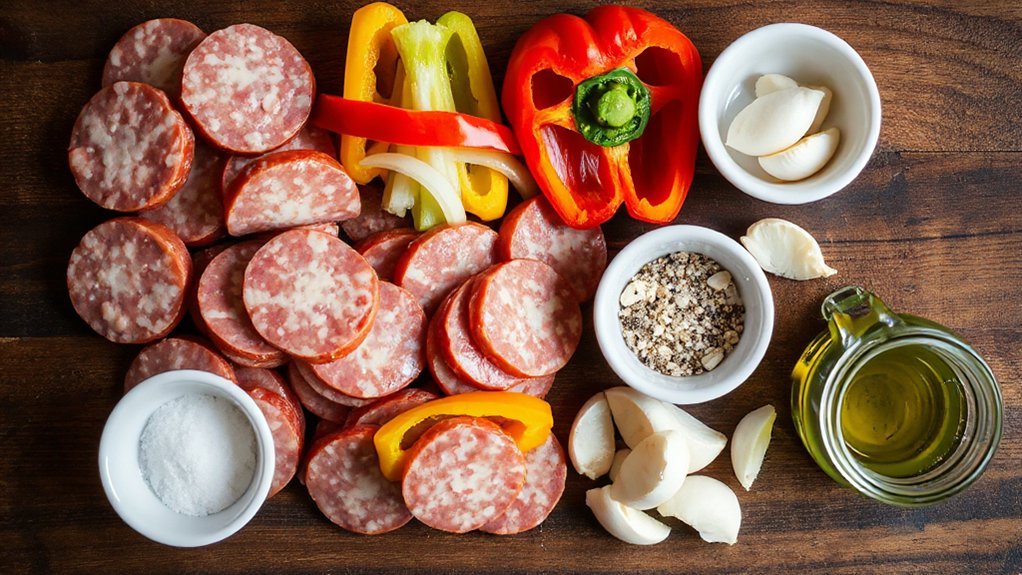
You’ll need just a few simple ingredients: kielbasa (Polish sausage), colorful bell peppers, and onions. Seasonings—think smoked paprika, garlic powder, salt, and pepper—and a little oil will bring it all together. Optional extras like mustard, hot sauce, or a squeeze of lemon can add a bright finish.
Kielbasa (Polish Sausage)
Kielbasa is the star—grab about 1 pound of smoked Polish sausage and slice it into 1/2-inch rounds so each piece crisps evenly in the air fryer. Choose high-quality kielbasa with a firm snap; the smoked variety adds caramelized flavor and holds up under high heat. You’ll appreciate how the sausage’s cultural origins influence seasoning—garlic, marjoram, and black pepper are traditional. Note the curing process used in many Polish sausages: it preserves, flavors, and gives that classic tang. If you can, pick a brand with minimal fillers and natural casings for the best texture. Keep extras on hand—leftovers reheat great—and don’t overcomplicate it; great kielbasa does most of the work. Serve simply with mustard, crusty bread, or roasted potatoes for an easy weeknight win tonight.
Bell Peppers and Onions
Grab 2–3 bell peppers (mix red, yellow, and green for color) and one large sweet onion—slice both into 1/2-inch strips so they cook evenly in the air fryer. You’ll want firm peppers without soft spots and a crisp, dry onion—those give you the best texture after air frying. If you grow your own, use simple growing tips like consistent watering and full sun to boost harvests; homegrown peppers can really shine here. Think about seasonal availability: peppers peak late summer, onions store well into cooler months, so plan accordingly. Slice sizes matter for even cooking, and keeping pieces similar means your kielbasa and veggies finish together. You’ll get bright, crunchy peppers and sweet, caramelized onion bites. Adjust quantities to suit your family or meal.
Seasonings, Oil, Extras
Seasoning your kielbasa and peppers right makes all the difference, so pick a simple spice mix and a good cooking oil. You’ll want kosher salt and black pepper as a base, smoked paprika for warmth, garlic powder for punch, and a pinch of red pepper flakes if you like heat. Use neutral oil with a high smoke point—avocado or light olive oil—so the air fryer crisps evenly. For flair, try DIY infusions: steep oil with garlic and herbs, strain, and toss with slices before cooking. Finish with lemon zest or a splash of vinegar to brighten. Sprinkle fresh parsley and toasted seeds for garnish textures that contrast the tender veggies and snappy kielbasa. Adjust quantities to taste and keep it simple and delicious always.
Equipment and Air Fryer Tips

You’ll want the right air fryer for this recipe—one with enough basket space so the kielbasa and peppers can lie in a single layer. Check capacity: overcrowding causes steaming, so leave room for airflow or cook in batches. Preheat and set a steady temperature (375–400°F is a good range), and adjust cook time based on how your model runs.
Choosing the Right Air Fryer


How do you pick the right air fryer for kielbasa and peppers? Think about reliable temperature control, easy-to-clean surfaces, and sturdy build — those make weeknight dinners simple. Look for models with intuitive controls and a quick preheat so your peppers get crisp without sogginess. Check warranty coverage and read customer reviews to spot recurring problems or praise; they reveal real-world durability. Prefer nonstick baskets with removable trays and dishwasher-safe parts for fast cleanup. Prioritize airflow design and consistent heat distribution so sausage browns evenly. If you like one-touch presets, choose a unit that doesn’t sacrifice manual settings. Pick something that fits your cooking style, cleans easily, and feels solid when you open and close it. Also compare energy use and long-term operating costs.
Basket Size and Capacity
Because basket size directly affects how much kielbasa and peppers you can cook at once, pick one that lets you lay ingredients in a single layer so everything crisps evenly. You’ll fit more by choosing a 5 to 6 quart basket for two to three servings, or upsize for family meals. Consider Counter Footprint and Cabinet Clearance when measuring: you want room to pull the basket out comfortably. Don’t cram the basket; crowding causes uneven browning. If you need more capacity, cook in batches or use a wider basket attachment. Quick tip: a shallow, wide basket often gives better airflow than a tall, narrow one.
| Size | Servings |
|---|---|
| Small (2 to 3 qt) | 1 to 2 |
| Medium (4 to 6 qt) | 2 to 4 |
Measure twice, buy once.
Preheating and Temperature Control
When you preheat your air fryer, it’ll get the basket hot so kielbasa and peppers sear on contact and crisp evenly. Preheating minimizes thermal hysteresis—those lagging temperature effects that cause uneven cooking—so you won’t be chasing doneness. Set the temp a few degrees higher than your target for a quick ramp, then drop it when you add food to avoid overbrowning. Be mindful of heat gradients: thicker kielbasa pieces and piled peppers see different zones, so spread items in a single layer and shake once or twice. Use short pauses to let the fryer recover temperature, and trust your dial or app to stabilize. With simple timing tweaks, you’ll get reliable, golden results every time. Adjust for altitude and your personal crispness preference daily.
Step-by-Step Cooking Instructions
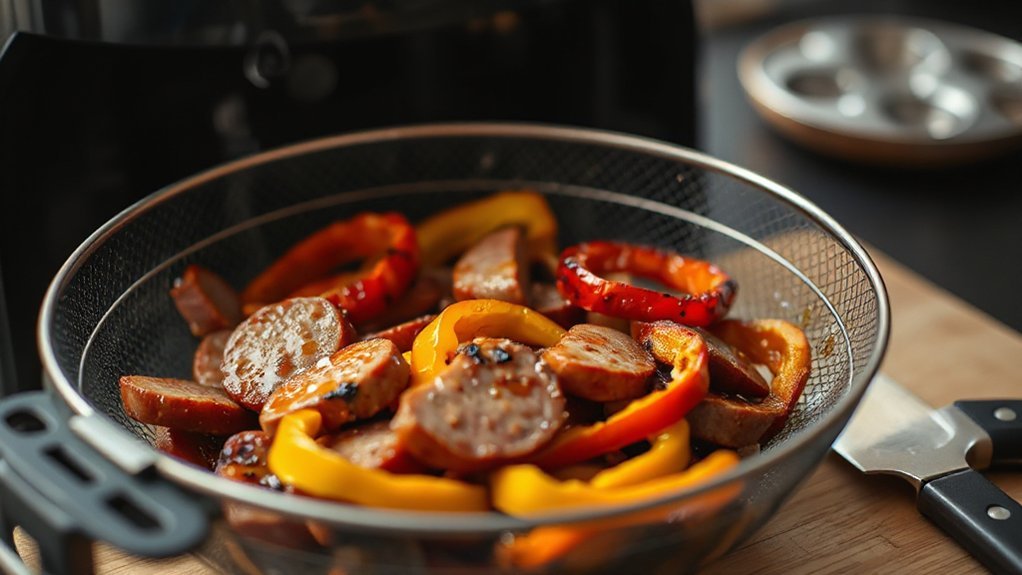
First, preheat your air fryer to 400°F and slice the kielbasa into 1/2-inch rounds and the peppers into strips so everything cooks evenly; you’ll toss them with a little oil, salt, pepper, and smoked paprika before arranging in a single layer for crisp, caramelized edges. Next, slide the basket in and set the timer for 10 minutes, shaking halfway to redistribute and brown evenly. Use Visual indicators—browned edges and softened peppers—to judge doneness, but trust the timer too.
If you like extra char, give it 2–3 more minutes, checking every minute. Follow Safety reminders: use oven mitts when pulling the hot basket, keep fingers away from steam, and don’t overcrowd the basket to avoid uneven cooking. Let the pan rest a minute before serving so juices settle; that makes slicing safer and neater. Enjoy a quick, flavorful weeknight meal with minimal cleanup and reliable results every time consistently.
Serving Suggestions and Pairings
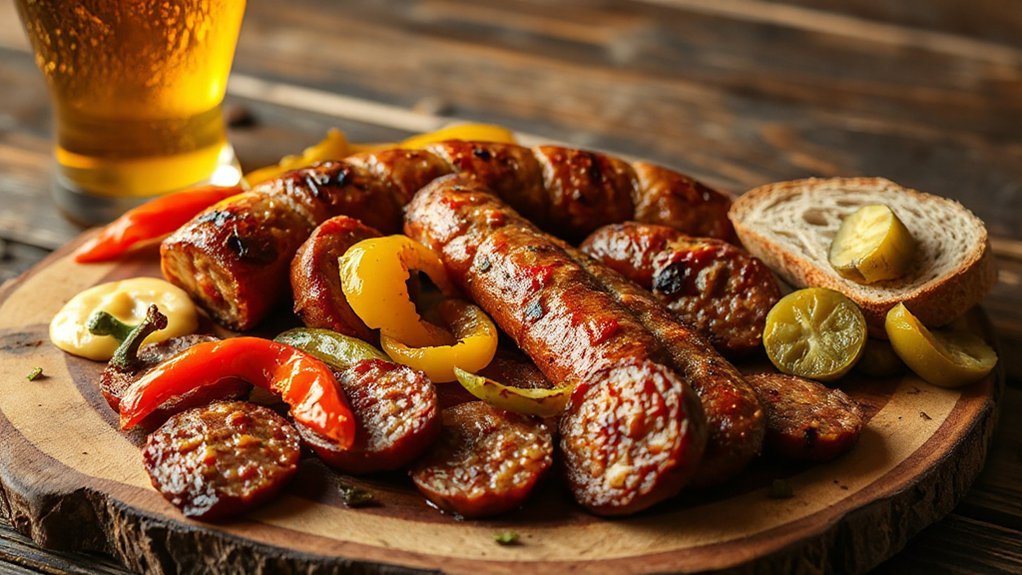
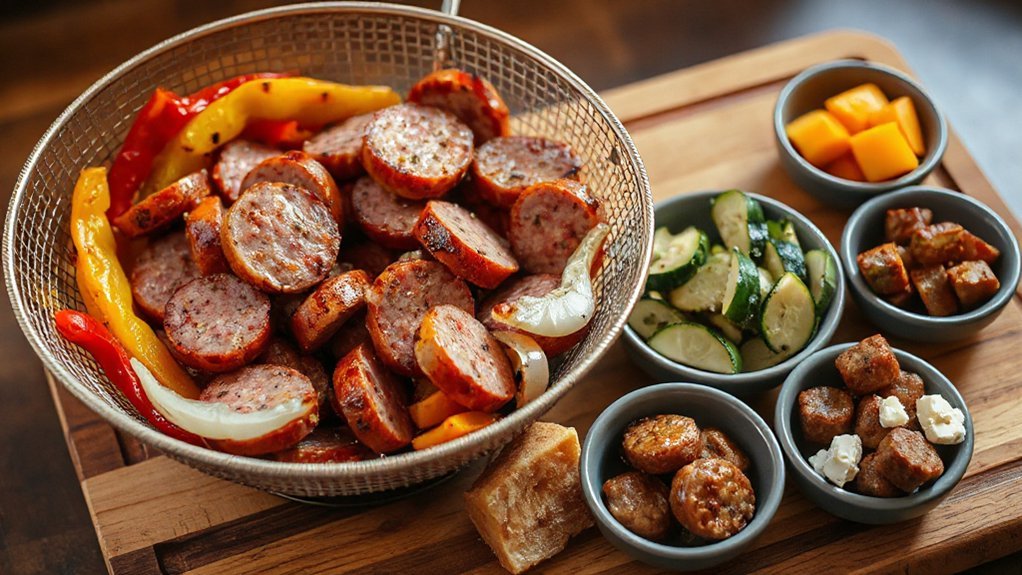
After you’ve pulled the basket and let the flavors settle, plate the kielbasa and peppers over steamed rice, creamy mashed potatoes, or buttery polenta for a hearty meal, or stuff them into crusty rolls for an easy sandwich. Serve family-style on a big platter so everyone grabs what they want — it’s great for weeknight dinners or casual gatherings. For sides, toss a simple green salad or quick pickled cucumbers alongside to cut the richness. Don’t forget Bread accompaniments: toasted sourdough, seeded rolls, or garlic baguette lift every bite. For Drink pairings, go with a crisp lager, a spicy Riesling, or a citrusy IPA to match the sausage’s smoky, peppery notes; nonalcoholic sparkling water with lemon works too. Finish with quick slaws or grain salads to add texture. Keep plates informal, provide napkins, and let people build sandwiches or bowls to their liking. Serve warm and enjoy together.
Make-Ahead and Storage
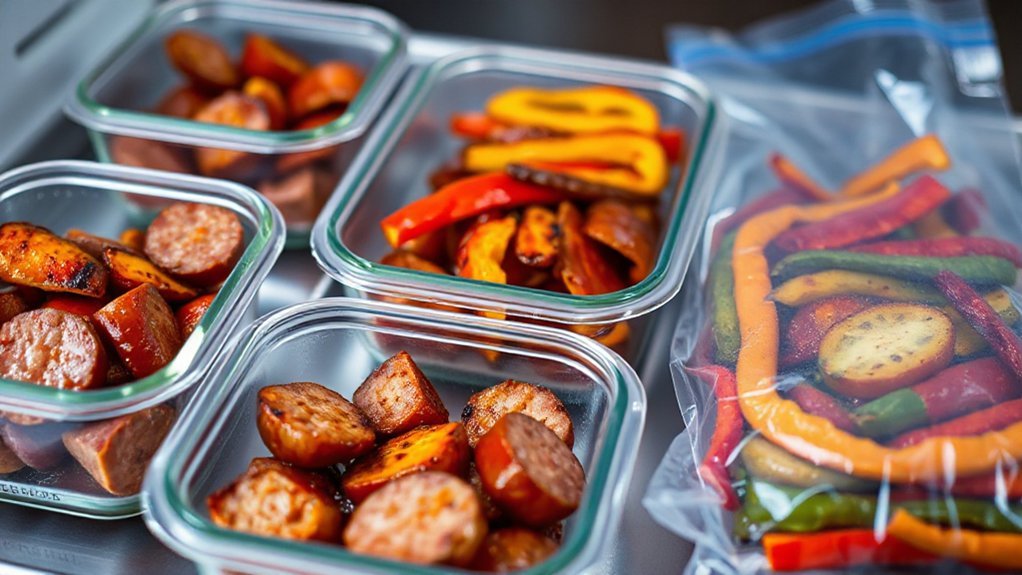
If you want to save time later, you can prep or fully cook this dish ahead with great results. Cooked kielbasa and peppers keep well in the fridge for three to four days; cool to room temperature, store in airtight containers. If you want longer storage, freeze portions for up to two to three months. Vacuum sealing will extend freezer life and reduce freezer burn, but still note safe timelines. Always practice labeling dates on packages so you know when you cooked or froze them. For make-ahead prep, slice sausages and peppers and keep them raw in the fridge for up to twenty-four hours, or assemble cooked portions for reheating. Reheat straight from the fridge in the air fryer at 350°F for five to eight minutes or in 350°F oven for ten to twelve minutes until heated through. Thaw frozen portions overnight in the fridge before reheating them.
Variations and Substitutions
While you can stick with traditional kielbasa and bell peppers, don’t be afraid to mix things up—swap smoked sausage for chicken apple, chorizo, or a plant-based sausage, trade bell peppers for poblano or sweet banana peppers, and toss in onions, mushrooms, or zucchini for extra veg. You can lean into Regional variations by using kielbasa with garlic and caraway for Eastern European vibes or smoky paprika and chiles for a Spanish twist. For quick Flavor fusions, add pineapple and teriyaki for a sweet-savory angle, or toss in mustard and sauerkraut for a tangy contrast. Use different oils and finishes—olive oil and lemon for brightness, butter and herbs for richness. If you want lower fat, pick leaner sausages or more veg. Keep proportions similar so cook times stay predictable, and taste as you go to balance spice, salt, and sweetness. Swap toppings like scallions, toasted nuts, or yogurt sauce.
Troubleshooting and Expert Tips
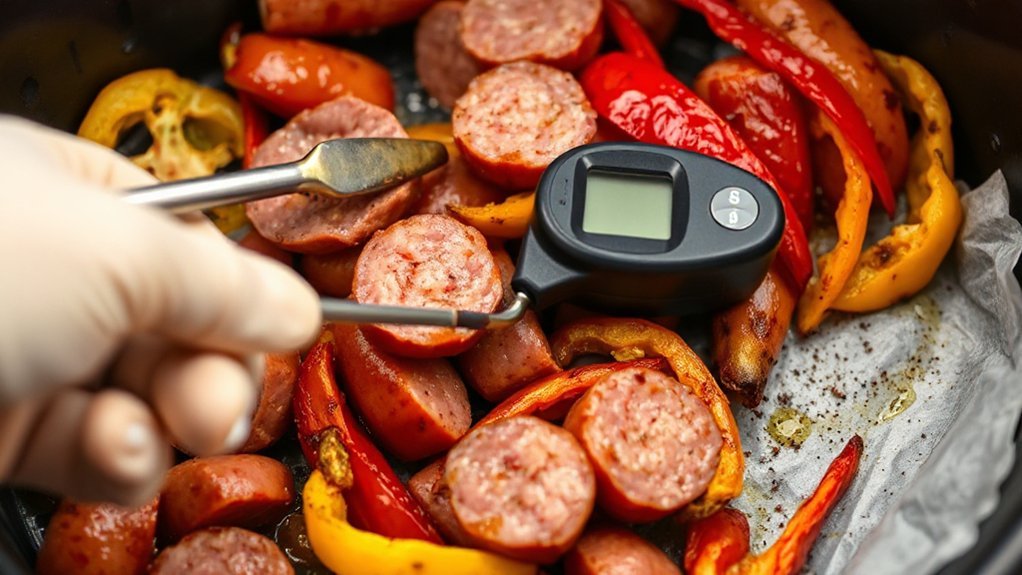
When something goes wrong, you can usually fix it fast: dry sausage means you’ve overcooked—drop the air fryer to 350–375°F, slice the kielbasa thicker, and check doneness with a probe (160°F for pork, 165°F for poultry); uneven browning or soggy peppers means you’ve overcrowded the basket—give pieces space, shake or flip halfway, and toss peppers in a little oil so they crisp; smoking often comes from fat dripping on the element—trim excess fat, line the drawer with perforated foil, or lower the temp; sticking is solved by a light oil spray or parchment made for air fryers; and if a sweet glaze burns, add it in the last 3–5 minutes. Use cleanup shortcuts like warm soapy water, a brush for the basket, and wipe the element when cool. Keep knife maintenance simple: hone often, sharpen as needed, and store blades safely to avoid accidents and speed recovery quickly.
Conclusion
You’ll find this air-fryer kielbasa with peppers is like a quick, reliable bicycle—simple parts, smooth ride, and it gets you where you want to go. When you heat the sausage and peppers, you’re tuning the spokes and pumping the tires: small effort, big payoff. Keep the routine, swap a part or two if needed, and you’ll always arrive at a satisfying, no-fuss dinner that feels both homey and adventurous, and perfect for busy weeknights too.