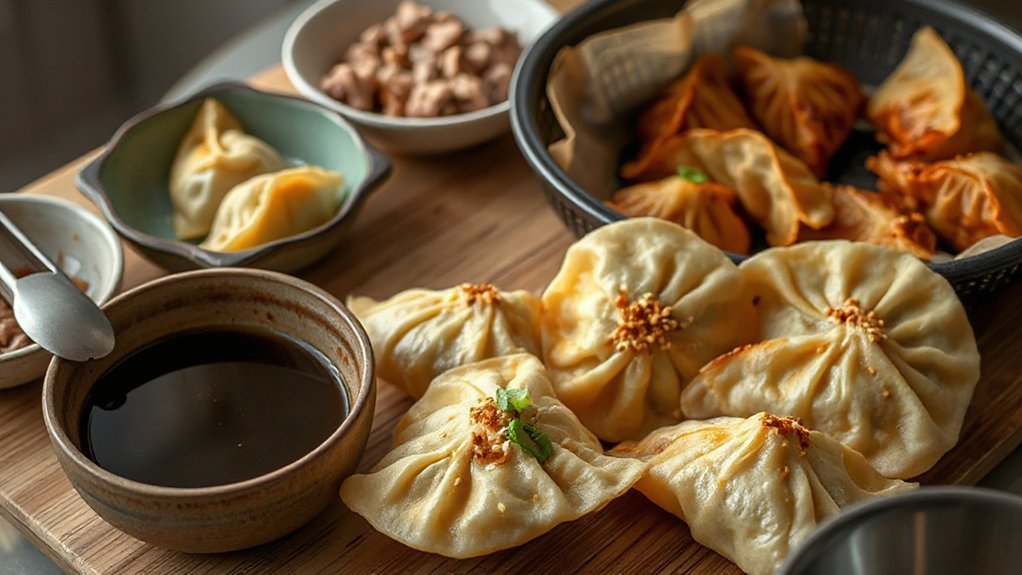
You’ll crank out restaurant-style crispy pork gyoza in about 15 minutes using an air fryer, a seasoned pork–cabbage filling, and classic pleats for even cooking and juice retention. Start with 20–30% fat pork, finely chopped cabbage, scallion, ginger, garlic, soy, sesame oil and a binder. Preheat the air fryer to 370°F, arrange gyoza in a single layer, and flip halfway for even browning. Keep going and you’ll pick up pro tips, sauces, and make-ahead tricks.
Ingredients and Equipment
You’ll need a handful of simple ingredients and a few handy tools: gyoza wrappers, ground pork (or chicken/tofu for a swap), finely chopped cabbage, scallions, garlic, ginger, soy sauce, sesame oil and a touch of cornstarch or egg to bind the filling. Add Pantry staples like salt, pepper, a little sugar, and rice vinegar for dipping sauce, plus optional toasted sesame seeds. For equipment, you’ll want an air fryer that can hit high heat, a mixing bowl, a small bowl for water, a silicone brush, and tongs or a spatula that won’t scratch the basket. Keep handy a rolling mat or board if you’re pleating, though wrappers come ready-made. Kitchen gadgets such as a garlic press and small grater speed things up, but a knife works fine. You’ll also need parchment or a perforated liner to prevent sticking, and a clean towel to cover dumplings while you assemble.
Preparing the Pork Filling
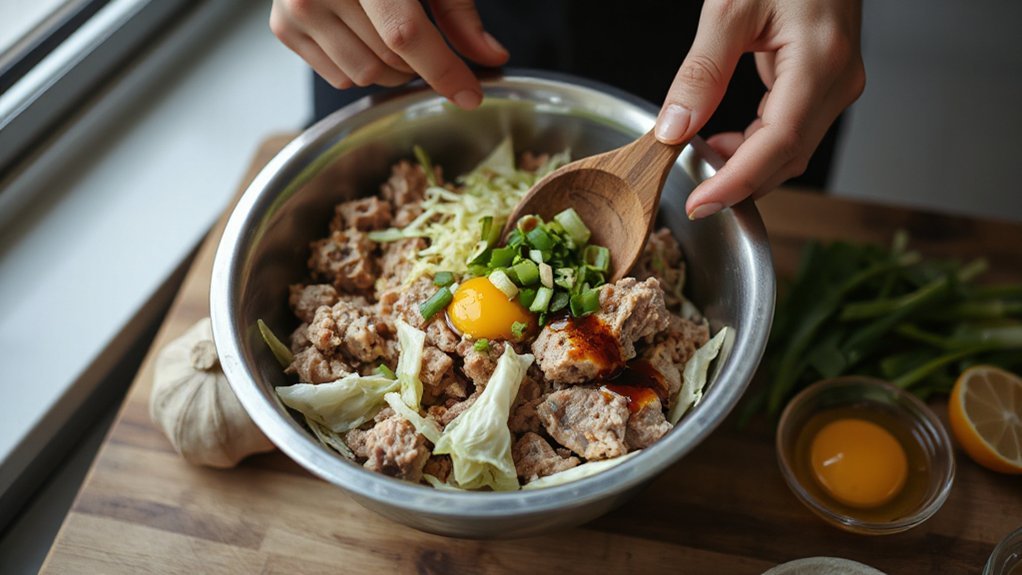
Choose pork with the right fat—shoulder or a mix of shoulder and belly—for moist, flavorful gyoza. Grind or finely mince the meat so the filling stays springy and holds together without turning pasty. Season carefully with soy, sesame, ginger, and a touch of salt to balance umami and fat.
Selecting Pork Cuts
When picking pork for gyoza, go for a cut that has some fat—about 20–30% gives you juicy, flavorful filling without greasiness. You’ll often choose pork shoulder for balance; pork belly is richer and lean cuts like loin are cheaper but drier. Consider fat content and do a quick cost comparison so you get value without sacrificing taste. Here’s a simple guide to help decide:
| Cut | Notes |
|---|---|
| Pork shoulder | Balanced fat, classic choice |
| Pork belly | High fat, very rich |
| Pork loin | Lean, economical |
| Ground pork blend | Convenient, consistent |
| Mixed cuts | DIY balance, flexible cost |
Pick what matches your taste and budget, and you’ll be ready to season and assemble. Don’t overthink it—choose based on flavor goals and how much you want to spend per batch.
Mincing and Texture
Mincing the pork correctly makes all the difference in your gyoza’s bite and juiciness. You’ll want consistent pieces so the filling cooks evenly and feels cohesive, not mushy. Pay attention to grain orientation when slicing against the fibers; that gives a tender chew. Chill meat before you work it—cold pork minces cleaner. Aim for mince uniformity: even bits mix better with other filling components and spread heat predictably.
- Cut into strips against the grain
- Chill and partially freeze for cleaner cuts
- Use a sharp knife for control
- Pulse lightly if using a food processor
- Check texture by pressing a small handful
Trust your hands to feel when the texture looks balanced and springy. Adjust mince size to suit wrapper size and air fryer crisping.
Seasoning and Balance

How do you get the pork filling to sing instead of just tasting salty? You balance flavors: soy for salt, miso for deeper umami layering, and a splash of rice vinegar to fix acid balance. Use ginger and scallion for brightness and a touch of sesame oil for aroma. Taste as you go—cook a teaspoon quickly to check. Keep proportions: 1 part seasoning to 8 parts meat roughly, then adjust. Don’t drown texture; fold gently to keep juiciness. Below is a tiny emotive reminder to honor each element:
| Salt | Umami | Acid |
|---|---|---|
| Soy | Miso | Vinegar |
| Adjust | Layer | Brighten |
Taste, tweak, rest the filling briefly so flavors marry; subtle tweaks, more umami, less acid, turn good into unforgettable. Make each dumpling sing with balanced soul.
Wrapping and Folding Techniques
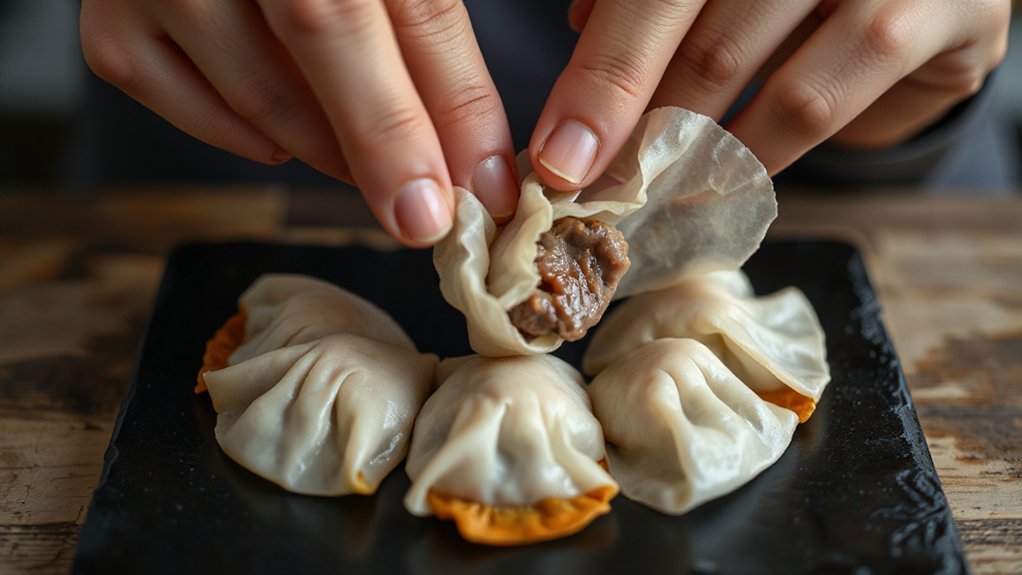
Mastering the wrap and fold turns good filling into restaurant-level gyoza—you’ll get crisp edges and juicy centers by sealing properly and using a few simple pleats. You want neat pleat patterns and confident edge sealing so steam stays inside and oil crisps the wrapper. Work on a clean station, dampen the rim, place a teaspoon of filling, fold, and press.
- Use one-handed pleating for speed; practice gives consistency.
- Try classic 7-pleat method for a traditional look and reliable seal.
- Pinch edges firmly, then run a finger to smooth and check the seal.
- Vary pleat depth to control steam release without bursting.
- If a wrapper tears, patch with a little water or remake to avoid leaks.
Wrap steadily, not rush. Keep wrappers covered to prevent drying, and test one in a pan to confirm your technique before cooking the whole batch. You’ll perfect speed and uniformity with practice soon.
Air Fryer Settings and Cooking Method

You’ll set the air fryer to the right temperature and time—about 370°F (190°C) for 8–10 minutes—to get crisp, golden gyoza. Preheat the basket for a few minutes so the bottoms start sizzling on contact. Halfway through, flip the gyoza to guarantee even browning and finish until they’re crisp.
Temperature and Time
When you set the air fryer, aim for 370–400°F (185–205°C) and plan on 8–12 minutes for fresh gyoza or 10–14 minutes for frozen, flipping halfway to get even browning. Pay attention to residual heat and factor in resting periods so the filling finishes cooking and the wrapper firms up; you’ll avoid soggy centers and burned edges.
- Start with a single layer for even airflow.
- Check color at the lower end of the time range.
- Add one to two minutes for crowded baskets.
- Use a quick touch test for firmness.
- Let gyoza rest briefly before serving.
Trust the timings as a guide; tweak for your model and batch size. Remember, small adjustments yield consistent restaurant-style results—note your adjustments and repeat what works every single time.
Preheat and Flip
If you’re after evenly browned, crisp gyoza, preheat the air fryer for 3–5 minutes to bring the basket up to temperature so the wrappers start searing on contact. Arrange gyoza in a single layer, leaving space for hot air to circulate. Use 370°F (188°C) as a starting point; adjust by 10°F if yours runs hot or cool. Halfway through, flip each dumpling with tongs to promote even color and a restaurant-style bottom. Rely on sound indicators — a faint sizzle — and visual cues like golden edges and shrinking wrappers to judge doneness. Finish with a quick spray of oil if needed for extra crispness, then rest briefly before serving. If you want darker color, add 1–2 minutes while watching sound indicators and visual cues.
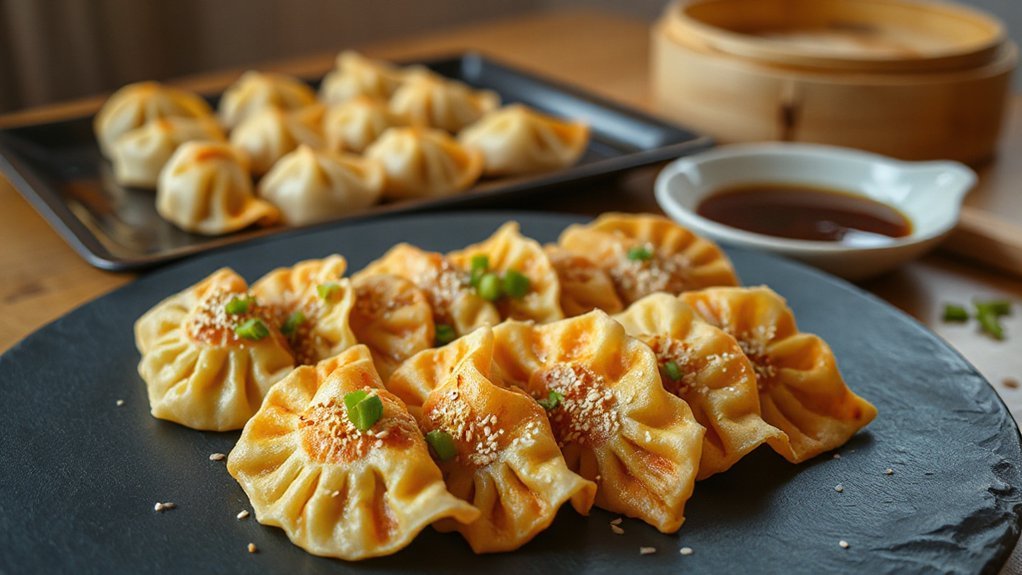
Dipping Sauce and Serving Suggestions
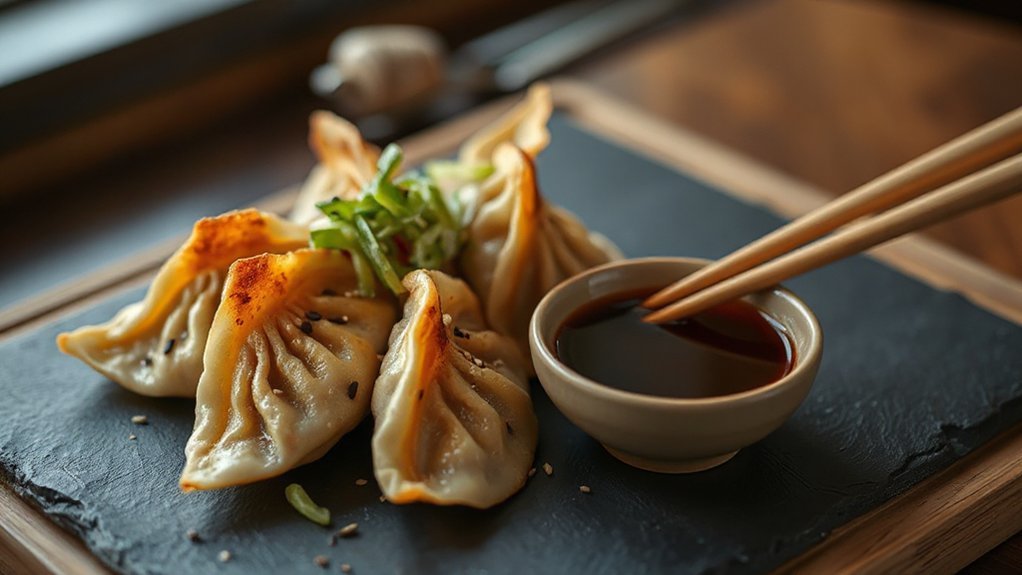
Mix a quick dipping sauce—soy sauce, rice vinegar, a dash of sesame oil—and brighten it with a little chili oil or minced scallion for the classic flavor combo; you can swap in ponzu for a citrusy lift or stir mayo with sriracha for a creamy, spicy option. You’ll want a trio of sauces: classic soy-vinegar, a citrusy Ponzu variations mix, and a rich spicy mayo. Serve gyoza hot from the air fryer, arranged crisply on plates to showcase the golden bottoms—Plating suggestions matter for that restaurant vibe. Offer small bowls so guests can customize, and garnish with toasted sesame, chopped scallion, or shichimi. Keep napkins ready; these get addictive.
- Classic soy-vinegar with chili oil
- Ponzu variations with yuzu or lime zest
- Spicy mayo (mayo + sriracha)
- Simple sesame oil and scallion drizzle
- Scallion, sesame, shichimi for garnish
Pair with cold beer or green tea for balance and smiles.
Tips, Variations, and Make-Ahead Advice
After you’ve sorted sauces and plating, grab a few quick tips to keep your gyoza crispy, flavorful, and stress-free: don’t overcrowd the basket (work in single layers), give each side a light oil spray for better browning, and shake or flip them halfway through cooking so they crisp evenly. For variations, swap pork for ground chicken, shrimp, or finely chopped shiitake and napa cabbage; add ginger, garlic, or sesame oil to tweak the profile. If you want pan-fried bottoms, rest dumplings briefly after air frying and sear in a hot skillet. For make-ahead ease, use batch freezing—freeze trays of arranged raw gyoza, then transfer to bags; cook from frozen, adding a minute or two. For weeknight shortcuts, prebrown filling, use prepped wrappers, or reheat leftovers in the air fryer to revive crispness. Store dipping sauce separately, and don’t forget a sprinkle of toasted sesame and scallions before serving.
Conclusion
You’ll love how these air-fryer gyoza crisp up in minutes, giving restaurant-style pork dumplings with way less oil and fuss. Did you know air fryers cut fat by up to 75% compared with deep frying? That means you can enjoy crispy, satisfying gyoza more often. Try making a big batch, freeze extras, and reheat straight from frozen — you’ll impress friends and still get dinner on the table fast without breaking your budget or spending hours.