We’re fixin’ to teach you a simple, joyful way to get golden, crisp bites in about 20–25 minutes total. Prep takes 12–15 minutes; cook at 390–400°F for 8–10 minutes, flipping at halfway. Preheat five minutes for a head start on crisping.
Cut your meat into roughly 1-inch cubes or about 1/3-inch-thick pieces so everything cooks even and stays juicy. Lightly spray the basket and the tops of the pieces—single layer only. Use panko and pantry spices—paprika, garlic powder, onion powder, dried oregano, salt, pepper, and a pinch of cayenne—for big crunch and warm flavor.
We’ll show two breading paths: classic egg-and-crumbs, or the buttery breadcrumb trick for extra color. Cook in batches if needed. Freeze cooked pieces up to 2–3 months and reheat from frozen at 390°F for about 10–12 minutes.
Key Takeaways
- Prep and cook in about 20–25 minutes total.
- Cut to 1-inch cubes or 1/3-inch slices for even cooking.
- Panko and simple spices give the best crunch.
- Preheat, single layer, flip halfway—no soggy bites.
- Freeze cooked pieces and reheat at 390°F for 10–12 minutes.
Why this easy recipe works for crispy air fryer chicken nuggets
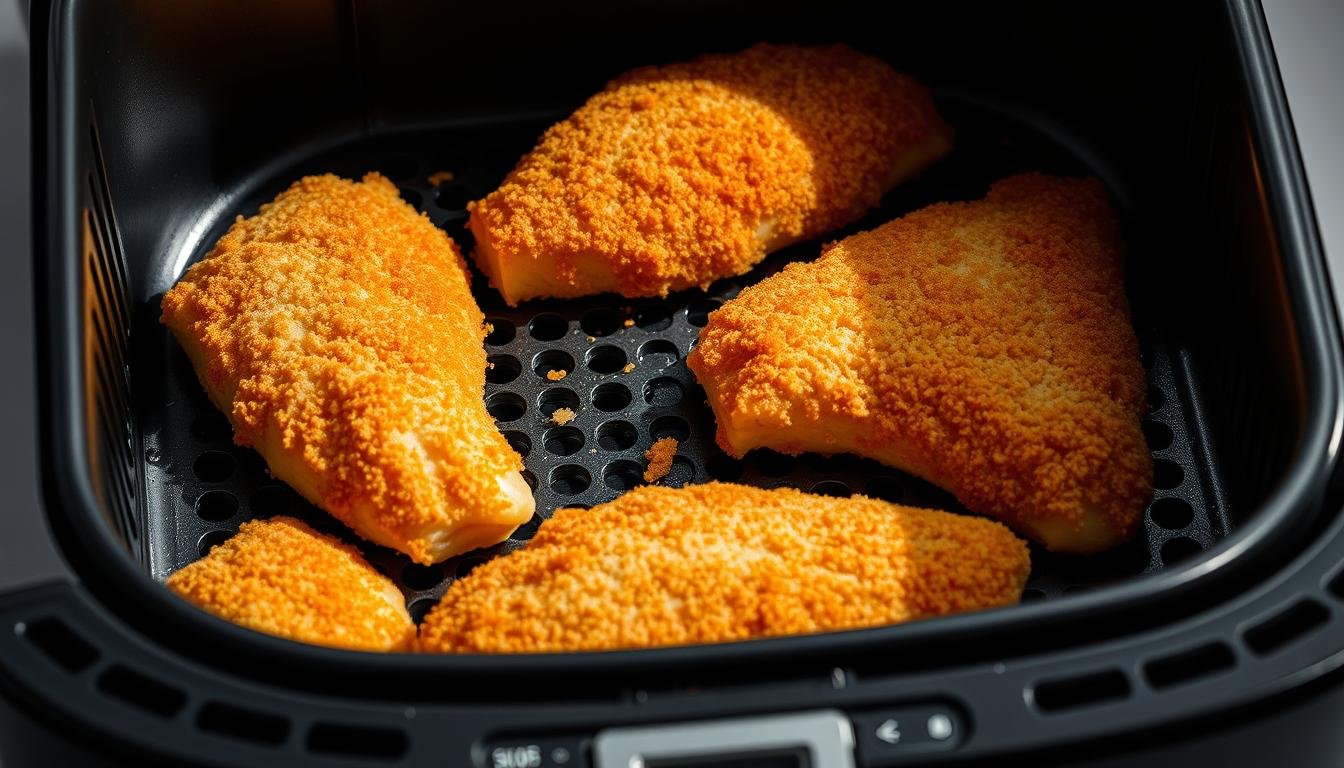
Rapid hot air does the heavy lifting, turning crumbs into a crisp crust in minutes. The basket’s circulating heat browns the coating fast, so you get a crispy outside with much less oil than a deep fry.
Preheating five minutes at 400°F jump-starts that browning. We like a thin brush of melted butter plus a splash of olive oil — butter for color and flavor, oil to help crumbs stick.
Use panko for bigger, craggier crumbs that crisp up quicker than fine crumbs. Lay pieces in a single layer with a little breathing room so hot air reaches every side. Flip once about halfway through the cook time—usually 8–10 minutes depending on thickness.
| Element | Why it matters | Quick tip |
|---|---|---|
| Preheat | Speeds browning | 5 minutes at 400°F |
| Coating fat | Helps crumbs adhere | Melted butter + olive oil |
| Panko | Extra crunch | Choose large flakes |
| Spacing | Even crisping | Single layer, leave gaps |
- Short time, big crunch—this is a weeknight-friendly recipe you can trust.
homemade chicken nugget air fryer ingredients and smart substitutions
Let’s talk ingredients — the good, the flexible, and the swaps that save dinner tonight. Start with 1 pound boneless, skinless chicken breast as the base. We like lean breast for that classic bite, but thighs add juiciness if you prefer.
Cuts and crumbs
Panko gives big crunch. Use 1–2 cups panko and mix with Italian breadcrumbs for extra flavor. Swap in gluten-free panko breadcrumbs or GF flour to keep this friendly for all diets.
Binders, fat, and seasoning
Whisk 2 eggs with 1/4 cup milk in a bowl for the wash. An egg helps the crumbs stick. Stir 2–4 tablespoons melted butter and 1–2 tablespoons olive oil into the crumbs for color.
| Item | Why | Quick measure |
|---|---|---|
| chicken vs thighs | Lean vs juicy | 1 lb breast |
| panko / breadcrumbs | Crunch + flavor | 1–2 cup panko |
| Binders | Helps coating adhere | 2 egg, 1/4 cup milk |
| Seasoning | Balanced heat | 1 teaspoon paprika, 1 teaspoon salt, 1/2 teaspoon pepper, pinch cayenne |
- Keep one bag or bowl for crumbs—clean hands, tidy station.
- Taste the crumb mix and adjust salt and pepper before you coat.
Essential equipment: air fryer, basket, and tools you’ll actually use
Grab your gear — the right tools make crisp, golden bites a whole lot easier. We keep it simple: a reliable air fryer and a roomy fryer basket set the stage. Preheat the machine at 400°F for 5 minutes so it’s ready when the crumbs hit the heat.
Lightly spray the basket with olive oil so breading doesn’t stick and tear when you flip. Lay pieces in a single layer with a little breathing room so hot air can swirl and crisp every side.
Work with two bowls — one for egg wash, one for the butter-and-oil seasoning. Use a big zip-top bag to shake the panko on quick and tidy. Keep tongs and a wire rack nearby; set finished nuggets on the rack so steam won’t sog the bottoms while the next batch cooks.
- Pro tip: If your fryer runs hot, shave a minute off the first batch and adjust.
- Clean the basket soon after use—little crumb bits burn fast and ruin the next round.
Step-by-step: how to make chicken nuggets in the air fryer
Follow these clear steps and you’ll be flipping perfect bites in about ten minutes. Cut your chicken breast into even pieces—aim for 1-inch cubes or about 1/3‑inch thick slices so cook time stays tight and juicy.

Set up a tidy station. Put a bowl with egg (add a splash of milk if you like) and a bag or bowl of seasoned panko breadcrumbs. Option A: dip in egg, press into crumbs. Option B: stir melted butter and olive oil into the crumbs, then toss the pieces for extra color.
Preheat the air fryer 5 minutes at 400°F. Lightly spray the basket so nothing sticks.
- Place the coated pieces in a single layer with a little space between each.
- Air fry 5 minutes, then flip with tongs.
- Cook another 4–5 minutes—about 8–10 minutes total—until internal temp reaches 165°F.
If pieces are thicker add a minute; thinner ones may finish sooner. Work in batches to avoid overcrowding. Move finished nuggets to a wire rack so steam won’t sog the crust while you fry the next batch.
| Step | What to do | Why it matters |
|---|---|---|
| Cut | 1-inch cubes or 1/3-inch slices | Even cooking, juicy center |
| Bread | Egg bowl + panko bag or buttered crumbs | Good adhesion and color |
| Preheat & load | 400°F for 5 minutes, single layer, spray tops | Better browning and crispness |
| Cook | 5 min, flip, 4–5 min more to 165°F | Safe doneness and golden finish |
“Taste and tweak the crumbs between batches—this is your house specialty now.”
Time and temperature: minutes, flip, and doneness cues
Timing and heat are the heart of a great cook. Preheat 5 minutes at 400°F so the basket is ready when the crumbs hit. That jump-starts browning and saves you guesswork.
Cook at 390–400°F for about 8–10 minutes total. Most cooks do 5 minutes, flip, then 4–5 minutes more. Always flip halfway—both sides need that hot-air hug.
Use internal temp first: 165°F is the goal. Golden brown is a great visual cue, but don’t rely on color alone. Thinner 1/3‑inch pieces finish closer to 8 minutes; thicker cubes or breast cuts may need a minute or two more.
“If the outside looks done but the center isn’t, drop to 370°F and cook 1–2 more minutes.”
| What | Why | Quick tip |
|---|---|---|
| Preheat | Speeds browning | 400°F for 5 minutes |
| Cook time | Even crisp and safe doneness | 390–400°F for 8–10 minutes |
| Crumb checks | Color vs temp | Light oil mist for pale panko or breadcrumbs |
- Keep batch sizes even so your minutes stay predictable.
- Remember seasoning (paprika, pepper) can darken crumbs—check temp, not just color.
Pro tips for a crispy outside and juicy center
Small changes make a big difference—here’s how to get that perfect crisp and moist center. We keep these moves simple and reliable. Try them and you’ll see a marked change in texture and color.

Melted butter in the breading
Drizzle melted butter into the crumbs. It adds moisture and gives a warm, golden color. That bit of fat helps the crust crisp like restaurant fare.
Don’t crowd the basket
Space pieces in a single layer. Crowding traps steam and makes a soft crust. Give each piece room so the hot air can move all around.
Preheat and a light mist
Preheat 5 minutes so the crust starts sizzling as soon as the pieces hit the basket. Give a light top spray of oil—just enough to boost browning without sogginess.
- Flip at halfway and mist again if tops look dry.
- Keep sizes consistent so every piece finishes at 165°F.
- Use a wire rack between batches to stop steam from softening the bottoms.
| Tip | Why it works | Quick action |
|---|---|---|
| Buttered crumbs | Moisture + color | Stir 1–2 tbsp melted butter into crumbs |
| Single layer | Even crisping | Arrange with gaps; cook in batches |
| Preheat | Instant sear | Preheat 5 minutes at 400°F |
| Light spray | Better browning | One quick mist before cooking |
Batch cooking, fryer basket care, and single layer best practices
Treat each round like its own little mission: space, spray, and quick resets. When we work in batches, hot air can swirl around each piece. That keeps the crust crisp and the center juicy.
Keep things single layer. Lay pieces so none overlap. A roomy fryer basket helps, but don’t tempt fate—crowding cancels crisp.
- Work in batches so air can flow—overcrowding leads to soggy bites.
- Always start with a light spray on the basket to prevent sticking and torn breading.
- After each batch, knock out loose crumbs so they don’t burn and taste bitter.
- Park finished nuggets on a wire rack while the next batch cooks—no steam traps.
- Aim for about 8–10 minutes per batch, flipping halfway; adjust for thickness.
- If you’re meal-prepping for the freezer, cool completely before packing.
| What | Why | Quick tip |
|---|---|---|
| Basket care | Prevents burnt bits | Wipe crumbs between rounds |
| Single layer | Even browning | Give each piece elbow room |
| Spray | Stops sticking | Light mist before cooking |
“Small batches = big crisp.”
Make-ahead, freezer tips, and how to reheat chicken nuggets
Prep once, reheat later — that’s how we keep weeknights easy and tasty. Cool your cooked pieces completely before packing. Warm crumbs steam if you stash them hot, and that kills crunch fast.

Freeze right so they last
Lay the bites in a single layer on a sheet and freeze until firm. Then move them to an airtight bag or container and label with the date. Stored this way, they’ll keep in the freezer up to 2–3 months.
Reheat from frozen — no thaw needed

Pop frozen pieces straight into the air fryer at 390°F for about 10–12 minutes. Check at 9 minutes — smaller pieces may finish earlier. A quick mist of oil before cooking perks the crust back up.
Why we use the air fryer for reheating
The microwave tends to steam the coating and makes it limp. The fryer chicken method brings hot circulating air that crisps the outside while heating the inside. Warm a little sauce on the side and you’re good to go.
| Step | Tip | Time |
|---|---|---|
| Freeze single layer | Airtight bag after firm | Up to 2–3 months |
| Reheat | Mist oil if dry | 390°F for 10–12 minutes |
| Serve | Warm sauce for dipping | Ready in minutes |
Serving ideas: sauces, sides, and kid-friendly pairings
A crowd-pleasing sauce lineup turns a tray of bites into a party platter in minutes. Set up a few bowls and let folks dunk and decide. We do this often—it’s easy and fun for the whole family.
Dipping favorites
Ranch brings cool creaminess. BBQ gives that sweet-smoky kick. Honey mustard adds tang, and ketchup keeps the kids happy. For a twist, offer marinara for Italian vibes and a quick garlic-lemon aioli for grown-up flavor.
Easy sides that pair well
Serve baked fries or tater wedges—they cook at the same temp as the main pieces and are easy to batch. Roast broccoli or green beans while the main tray cooks and dinner is done together.
- Flaky biscuits or buttery cornbread make the plate feel like comfort food.
- Applesauce or fruit cups add a sweet, kid-friendly balance.
- Build bowls with rice, slaw, and pickles—drizzle your favorite sauce and dig in.
Game day tip: keep the hot pieces coming and park sauces on a tray for dunking. Want more heat? Drizzle hot honey or sprinkle cayenne into a sauce. A quick squeeze of lemon brightens everything.
“Make it a family bar—everyone picks a sauce and a side. Supper, sorted!”
| Sauce | Best side pairing | Quick tip |
|---|---|---|
| Ranch | Roasted broccoli | Chill in fridge, stir before serving |
| BBQ | Baked fries | Warm slightly for extra aroma |
| Honey mustard | Buttery biscuits | Add a spoon of mustard for tang |
| Marinara / Aioli | Rice bowls / slaw | Serve in shallow bowls for dunking |
Variations to try: seasoning twists and breadcrumb upgrades
Swap, stir, and sprinkle—tiny changes to the breadcrumb mix make big taste differences.

Try half panko, half Italian breadcrumbs for a crunchy, textured crust. Stir in grated Parmesan and a teaspoon of Italian seasoning for instant umami.
Go smoky with smoked paprika and a pinch of cayenne, or toss in Cajun spice for a bayou kick. Add lemon zest and cracked pepper to brighten things up.
Want juicier results? Swap thighs for breast—trim and cut even pieces about 1/3‑inch thick for the fastest cook. Keep an egg wash to help cheesy crumbs cling.
Mix melted butter into the crumbs for that golden, bistro finish. Gluten-free cooks can use GF panko and keep the recipe friendly for all.
“Build a house blend and keep it by the stove—you’ll reach for it every time.”
| Variation | Key add-ins | Best for |
|---|---|---|
| Textured crust | 1 cup panko + 1 cup Italian breadcrumbs | Crunch seekers |
| Umami boost | Parmesan + 1 teaspoon Italian seasoning | Snack plates |
| Bright & spicy | Lemon zest + cracked pepper + cayenne | Family dinners |
| Buttery finish | 2 tbsp melted butter mixed into crumbs | Bistro color & crisp |
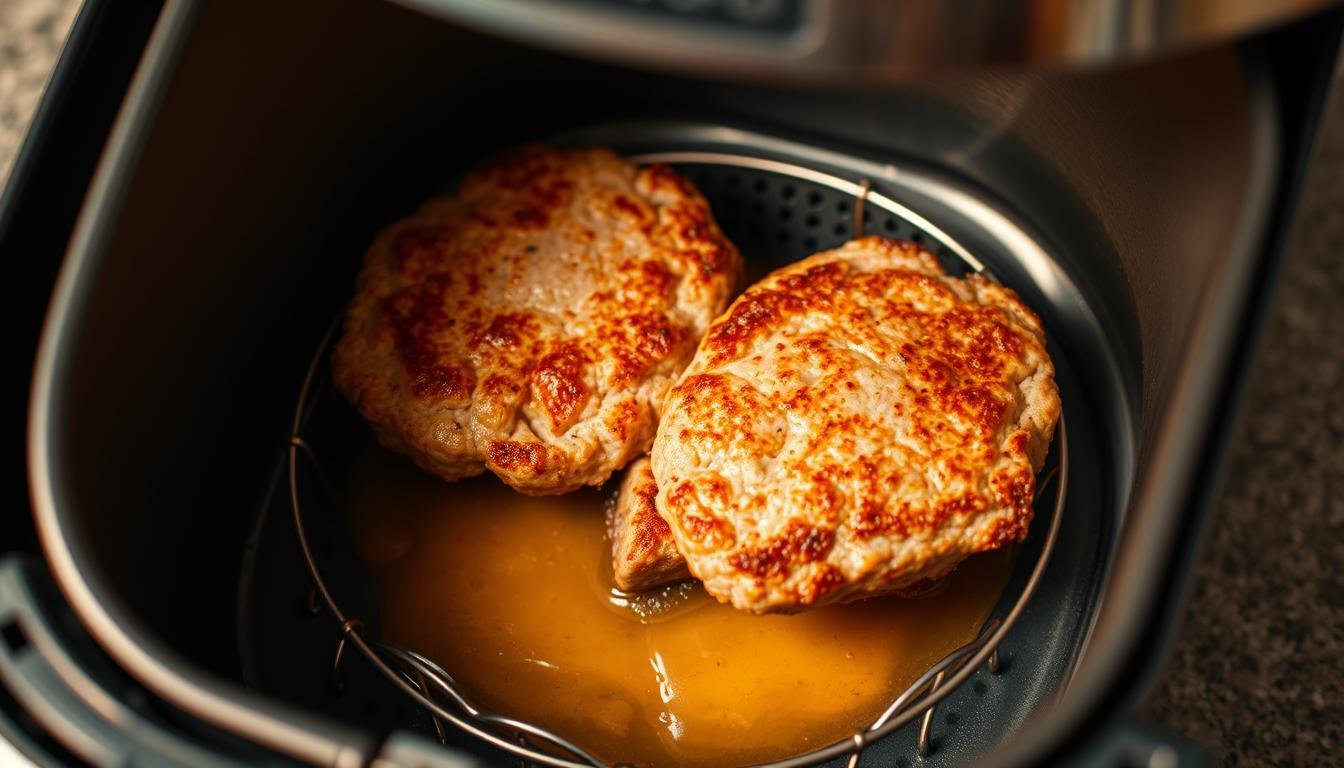
Troubleshooting: uneven browning, dry centers, and soggy crumbs
When browning goes south, a few simple checks usually do the trick. We’ll walk you through quick fixes so your batch comes out even, crisp, and juicy.
Uneven browning? Preheat five minutes and make sure pieces sit in a single layer with space between them. Flip at the halfway mark so both sides get the same kiss of heat.
Pale crust? Give the tops a light oil spray or stir a teaspoon of melted butter into the panko and breadcrumbs next round. That little fat boost browns faster.
Dry centers? Cut your cuts slightly larger or shave a minute off the time. Pull pieces right at 165°F so they stay moist.
Soggy crumbs or coating falling off? Don’t crowd the basket. Cook in batches. Pat the meat dry, dip fully in egg, then press crumbs on firmly. Cool finished nuggets on a wire rack—not a plate.
“If crumbs taste bitter, clean burned bits from the fryer basket between rounds.”
| Issue | Cause | Quick fix |
|---|---|---|
| Uneven browning | Overcrowded basket / no preheat | Preheat 5 min; single layer; flip at halfway |
| Pale crust | Too little fat in crumbs | Add 1 tsp melted butter or mist oil |
| Dry center | Overcooked pieces | Cut thicker pieces or reduce minutes by 1 |
| Soggy crumbs | Crowding / steam | Cook in batches; cool on a wire rack |
| Patchy coating | Wet clumps in bag or bowl | Keep crumb bowl/bag dry; refresh crumbs |
Finally, reheating in the air fryer at 390°F for several minutes brings crunch back—skip the microwave. If pepper or salt feel strong, season lighter next time and finish with a sprinkle after cooking.
Conclusion
Wrap it up fast: follow this simple recipe and you’ll serve golden, tender chicken nuggets with confident ease. One clear step — preheat 5 minutes — sets the whole run right.
Cook at 390–400°F about 8–10 minutes, flip once, and pull pieces at 165°F. That keeps centers juicy and crusts crisp thanks to hot air.
Make extras, freeze up to 2–3 months, and reheat from frozen at 390°F for 10–12 minutes. Batch smart, rack between rounds, and try melted butter in the crumbs for extra color and crunch.
Dish them with ranch, BBQ, honey mustard, ketchup, or marinara — supper’s done. Now go on — air fryer chicken pros, enjoy every crispy bite!