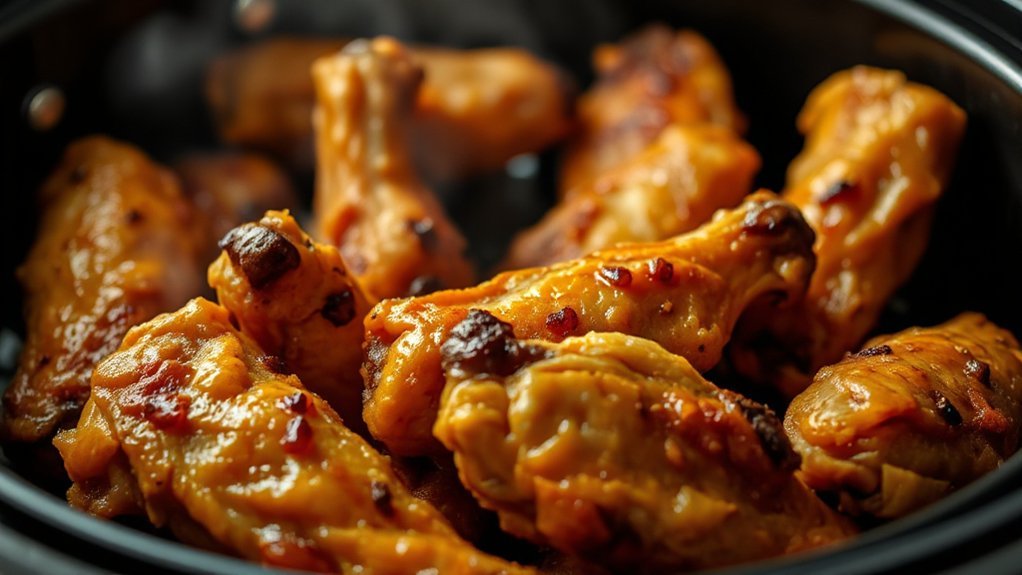
We’ve got a weeknight savior right here — a fuss‑free, straight‑from‑the‑freezer recipe that gives you golden, crunchy skin and tender meat. We’ll walk you through exact time and temp for bone‑in and boneless pieces, when to flip, and how to finish with a hot blast for that shattery crust.
From our tests: bone‑in, skin‑on cooks about 25–35 minutes at 360–400°F; boneless skinless about 18–20 minutes at 400°F. Flip halfway — roughly 10 minutes for boneless, 14 for bone‑in. Use an instant‑read thermometer and aim for at least 165°F safety, or 175–190°F for extra crisp and rendered fat.
We’ll also share quick fixes — separate stuck pieces in cold water for 5–10 minutes, pat dry, rub with a touch of oil so your seasoning sticks, and avoid crowding. Got a Ninja or a Cosori? We’ll help you tweak minutes so supper lands just right. Come on — let’s get dinner singing!
Key Takeaways
- Cook bone‑in, skin‑on about 25–35 minutes; boneless about 18–20 minutes.
- Flip halfway and finish 3–5 minutes at higher temp for extra crisp.
- Use an instant‑read thermometer — avoid the bone when checking temps.
- Separate stuck pieces in cold water, pat dry, and oil before seasoning.
- Adjust minutes by model — Ninja and Cosori may need slight tweaks.
Why Air Fryer Frozen Chicken Thighs Are a Weeknight Win
When time’s short, this method puts a crispy, tender meal on the table without the planning. We love that you can toss frozen chicken thighs straight into the basket and still get great results.
Juicy, crispy results without thawing
Thighs hold a little extra fat, so they stay moist even if you run a few minutes long. Bone‑in, skin‑on gives big flavor and crackly skin. Boneless cooks faster — pick the way that suits your evening.
Budget‑friendly, low cleanup, and forgiving cook
- No thaw? No trouble — cook only what you need and stash the rest.
- Season in a bowl or right in the basket — then one pan to rinse.
- Preheat helps sometimes, but many recipes work without it. Quick wins either way.
“It’s the kind of trick that makes weeknights calmer — fast feedback and tasty results.”
| Cut | Speed | Flavor |
|---|---|---|
| Boneless skinless | Faster | Lean, quick to season |
| Bone‑in skin‑on | Longer | Richer, crispier skin |
| From frozen (general) | Reliable | Juicy thanks to higher fat |
frozen chicken thighs in air fryer
We’ll give you the quick, reliable method with exact numbers so dinner lands right. Read this and you’ll know the time, temperature, and when to flip or crank the heat.
What you’ll learn: bone‑in vs. boneless, skin tips, seasoning timing, and safety checks for internal temperature. We also show a fix for stuck pieces and why a light oil rub matters.

User intent: exact time and temp
Boneless skinless: 18–20 minutes at 400°F. Flip and season at 10 minutes. Bone‑in skin‑on: 25–35 minutes at 360–400°F. Flip/season at 14 minutes. Finish 3–5 minutes at 380–390°F for extra crisp.
- Target at least 165°F internal temp; many prefer 175–190°F for rendered fat and crunch.
- If pieces are stuck, separate in cold water 5–10 minutes, then pat dry before oiling.
- Light oil helps seasoning stick and promotes a golden crust.
“Exact times, safe temps, and a couple of small tricks — that’s how we make weeknight wins.”
| Cut | Total Minutes | Flip/Season At | Finish Temp |
|---|---|---|---|
| Boneless skinless | 18–20 | 10 | 400°F |
| Bone‑in skin‑on | 25–35 | 14 | 360–400°F (finish 380–390°F) |
| Safety target | — | Check at end | 165°F min; 175–190°F for crisp |
What You Need: Tools, Chicken Cuts, and Pantry Staples
Let’s gather the small gear and pantry pals that make crisp results easy and repeatable. A quick check now spares a scramble later.
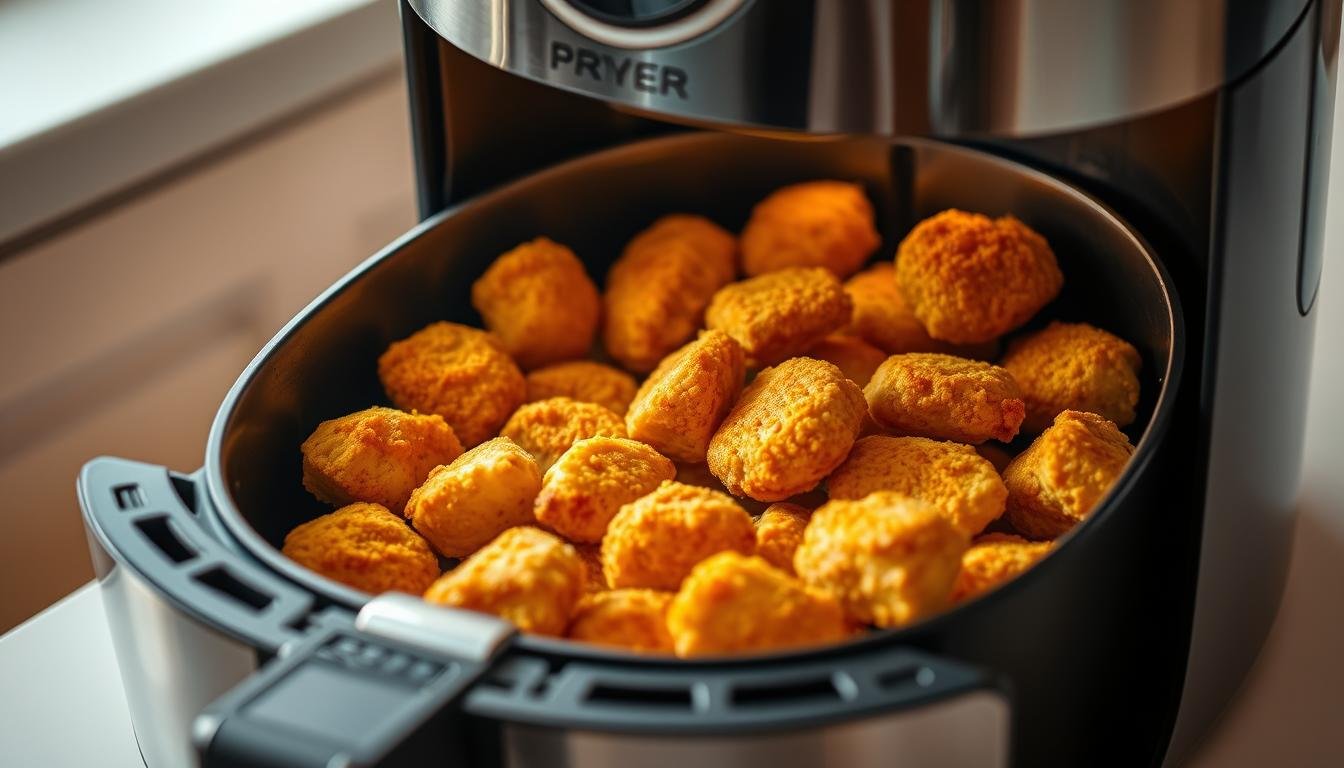
Air fryer and basket size considerations
Check your air fryer basket size before you load. Square baskets often fit more pieces. A Cosori 5.5L XL holds roughly six bone‑in pieces. Brands like Ninja and Cosori both work — but output varies, so we spot‑check temps.
Which cut to pick
Pick bone‑in, skin‑on for big flavor and crackly skin. Choose boneless, skinless for a quicker cook and leaner bites. Keep pieces separated — don’t cook a frozen clump in the fryer basket.
Pantry staples and tools
Keep a little oil—olive, vegetable, or avocado—so the seasoning hugs the meat. Basic spice pals: salt, pepper, paprika, garlic and onion powders, and Italian seasoning.
- Two must‑haves: kitchen tongs and an instant‑read meat thermometer.
- Fresh herbs matter — if jars are older than six months, swap them out.
“Small prep, big payoff — that’s our motto.”
Prep From Frozen: Separating, Oiling, and Seasoning Setup
A little prep before the basket goes a long way — here’s how we set things up from frozen.
Separate safely and dry well
If pieces are stuck together, dunk them in a bowl of cold water for 5–10 minutes. Just long enough to loosen—don’t thaw them fully.
Pat each piece dry with paper towels. Water will fight crisp skin, and we want that golden finish.
Light oil rub and seasoning options
Rub a thin sheen of oil over each piece so spices cling and the meat won’t stick to the basket. A little goes a long way.
Season in a bowl for even coverage, or toss them straight in the basket if you’re pressed for time. Either way works.
- Give each piece elbow room—air must flow for even color.
- Start skin‑side down, then flip to finish skin‑side up for max crisp.
- Keep tongs handy for quick, safe flips without fumbling.
- This small prep is the secret sauce to that “how’d you do that?” finish.
“These tiny steps—separate, dry, oil, season—turn weekend effort into weekday magic.”

| Step | Why it matters | Timing |
|---|---|---|
| Cold water separation | Prevents clumps and allows even cook | 5–10 minutes |
| Pat dry | Promotes crisp skin and browning | 30–60 seconds per piece |
| Light oil + season | Prevents sticking and helps spices adhere | 1–2 minutes per piece |
The Two Proven Methods You Can Use
Two simple paths will get you to crispy skin and juicy meat—pick the one that fits your night. We tested both and trust each for different goals.
Method A: Season first, then air fry (simple, fast)
Oil and rub your seasoning onto the pieces and cook straight away. This is the fastest way to get dinner on the table.
Pros: quick, minimal steps. Cons: some spice may slip off a hard surface while cooking.
Method B: Partial cook to thaw, then season (better seasoning adhesion)
Preheat to 400°F and run the basket 10 minutes for boneless or 14 minutes for bone‑in. Pull the pieces, brush an oil-plus-spice paste, then return to cook.
Finish times: add 10–12 minutes more for boneless; 14–16 minutes for bone‑in. Testers loved how the seasoning stuck like a dream.
When to choose each method
- Choose A when you need speed and a reliable recipe—great for weeknights.
- Choose B when flavor is the star and you want better crust and adhesion.
- Finish skin‑side up for glossy, crackly results. Keep a thermometer handy to hit target temperature, not just the clock.
- Mix it up: use Method A for quick suppers, Method B for weekend meals with extra flavor work.
“Fast nights—Method A. Flavor nights—Method B. Both get you dinner that everyone loves.”
Time and Temperature Guide for Perfect Doneness
Let’s pin down the exact minutes and temps so you nail doneness every single time. Short rules here — follow the clock, then verify with a probe.

Boneless, skinless pieces
Set the basket to 400°F. Cook for 10 minutes, flip and season, then finish for 8–10 more minutes. Total: 18–20 minutes.
Bone‑in, skin‑on pieces
Run 360–400°F for 14 minutes, flip and season, then add another 11–21 minutes depending on size. Total: 25–35 minutes.
Extra‑crispy finish & appliance notes
For a crackly surface, blast 3–5 final minutes at 380–390°F. Remember: Ninja tests ran true at 400°F and a Cosori basket holds about six pieces. Outputs vary, so trust the probe.
- Target at least 165°F internal temperature; 175–190°F gives more rendered fat and crisper skin.
- Larger cuts need more minutes; small ones need less.
- Cook skin‑side up to finish for a dry, glossy surface.
- Second batches may cook faster in a hot basket.
“Trust your thermometer over the timer — that little probe is your best friend.”
| Cut | Temp (°F) | Total minutes | Flip/Season at |
|---|---|---|---|
| Boneless skinless | 400 | 18–20 | 10 |
| Bone‑in skin‑on | 360–400 | 25–35 | 14 |
| Extra crisp finish | 380–390 | +3–5 | At end |
How to Check Internal Temperature the Right Way
Let’s talk about the one check that saves supper—how to read doneness like a pro.
Targets to aim for
Use an instant‑read meat thermometer to measure the internal temperature.
Food is safe at 165°F. For thighs we often prefer hotter—about 175–190°F—for more rendered fat and crispier skin.
Where and how to probe
Slide that probe into the thickest part of the piece. Do not let the tip touch bone — that gives a false high reading.

Check the biggest piece first. If it’s done, the rest usually are too.
- Read quickly with an instant‑read so you don’t lose heat from the fryer.
- If temperature is a touch low, pop it back for a couple minutes and recheck.
- Let the meat rest 5 minutes before serving—juices settle and skin stays crisp.
- Keep your thermometer clean—wipe between checks so readings stay honest.
“Trust the probe, not the clock—one quick check keeps dinner perfect.”
Step‑By‑Step: Bone‑In, Skin‑On Thighs (From Frozen)
Begin with the thighs separated and skin‑side down; those first minutes set the whole cook. If they arrived stuck, dunk briefly in cold water and pat each piece dry.

Rub a light sheen of oil so your seasoning will cling and the skin can brown. Load the basket with space between pieces—give air a path to work.
- Start skin‑side down and run 14 minutes at 360–400°F.
- Flip to skin‑side up, season generously, then continue for another 11–21 minutes depending on size.
- Check the thickest spot for at least 165°F. If you want extra crunch, bump to 380–390°F and finish 3–5 more minutes.
- Let rest 5 minutes before serving so juices settle.
If skin still looks pale, give pieces more space or a few extra hot minutes. Use tongs—don’t pierce—so juices stay put. We like this run for reliable, golden results when you need a fast weeknight win.
“Simple steps—separate, oil, time, and rest—are the real keys to a great finish.”
Step‑By‑Step: Boneless Skinless Chicken Thighs (From Frozen)
Short cook, big reward — boneless skinless pieces are our go‑to when the clock’s ticking. Preheat your unit to 400°F so the surface starts browning right away.
Shorter cook time, same safety checks
Load the basket in a single layer. Cook for 10 minutes, then flip and add seasoning.
Return for another 8–10 minutes. Aim for an internal temperature of 165°F or higher. Let rest for 5 minutes before serving — that little pause keeps juices where they belong.
- Preheat to 400°F for a speedy, reliable run.
- Partial‑cook then season if you want spices to stick like a charm.
- Smaller pieces may finish sooner — start checking at 16 minutes.
- Keep one layer for even color; do a second batch if needed.
- Probe the thickest piece and avoid touching the tray or bone when you test.
“Short steps — heat, flip, probe, rest — and supper’s done right.”
Seasoning Variations and Sauces That Work From Frozen
A quick spice switch-up is the easiest way to make weeknight dinners feel special. We keep things simple — a few pantry staples and one small trick will stretch a basic meal into several tasty turns.
All-purpose blend vs. Italian
All-purpose blends mix onion and garlic powders, black pepper, smoked paprika, and dried parsley or oregano. It’s our grab-and-go rub for a reliable result.
Italian seasoning leans herbal — basil, oregano, thyme. Use it when you want a milder, pasta-friendly profile.
Bold rubs: Cajun, taco, and BBQ
- Build a bold blend with smoked paprika, garlic and onion powders, and black pepper.
- Taco or Cajun mixes shine for tacos or spicy plates — serve with rice or cornbread.
- BBQ rubs please the sweet‑smoky fans; finish with a honey BBQ glaze at the end.
When to add glazes
Add sticky sauces like honey BBQ or buffalo only in the last five minutes. That lets them caramelize without burning and keeps the skin glossy.
“Mix spices with a splash of oil and a squeeze of lemon for a quick paste that clings — this is the way to turn a freezer staple into a new recipe every week.”
Pro Tips for Air Fryer Success
A couple of little tricks will keep your supper golden and your stress low. We keep things simple and steady so every run turns out great.
Give each piece breathing room
Don’t overcrowd. Leave gaps so hot air moves freely around each piece. Use the basket in batches if needed.
Flip at the right moment
Flip halfway and finish skin‑side up so the top crisps perfectly. That small habit makes a big difference.
Preheat—when it helps
Some recipes don’t need preheat. When you want a faster sear, preheat your unit. Know your brand and adjust timing.
Troubleshoot soggy or uneven results
- For soggy skin: pat dry, separate pieces, then bump the temperature 3–5 minutes at 380–390°F.
- Uneven cooking? Pull small pieces early and let larger ones finish while you check temperature with a probe.
- If seasoning slides off, try partial‑cook then season for better adhesion.
- Keep the fryer basket clean between batches—pooled grease turns crisp into steam.
“Watch the temperature, not just the clock—every appliance has its own personality.”
Storage, Reheating, and Meal Prep
Keep those leftovers working for you—smart storage makes weekday meals a breeze. Let things cool a bit, then move portions to an airtight container so flavors stay true and moisture stays out.
Cool, pack, and fridge life
Let pieces rest until warm stops rising. Tuck them into an airtight container and refrigerate—good for up to 3 days. Label with the date so you don’t guess later.
Freeze and reheat to crisp
For longer keeping, slide cooked portions to the freezer. USDA notes: you may safely freeze cooked food even if it began frozen raw. To revive, reheat in the air fryer at about 350°F for 5–7 minutes—this warms and re‑crisps skin nicely.
Meal prep uses
Portion for bowls, salads, soups, or tacos. Dice for quick wraps or shred for grain bowls. A little planning stretches one good recipe into several easy meals.
“Label those containers—future you will thank us!”
Serving Ideas and Simple Sides
Pairing is the easy part — a few smart sides take this meal from good to beloved. We like simple, quick fixes that let the crisp skin and rendered fat shine.
- Spoon those crispy chicken thighs over creamy Parmesan orzo for comfort on a plate.
- Roast red potatoes while the meat cooks — same oven rhythm, less fuss.
- Toss a veggie medley in olive oil and salt; air fry or sauté for a fast green side.
- Try Instant Pot buckwheat groats for a nutty, wholesome base — a real stick‑to‑the‑ribs favorite.
Add a cool, creamy pasta salad for a hot‑cold contrast. Peas or Italian green beans make family‑friendly greens. Cornbread? Yes please — sweet meets savory and rounds things out.
“Small sides let the main show off — simple recipes, big payoff.”
| Side | Why it works | Timing |
|---|---|---|
| Parmesan orzo | Rich, creamy base that soaks up juices | 15–20 min |
| Roasted red potatoes | Crunchy exterior; cooks alongside pieces | 25–35 min |
| Buckwheat groats | Nutty, hearty alternative to rice | 10–15 min (Instant Pot) |
Conclusion
Turn a frozen stash into a weeknight win with a few steady minutes and a hot finish.
No thawing needed—boneless pieces run about 18–20 minutes at 400°F; bone‑in takes roughly 25–35 minutes at 360–400°F. Flip at 10 or 14 minutes, then crank the heat for 3–5 final minutes if you want extra crackle.
Trust the probe—aim for at least 165°F so your meal is safe and juicy. Store leftovers up to three days and re‑crisp them in the air fryer at 350°F for about 5–7 minutes.
Season how you like—Italian, Cajun, BBQ, or a last‑minute buffalo glaze. This recipe keeps weeknights calm and tasty: smart time, steady temps, and a thermometer you can count on. Now go on—air fry, rest, and dig in. Supper’s served!