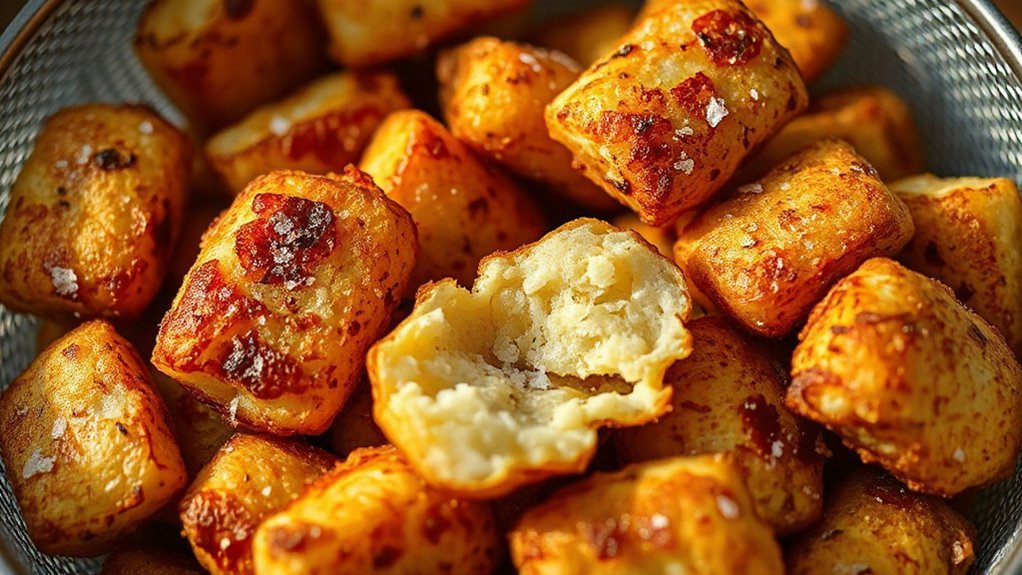
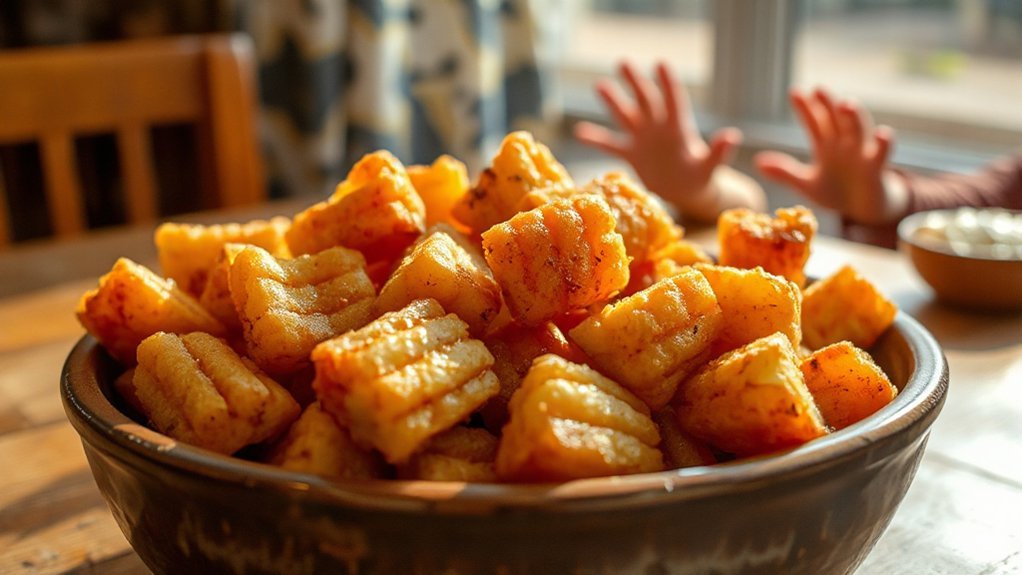
You’ll get extra-crispy, golden tater tots by preheating the air fryer to 400°F, pre-toasting briefly, misting each tot with a fine oil spray, and arranging a single-layer with space between pieces. Shake the basket mid-cycle, finish with a quick high-heat blast for deep color, then rest one to two minutes before serving with kid-friendly dips. This 2026-tested technique keeps centers light and edges snappy — keep going for tips on seasonings, glazes, and storage tricks.
Why This Method Delivers Extra Crunch
Because the air fryer blasts hot, circulating air right around each tot, you’ll get a crisp, golden exterior without dunking them in oil. You notice that immediate crunch because fast, dry heat promotes Maillard chemistry at the surface, creating browned flavor pockets that taste deeper than oven-baked versions. The small, exposed surface area of each tot means more edges crisp up simultaneously, so you don’t need long cook times or tedious flipping. You’ll also appreciate even heat distribution—no soggy spots, just uniform texture. Try shaking the basket once mid-cycle to keep tots separated and maintain airflow. Acoustic perception plays a neat role: that confident sizzle and audible snap tell you doneness before you even look. Follow timing guidelines and keep pieces single-layered, and you’ll consistently get tater tots that are browned, crunchy, and satisfying. It’s an efficient, kid-friendly way to boost texture with minimal fuss and repeat daily.
Ingredients for Frozen and From-Scratch Tots
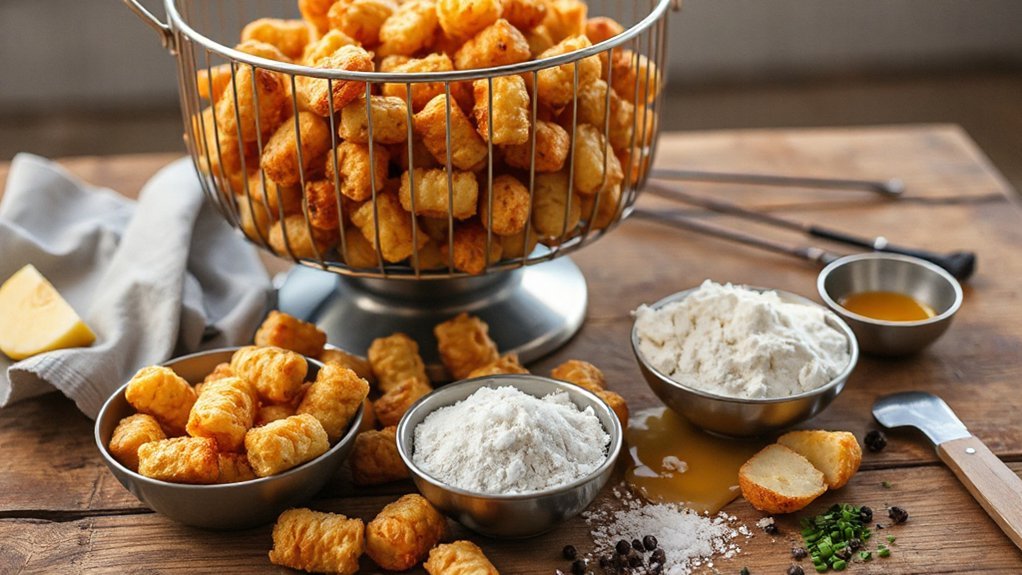
After mastering crispness, you’ll see the ingredients set the stage—frozen tots need little more than a bag, a light spray of oil, and your favorite seasoning, while homemade tots call for a few pantry staples and a bit of technique. For frozen, pick high-quality brands or avoid oversized clumps; the simplicity is the appeal. For from-scratch, start with starchy potatoes—russets or Yukon Gold—choose a texture that suits you and consider different starch varieties for subtle textural tweaks. You’ll mash or grate, squeeze excess moisture, then add a binding agent like an egg or a small amount of flour to hold shapes without sogginess. Season simply: salt, pepper, onion powder, maybe a pinch of smoked paprika. If you want cheesy tots, fold in grated sharp cheddar. Keep quantities modest so your tots stay crisp, and test a small batch to dial seasoning and binding before you make a tray.
Essential Tools and Air Fryer Setup
Pick an air fryer size that matches how many tots you usually make so they cook in a single layer.
Decide between a basket (better airflow and crispiness) and a tray (more even spacing or batch cooking), and plan to shake or flip halfway.
Preheat when your model recommends it and aim for about 380–400°F for frozen tots and a bit lower for homemade so they crisp without burning.
Air Fryer Size
How big should your air fryer be for tater tots? You’ll want one that fits the batch size you usually make. For solo snacks or small kids, a 2–3 quart model handles a single bag portion; for family servings aim for 5–6 quarts so tots crisp without overcrowding. Keep portion planning in mind: overcrowding makes uneven cooking, so choose capacity that matches how many kids or guests you feed. Also consider energy consumption: larger units use more power but can cook more at once, so they may save time and trips to the fryer. If you often make big batches, invest in a roomy unit. If not, a compact, efficient fryer keeps things quick and economical. You’ll get crisp tots every time, reliably too.
Basket Vs Tray
Which works better for tater tots — a basket or a tray? You’ll usually get crisper tots in a basket because hot air circulates all around, and shaking midway keeps things even. Trays give you more single-layer real estate so you can cook larger batches without overcrowding.
Choose based on your goals: if you want maximum crisp, pick a basket; if you need organized batches for dipping parties, use a tray. Consider Cleaning Ease — baskets can be fiddly to scrub, trays often wipe clean faster. Think about Storage Space too: trays stack neatly, baskets can be bulky. Either way, leave room between tots, flip or shake as needed, and you’ll get reliably crisp results every time. Kids will love the crunch and quick turnaround.
Preheat and Temps


Since air circulation and spacing affect crispness, getting the air fryer up to the right temperature matters as much as your basket or tray choice. Preheat for three to five minutes at 400°F so the tots hit hot air immediately; you’ll get crisper edges and shorter cook times. If your machine has significant ramp time, add a minute or two. Check your unit’s thermostat calibration — many run hot or cool by 10 to 25°F — and adjust temps or cook times accordingly. You don’t need to preheat for every brand, but consistency improves results. When you layer or crowd, raise temp slightly and shake more often. Small tweaks to preheat and temp give reliably extra crispy tater tots that kids will devour quickly.
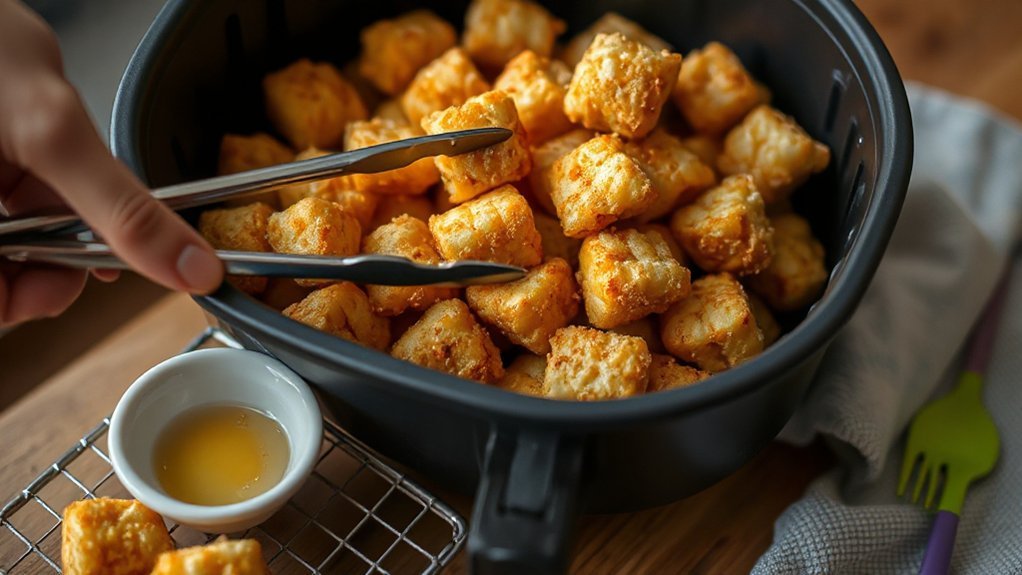
Pre-Toast, Oil Mist, and Spacing — the 2026 Technique

Pre-toasting the tots, misting them with a fine oil spray, and spacing them out in the basket is the 2026 technique that turns average air-fryer batches into restaurant-level crisps. You’ll pre-toast briefly to firm exterior starches so the crust microstructure develops more uniformly, which helps a thin oil mist adhere without sogging. When you mist, use a pump sprayer or aerosol that delivers a fine veil—just enough to promote browning and crunch. Don’t drench; over-oiling collapses pockets that create lightness. Equally important is spacing: give each tot breathing room so airflow dynamics circulate heat evenly and prevent steam buildup that softens edges. You’ll notice more consistent color, a snapier bite, and fewer dense centers when you combine these three steps. These adjustments are small, but they reliably upgrade texture and appearance without changing ingredients or adding prep time. Try them once and you’ll never go back again, either.
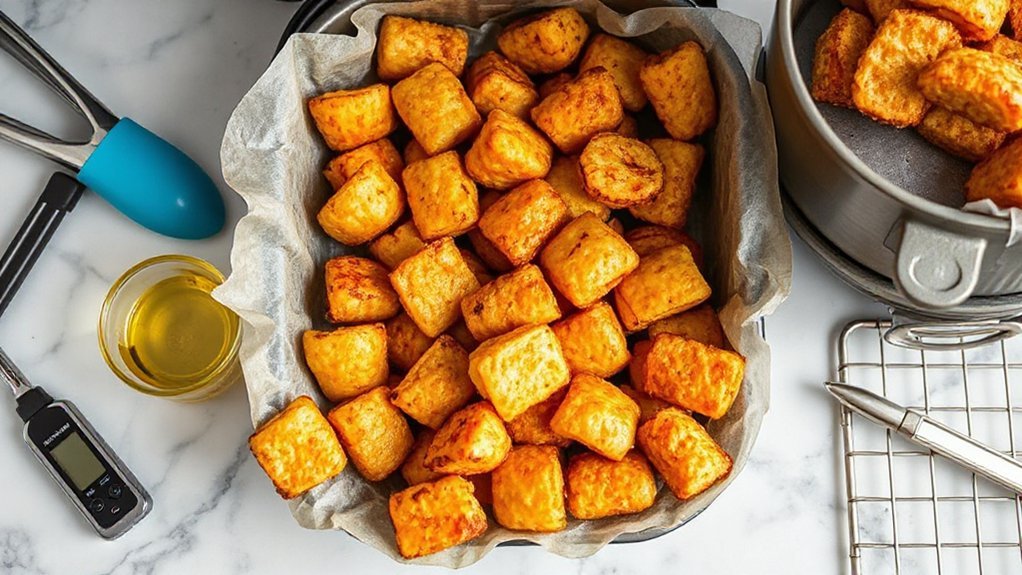
Step-By-Step Cooking Instructions
Start by preheating your air fryer to 400°F (200°C) so it’s hot and ready when the tots go in. Pat tots dry, mist lightly with oil, and arrange in a single layer with spacing. Cook six to eight minutes, shake the basket, then continue four to six minutes until golden. Use visual cues: deep golden color and firm exterior indicate doneness. If some tots brown faster, pull them; return others for another minute or two.
Table to check timing and texture:
| Step | Result |
|---|---|
| Preheat | Hot basket |
| Toast | Light browning |
| Mid-shake | Even color |
| Finish | Crisp exterior |
| Rest | Slight cool-down |
Let tots rest one to two minutes to set crispness. For plating presentation, arrange on a warm dish, cluster neatly, and add a clean napkin beneath for contrast. Serve immediately; kids will notice the crunch. Enjoy the snack.
Flavor Variations and Dipping Ideas
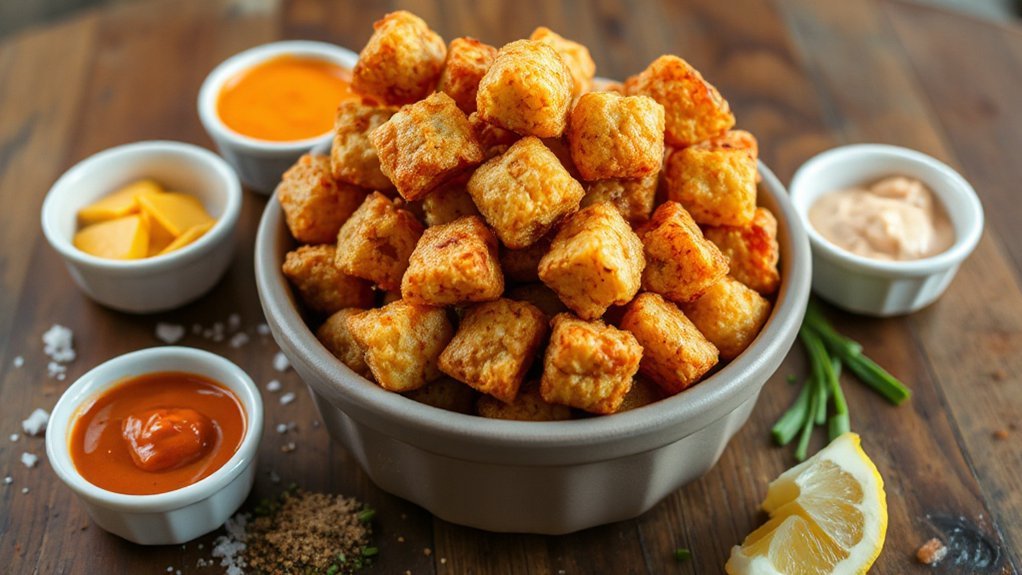
You can change up tater tots with savory seasoning mixes like garlic-parmesan, ranch, or smoked paprika for an instant flavor boost. If you like contrast, try sweet-and-spicy combos—honey-sriracha or maple-chipotle add a tasty kick. For kids, stick with simple dips like ketchup, cheese sauce, or creamy ranch — they’ll love dunking and you’ll love how easy it is.
Savory Seasoning Mixes
Kick your tater tot game up a notch with bold, savory seasoning mixes that turn simple tots into party-ready bites. You can sprinkle garlic-parmesan, smoked paprika-cumin, or rosemary-lemon pepper for instant flavor. Mix Umami Boosters like nutritional yeast, mushroom powder, or a touch of soy or tamari with a little smoked Salt Alternatives such as potassium chloride blends to deepen taste without overdoing sodium. For crunch and herb balance, toss tots with crushed seaweed, sesame seeds, and dried oregano after air frying. Serve with savory dips — herbed Greek yogurt, garlic aioli, or mustard-maple mustard (use Dijon for punch). Experiment in small batches, taste, and adjust so every batch feels exciting and perfectly seasoned. You’ll find favorites fast and keep snack time always fun.
Sweet and Spicy
How about mixing sticky sweetness with a clean hit of heat for tater tots that surprise every bite? You’ll play with honey, maple, or mango glazes balanced by chili flakes or chipotle for palate development and lively Cultural pairings. Brush before air frying or toss after crisping to keep texture. Try these quick combos as a starting point:
| Sauce | Heat | Sweetness |
|---|---|---|
| Sriracha-honey | Medium | High |
| Mango-chipotle | Warm | Moderate |
Let spicy-sweet contrast train your palate and invite bold tasting. Finish with lime or sesame for brightness. Keep spicy portions optional so picky eaters can opt out. You can experiment with textures—crunchy toasted nuts or crisped shallots—and vary sweetness intensity to match meals. Note regional spices to enhance Cultural pairings without overwhelming tots. Keep it simple, repeat.
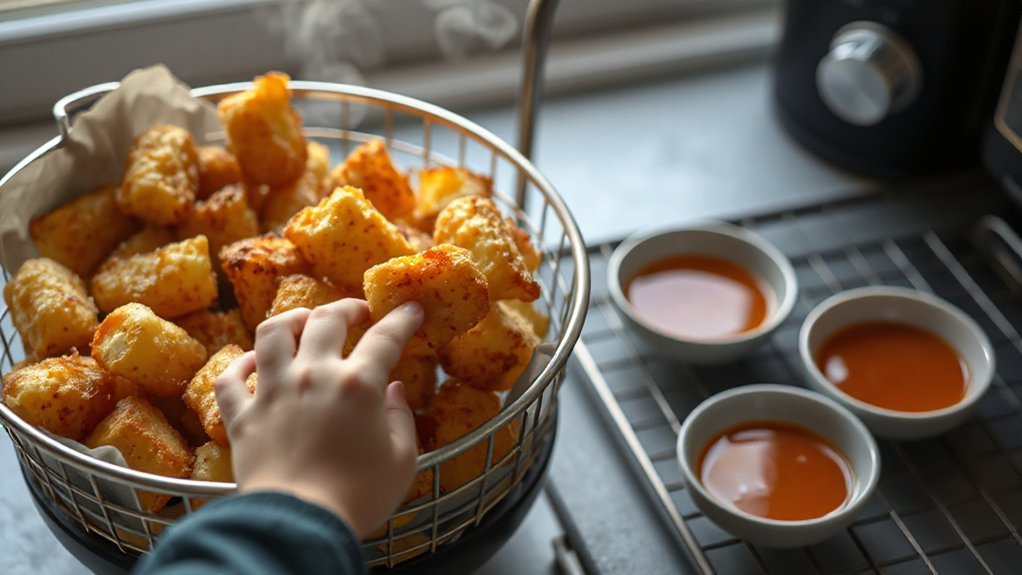
Kid-Friendly Dips
After playing with spicy-sweet glazes, make dipping easy for little hands and picky palates. You’ll keep tots exciting by offering a trio of simple dips: creamy ketchup-mayo, mild ranch made with yogurt, and a smoky BBQ honey blend. Let kids choose based on Texture preferences — silky, chunky, or pourable — so they feel in charge. For allergies, label bowls and offer Allergy swaps: use vegan mayo, dairy-free yogurt, or nut-free BBQ to keep everyone included. Serve dips in shallow dishes for easy scooping and small portion cups for variety. Rotate flavors weekly to test favorites, and encourage kids to mix two dips for custom tastes. It’s fun, fast, and totally kid-approved. Pair with warm tots for best results. Serve immediately for peak crispness always.
Troubleshooting and Reheating Tips
If your tater tots come out soggy, pale, or unevenly cooked, don’t panic—these are common and easy to fix with a few simple tweaks. For a Soggy Rescue, spread tots in a single layer, give them a quick spritz of oil, and air fry at 400°F for 3–5 minutes to revive crispness. If they’re pale, bump the temp and finish with 1–2 minutes of high heat to brown edges without drying centers. Use a fork to check doneness so you avoid overcooking.
For reheating, preheat the air fryer to 375°F, arrange tots in a single layer, and heat 4–6 minutes, shaking halfway for even color. Want Texture Restoration after freezing? Thaw in the fridge briefly, then air fry at 390°F for 5–7 minutes. Store leftovers airtight and reheat only once for best results. If you follow these tips, you’ll enjoy consistently crispy tots that kids and adults will love.
Conclusion
You’ve nailed the 2026 method and now you get reliably extra-crispy tots every time. With a quick pre-toast, light oil mist, and proper spacing, your air fryer becomes a tiny, futuristic skillet—like something out of a 1950s diner sci-fi comic. Keep experimenting with seasonings and dips, and you’ll wow kids (and adults) at every snack time. Reheat smart, follow the steps, and enjoy golden, crunchy bites anytime. Serve immediately for peak texture and smiles always.