You can make an elegant air-fryer chicken piccata in 20 minutes that’s crisp outside and juicy inside. Pound thin cutlets, dredge in flour, egg and panko, then air-fry at 380°F for about 4–5 minutes per side. While they cook, whisk lemon, warm stock or wine, capers and garlic, reduce briefly and finish with cold butter for a glossy sauce. Serve with pasta or greens, and keep going to pick up timing, tips and plating tricks.
Ingredients
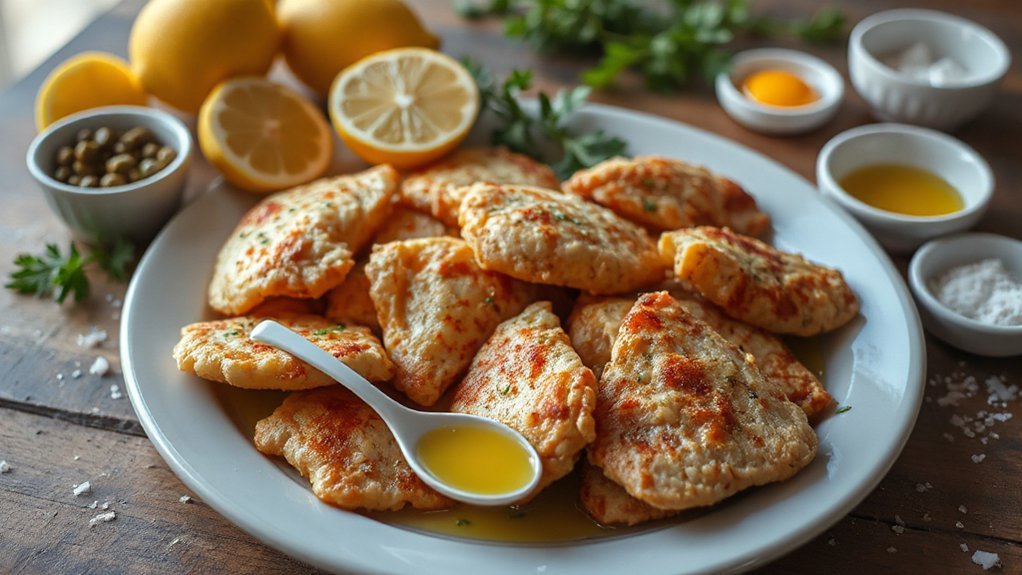
A handful of pantry staples and a few fresh items will get you to a bright, crispy Air Fryer Chicken Piccata. You’ll need thin chicken cutlets (about 1 pound), kosher salt and black pepper, all-purpose flour for dredging, eggs for an egg wash, and panko or fine breadcrumbs for crunch. For the sauce, grab fresh lemons, low-sodium chicken broth, capers, and unsalted butter or olive oil. Add chopped parsley for color and optional red pepper flakes for heat. Measure ingredients so your nutritional breakdown stays accurate if you’re tracking calories or macros. Note allergen warnings up front: this recipe contains wheat, eggs, and dairy (unless you use substitutes). If you’re swapping ingredients, pick gluten-free flour and dairy-free butter to accommodate needs. These ingredients keep the method simple, let bright lemon and briny capers shine, and keep prep quick so you’ll serve dinner in about 20 minutes very easily.
Equipment and Tools
You’ll want an air fryer that reaches at least 400°F, offers a 3–5 qt basket (or larger for family portions), and includes a nonstick or perforated tray for even crisping. Have tongs, a meat mallet, an instant‑read thermometer, a small whisk and bowls, plus parchment or liners for easy cleanup. For serving, grab a nice platter, lemon wedges, capers and fresh parsley or small ramekins for the sauce so you can plate it beautifully.
Essential Air Fryer Specs
Basket size matters—pick one that fits the chicken breasts or the batch you want to cook without crowding. You’ll also want an air fryer with a reliable temperature range and clear basket capacity markings so you can set precise heat and avoid overloading. Look for even airflow and easy-to-clean surfaces.
- 3.5–6 qt for singles or small families
- 6–8 qt for larger batches or thicker breasts
- 180–400°F (usable cooking span) with accurate controls
- Good circulation design for even browning
- Removable, dishwasher-safe basket
You’ll appreciate quick preheat, consistent results, and simple controls when you’re racing the clock for a 20-minute dinner. Choose a model with intuitive buttons, a reliable timer, and a sturdy build so you’ll get repeatable golden piccata-ready chicken every time without fuss easily.
Essential Utensils and Tools
Once you’ve picked the right fryer size and airflow, outfitting your kitchen with the right tools makes cooking piccata fast and foolproof. You’ll want tongs, a nonstick skillet-safe spatula, a sharp chef’s knife, and a meat mallet or heavy rolling pin to pound thin cutlets. Use a shallow dish for dredging flour and a silicone brush for a light oil mist. A small sauté pan or ovenproof skillet works for the sauce, while a fine mesh strainer keeps capers tidy. Keep a digital thermometer for perfect doneness. Choose durable utensils and silicone mats to ease cleanup; simple Cleaning Hacks—like soaking baskets immediately—save time. Think about Sustainability Considerations: pick long-lasting, recyclable tools and minimize single-use plastics. Store everything handy to streamline prep and plating daily.
Optional Serving Accessories
A warmed platter or shallow bowl makes the dish look restaurant-ready and keeps the piccata hot while you finish sides; pair it with long-handled tongs or a wide slotted spatula for gentle transfers so the crust doesn’t tear. You’ll also want a few optional accessories that lift the experience without fuss: they speed service, protect the sauce, and help set the vibe—think table centerpiece and mood lighting to make dinner feel special. Consider these extras for hosting or an elevated weeknight meal:
- Small ramekins for extra capers and lemon wedges
- A gravy boat or small pitcher for pan sauce
- Heatproof trivets or silicone mats
- Linen napkins and simple flatware
- A low-profile table centerpiece to avoid blocking views
Use what fits your space and mood.
Quick Prep Steps
First, grab your ingredients and tools—air fryer, tongs, plates, and a meat mallet—so everything’s within reach. Pound the chicken to an even thickness and season it well for fast, uniform cooking. While the chicken rests, whisk lemon, capers, butter, and broth so your sauce’s ready to finish in minutes.
Gather Ingredients and Tools
Before you fire up the air fryer, gather everything you’ll need so prep goes fast and smooth: boneless skinless chicken breasts (pounded to even thickness), flour, eggs, and panko or regular breadcrumbs for the dredge; fresh lemons, capers, chicken stock or dry white wine, butter, and olive oil for the sauce; plus kosher salt and black pepper and chopped parsley for finishing. Plan grocery timing and budget planning so you shop once and avoid substitutions. Lay out tools and ingredients on a clean counter so you work confidently.
- Air fryer basket and rack
- Shallow bowls for flour, eggs, breadcrumbs
- Tongs, whisk, and measuring spoons
- Citrus zester/juicer and small saucepan
- Plate for rested cooked chicken
You’ll move quickly and enjoy the process. Ready? Let’s cook.
Pound and Season Chicken
Grab a piece of plastic wrap and your meat mallet or rolling pin and flatten each chicken breast to an even thickness—about 1/2 inch—so it cooks quickly and consistently. Pat the pieces dry, then sprinkle kosher salt and freshly ground black pepper on both sides; seasonings stick better to dry meat. Lightly dust with a little flour if you like a crisp exterior, tapping off excess. Use your fingertips to press seasonings in—this helps the coating adhere. Let the pounded breasts rest on a wire rack for five minutes; resting benefits include even temperature and moisture redistribution, which improves final juiciness. Think texture science: thinner, uniform cuts sear and air-fry evenly, giving tender interiors and a golden edge. You’re prepped and ready to move.
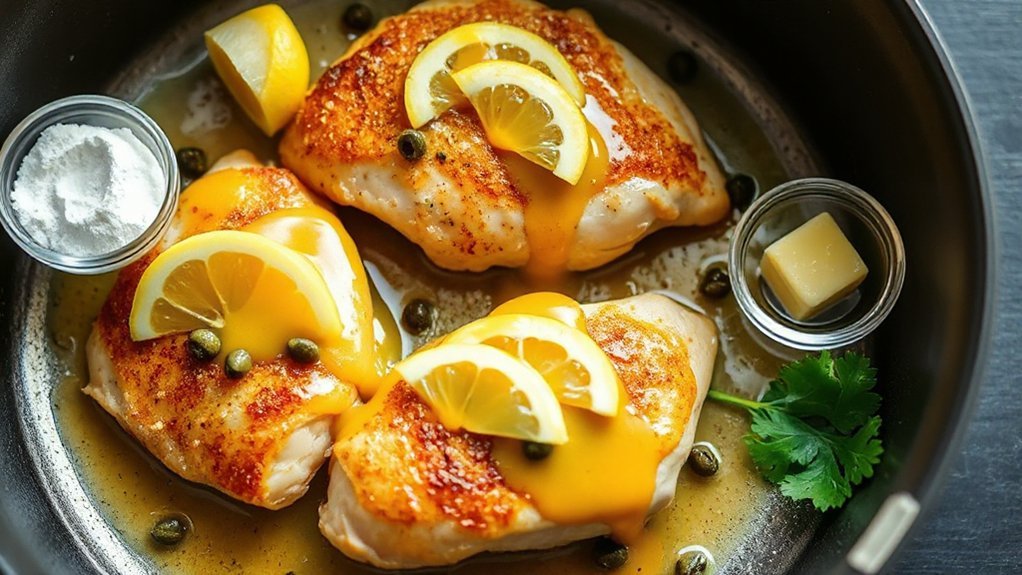
Prep Lemon Caper Sauce
While the chicken rests on the rack, get the lemon-caper sauce going—it takes minutes and ties the whole plate together. You’ll move fast: zest, juice, capers, stock, butter, and a quick reduction. Think of flavor chemistry—acid brightens, fat smooths, brine cuts through. Follow these quick steps:
- Warm butter and olive oil in the pan.
- Add minced garlic and zest, bloom briefly.
- Pour lemon juice and white wine or stock, simmer.
- Stir in drained capers and a splash of stock.
- Finish with cold butter to emulsify and season.
You’ll taste history in the balance—historical origins of piccata lean Italian, but the technique is universal. Spoon over chicken and serve immediately. Adjust acidity to taste—add another squeeze of lemon or a pinch of flaky sea salt.
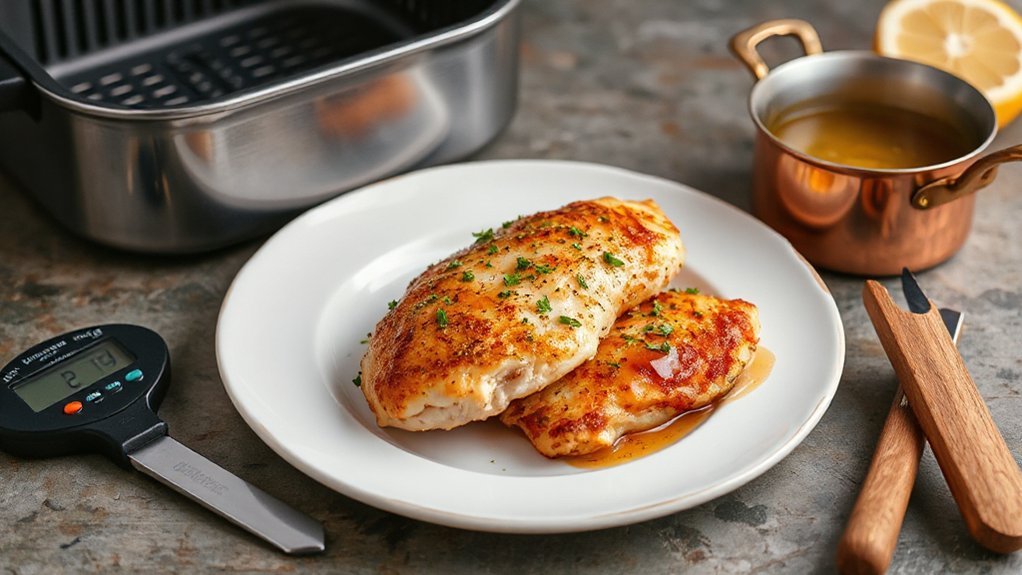
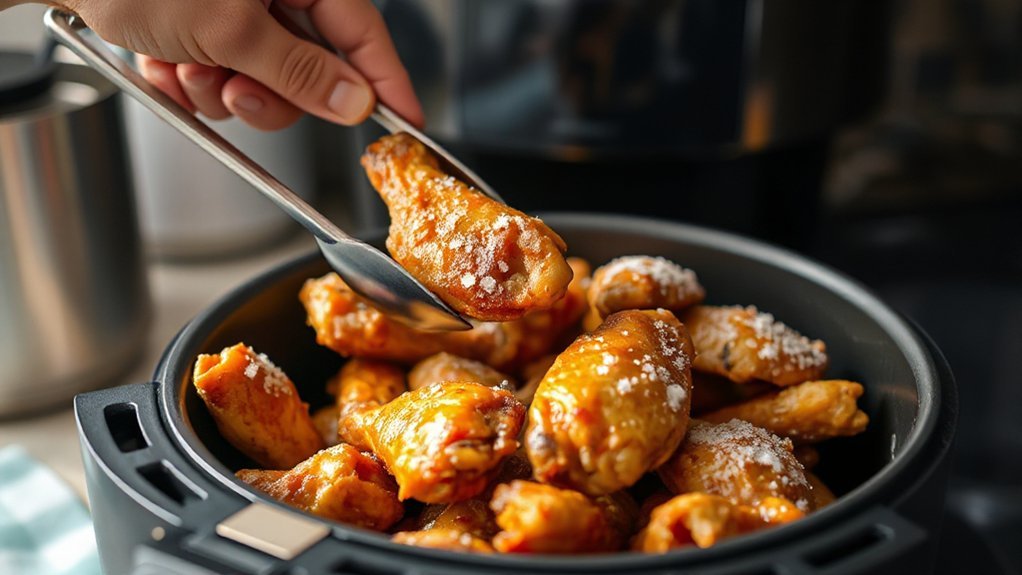
Air Frying the Chicken
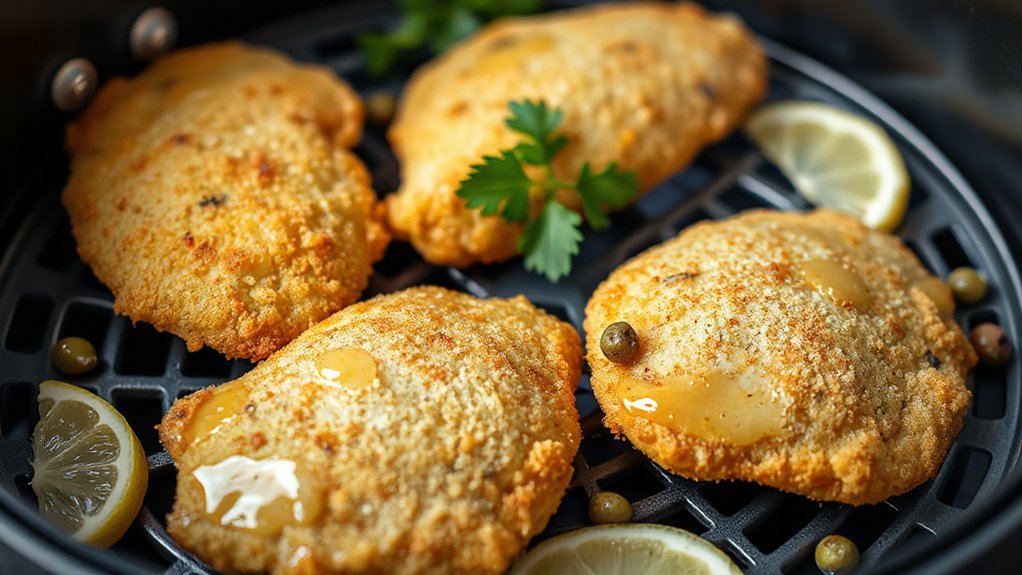
Preheating your air fryer to 375–400°F gets the crust crisp without drying the meat, so set it while you finish the last prep steps. Pat the cutlets dry, season, then dredge in flour, egg, and panko. Arrange them in a single layer with space between pieces for even airflow. For consistent Crisp Timing, aim for 8–10 minutes total: 4–5 minutes per side, flipping once halfway. Thinner cutlets may need less; thicker ones may need an extra minute, so check internal temperature for 160–165°F.
Lightly coat each cutlet with Oil Spritzing to promote browning and prevent sticking—use a high smoke point oil in a mister or brush. Don’t overcrowd; cook in batches if needed. When golden and the juices run clear, transfer to a warm plate to rest briefly before plating. This gives you reliably crunchy, juicy chicken ready for the sauce and saves you time on cleanup tonight.
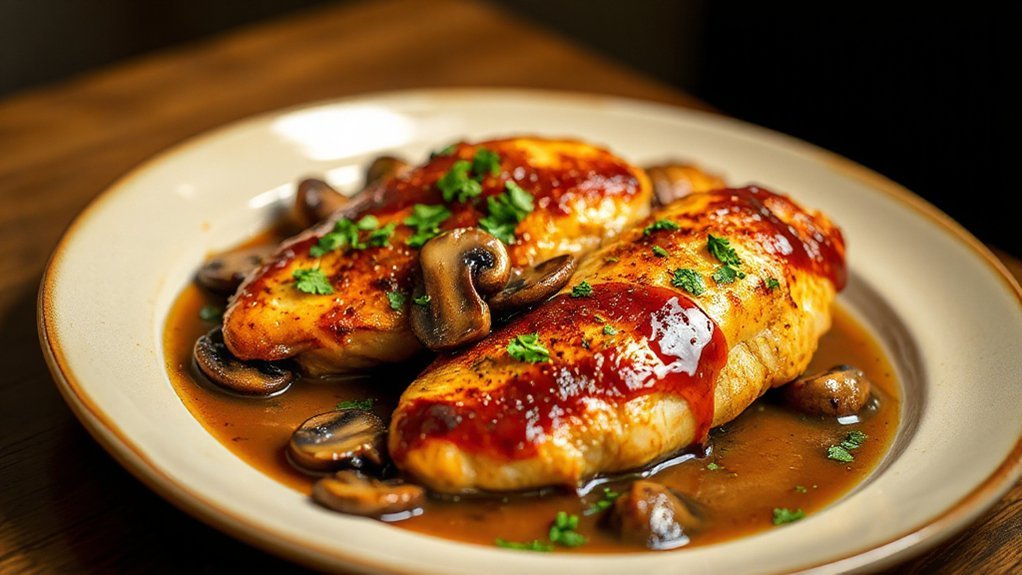
Making the Lemon-Caper Sauce
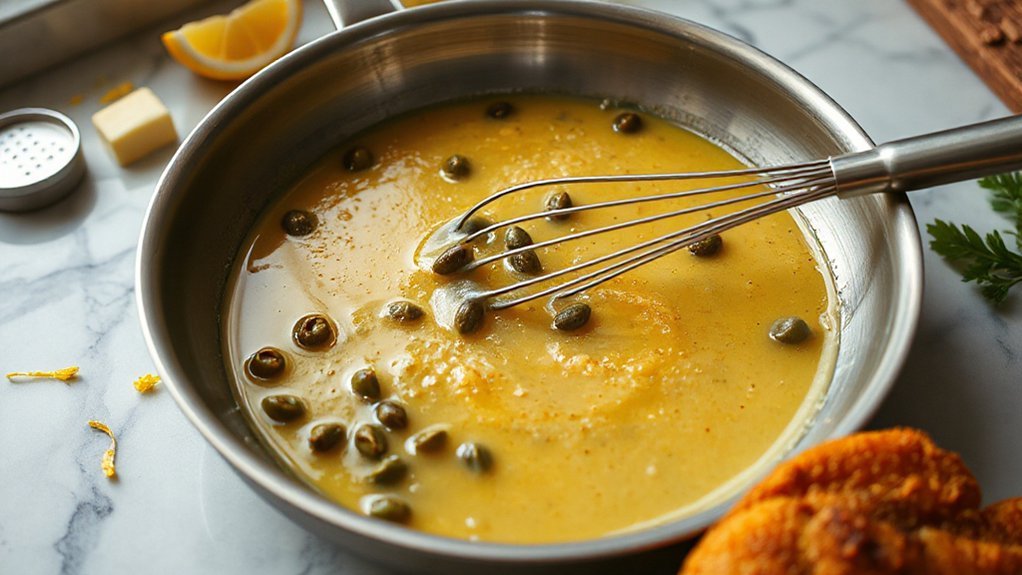
Finishing the chicken with a bright lemon-caper sauce takes just minutes and really wakes up the dish. You’ll deglaze the pan with fresh lemon juice and a splash of white wine or stock, scraping up browned bits to add depth. Add butter off heat to emulsify and tame sharpness; that’s your acidity control in action. Stir in capers and parsley, taste, and adjust salt and lemon. You can tweak for Regional variations—add anchovy, olives, or a touch of cream depending on where you’re cooking. Keep it simple and fast.
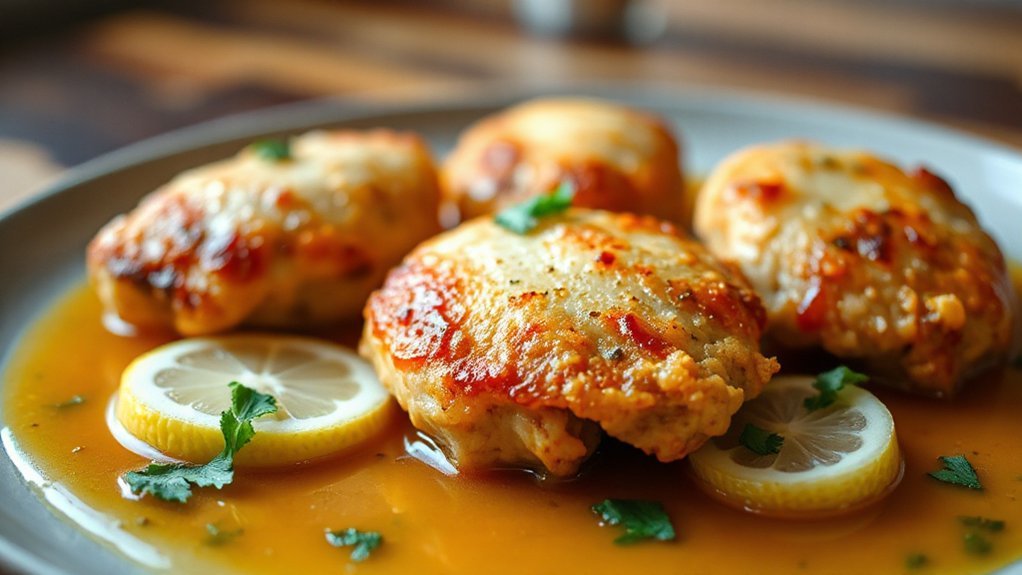
A quick lemon-caper pan sauce—deglaze, add butter off heat, stir in capers and parsley.
- Use 2 lemons for juice and zest.
- Warm wine or stock, not boiling.
- Finish with cold butter for shine.
- Rinse capers if too salty.
- Adjust lemon to balance flavor.
Serve immediately over the hot chicken, spooning sauce so each piece gets glossy, tangy coating. Taste as you go, and you’ll nail the balance between bright and buttery every time.
Serving Suggestions and Storage

When you plate the chicken, think bright and simple: spoon the lemon‑caper sauce over each piece and garnish with extra lemon zest and parsley so the dish looks as lively as it tastes. You’ll serve immediately with quick side pairings like buttered angel hair pasta, roasted asparagus, or a crisp arugula salad tossed with a lemon vinaigrette. Add crusty bread to mop up sauce, or serve atop creamy polenta. For wine, lean toward a zesty Sauvignon Blanc or a Pinot Grigio.
To store leftovers, cool chicken and sauce to room temperature, then transfer to airtight containers and refrigerate up to 3 days or freeze up to 2 months. For reheating tips, thaw overnight if frozen, then reheat gently in a 350°F oven for 8–12 minutes covered, or warm in a skillet over medium-low heat, spooning sauce over the chicken to keep it moist. Label containers and use within times.
Conclusion
You’re done, and in about 20 minutes you’ll have a restaurant-quality chicken piccata that’s light, tangy, and crisp. You’ll love that air frying cuts oil use by up to 75%, so it’s friendlier to your waistline without skimping on crunch. Keep extra sauce on hand for veg or pasta, and store leftovers in the fridge for three days. Enjoy, and don’t be shy about doubling the batch. Invite friends — they’ll really think you spent hours.