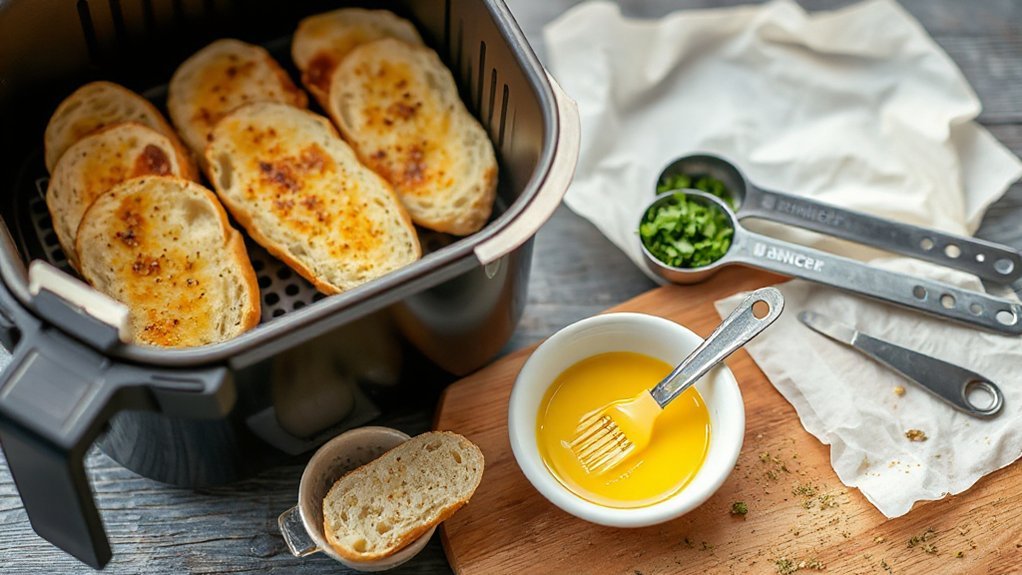
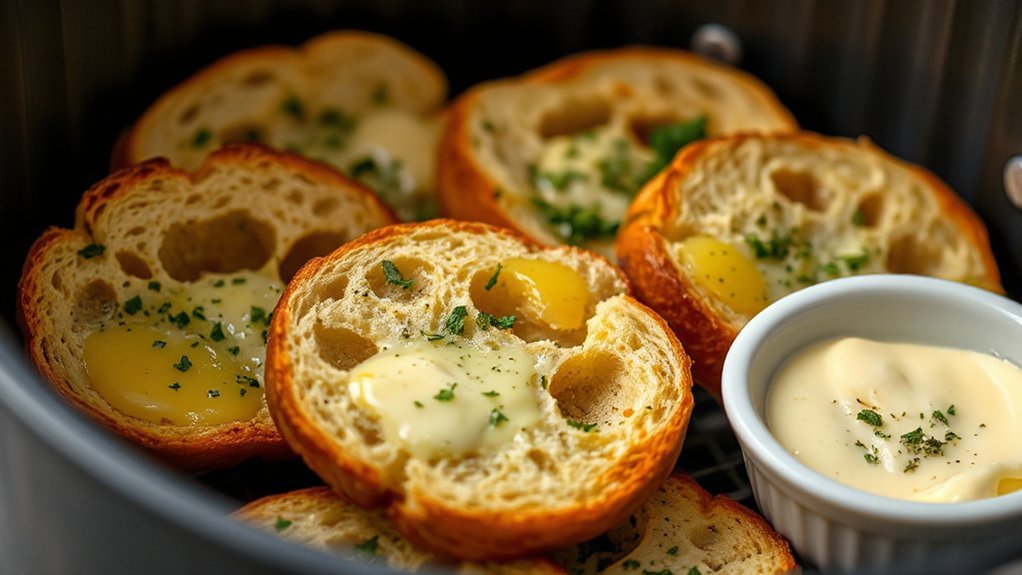
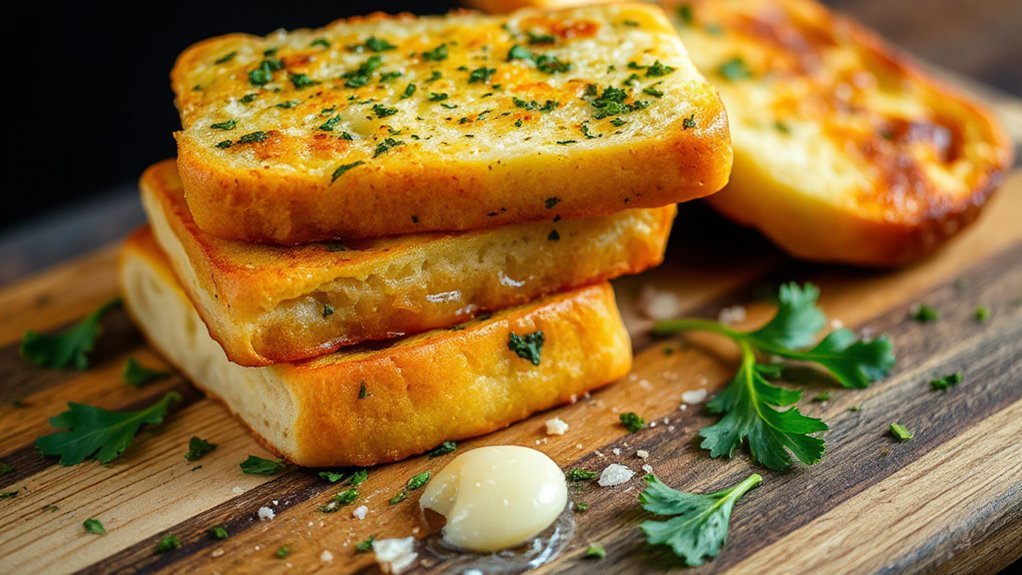
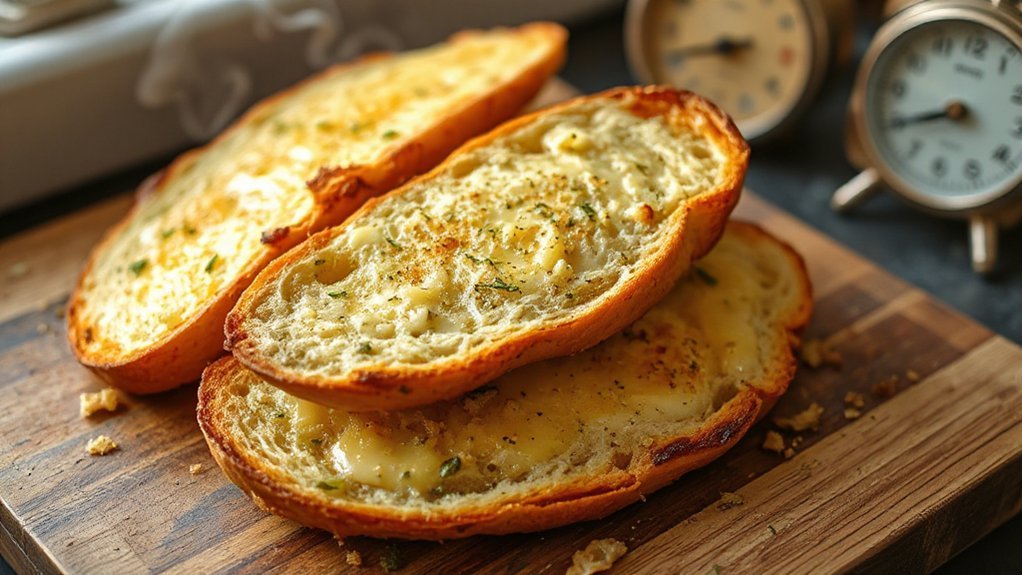
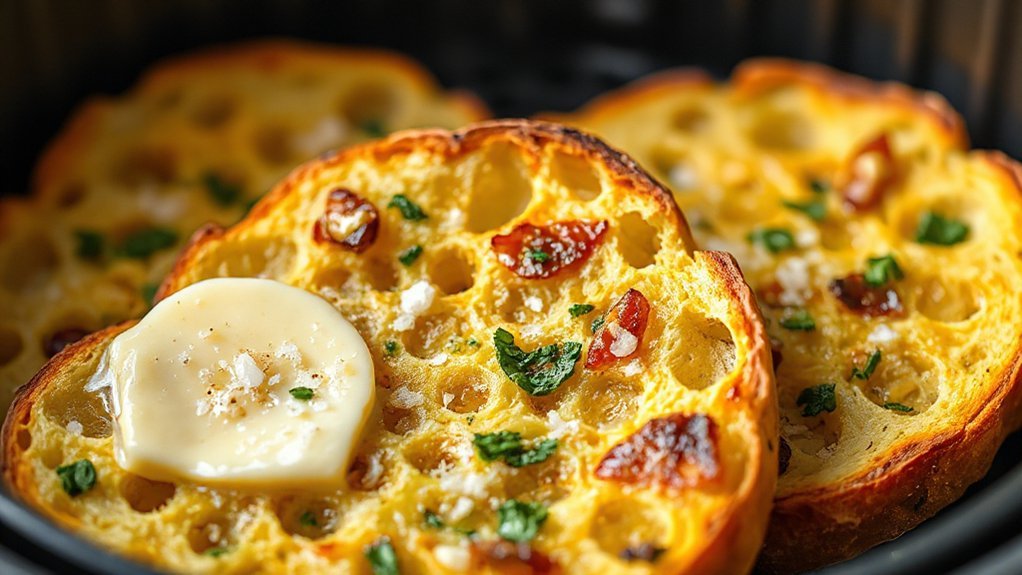
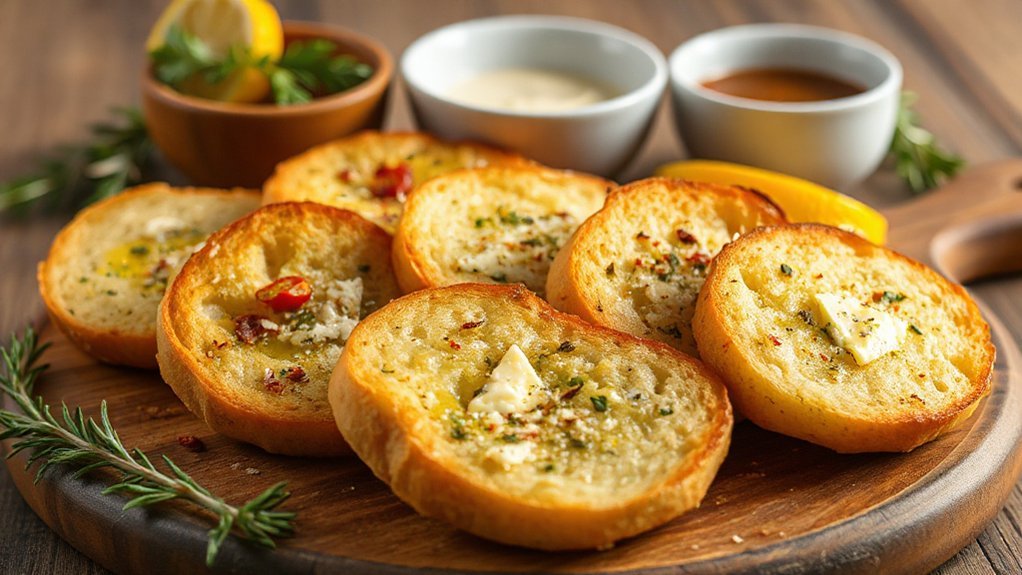
You’ll turn a baguette into addictive, crispy garlic bread in minutes, easily using your air fryer. Mix softened butter with minced garlic, parsley, salt and a squeeze of lemon. Spread it between shallow diagonal cuts or over slices and pop into a preheated 375°F basket. Cook for six to eight minutes, flipping once, until edges are blistered and the cheese, if you add it, bubbles. Try Parmesan for crunch or mozzarella for gooey pull. Soon.
Ingredients
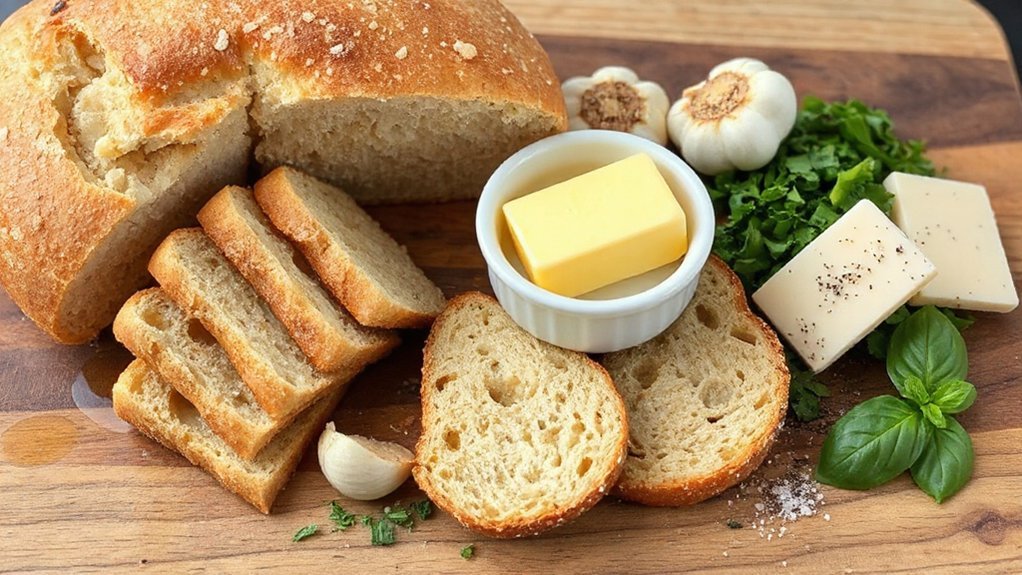
You’ll need a few simple ingredients: a baguette or ciabatta, softened butter, minced garlic (fresh or jarred), chopped parsley, and a pinch of salt and pepper. Add grated Parmesan or mozzarella if you want cheesy pull-apart slices. Use unsalted butter so you control seasoning, and have olive oil on hand to loosen the mix if needed. For herbs, fresh parsley brightens flavor; dried works in a pinch. Consider bread size—one medium baguette serves four as a side. If you care about impact, choose options with sustainable sourcing labels: responsibly produced butter, garlic, and cheese reduce environmental harm. You can also check packaging for origin and certifications. For nutrition-minded choices, swap part of the butter for olive oil to alter the nutritional breakdown, or use lower-fat cheese to cut calories. You’ll enjoy every crunchy bite.
Equipment and Prep
Pick an air fryer that’s big enough for your loaf and can reach 350–400°F so the bread cooks evenly. Gather a sharp knife, small bowl, spatula or brush, tongs, and parchment or a rack. Mince the garlic and let the butter soften, then mix them so you’ll spread a smooth, garlicky butter on the bread.
Air Fryer Choice
How big should your air fryer be and what’s worth investing in? Pick a size that fits the bread you usually buy, a 3 to 6 quart handles single loaves and servings, while 7 to 10 quart models let you toast multiple slices or a whole loaf. Prioritize brand reliability so your fryer heats evenly and lasts; read reviews and check warranties. Look for models with good airflow, adjustable temperature, and nonstick baskets for easy cleanup. Consider energy efficiency: smaller, well insulated units usually use less power and heat faster. You don’t need bells and whistles, but choose a unit with consistent results and simple controls. That way you’ll get golden, crispy garlic bread every time without wasting time or electricity and great taste.
Tools and Utensils
A sturdy cutting board and a sharp serrated knife make prepping garlic bread fast and safe, and you’ll want a small bowl for mixing butter, a garlic press or microplane for fresh garlic, and a silicone brush to spread the mixture evenly. Also grab tongs for flipping and a perforated air fryer basket or tray that fits your model. Keep a thermometer for precise temp control if you like extra crispness. Store tools within reach; good Drawer Organization saves time and prevents dings. After cooking, rinse and dry utensils promptly—Utensil Maintenance stops rust and odor. Use silicone mats or parchment sheets to cut cleanup. With these essentials at hand you’ll move confidently from prep to air frying, no fuss, just great results and more.
Prep Garlic and Butter
Soften room-temperature butter in a small bowl while you mince or press fresh garlic with a microplane or press—this gives a silky, spreadable base that blends evenly. You’ll notice how Garlic chemistry kicks in: crushing releases allicin for that sharp aroma, so let the minced garlic sit a few minutes to mellow. Stir garlic into butter, add a pinch of salt, chopped parsley, and a squeeze of lemon if you like. Use a fork or small spatula to whip until homogeneous; that’s practical Butter science—air incorporated gives lighter texture and better spread. Taste and adjust seasonings. Keep the compound butter chilled until assembly, or spoon into parchment to roll a log for neat slices. You’re ready to slather confidently. Enjoy the aromatic, golden results.
Quick Garlic Butter Blend
Whipping together a quick garlic butter gives your air-fryer bread that instant, garlicky punch. You’ll start with softened butter, minced garlic, a pinch of salt, chopped parsley, and a squeeze of lemon; these basics keep the flavor bright and simple. Mash them with a fork until smooth so the garlic disperses evenly — no clumps, no missed bites. If you like heat, stir in red pepper flakes; for extra richness, fold in grated Parmesan. Taste and tweak: you can dial salt or lemon up or down to suit your loaf. This blend is fast, versatile, and rooted in culinary tradition even as it nods to modern marketing angles and historical origins of garlic bread. Spoon it onto slices, spread right to the edges, and chill briefly so it firms slightly before cooking. You’ll get consistent, flavorful results every time. Enjoy making it; your kitchen will smell amazing tonight.
Air Fryer Instructions
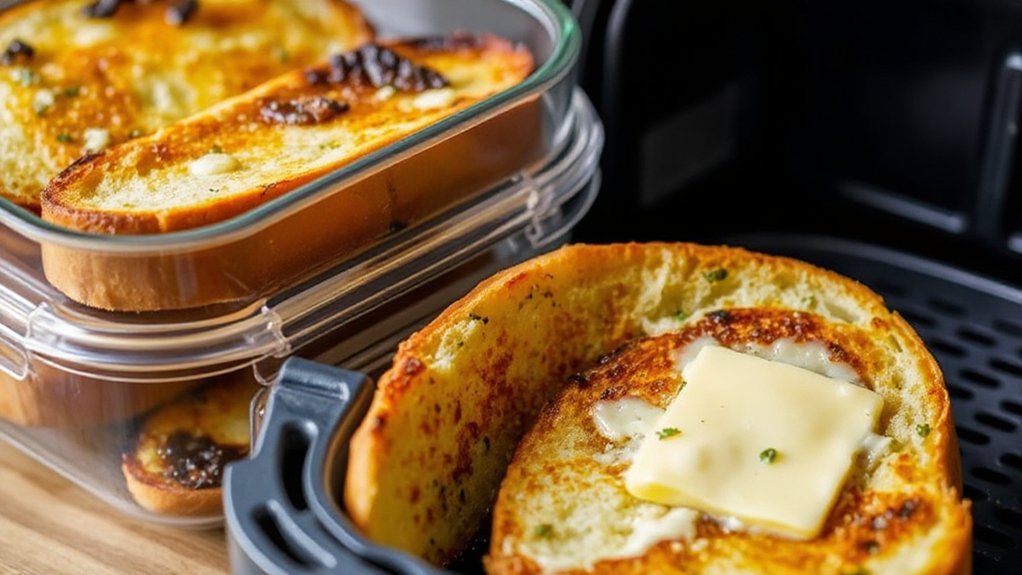
Preheat your air fryer to 375°F (190°C) and spread the garlic butter onto each slice, then arrange them in a single layer in the basket so hot air can circulate evenly. Close the basket and check that slices aren’t overlapping; you’ll get crisp, evenly browned edges when air flows freely. Flip once midway for balance, and keep an eye through the window so nothing overcooks. Use tongs to remove slices carefully—they’ll be hot.
Before and after cooking, follow a simple safety checklist: secure handles, keep the unit on a stable surface, and unplug before cleaning. Let the basket cool, then follow the manufacturer’s cleaning protocol: wipe the exterior, wash the basket with warm soapy water or place dishwasher-safe parts inside, and dry thoroughly. Regular maintenance keeps your air fryer performing well and your garlic bread delicious. Store leftover garlic bread in an airtight container for best freshness shortly.
Timing and Temperature Guide
When you dial in the right time and temperature, you’ll get crisp edges and a soft center: aim for 375°F (190°C) for 6–8 minutes for standard slices, flipping once halfway; you’ll usually find crust golden and butter melted. Thicker or stuffed loaves need 8–10 minutes; thinner baguette slices may only take 4–5. Watch the first batch, note visuals, and adjust a minute or two next time. Remember Carryover Heating — bread keeps cooking a bit after you remove it, so pull it when it’s just shy of your ideal. If you cook multiple trays, practice Batch Scaling: don’t overcrowd, stagger start times, and rotate baskets so airflow stays strong. Use a quick probe or touch test to judge doneness, and jot your perfect time for your specific air fryer model. Save that note for future quick reheats.
Tips for Extra Crispiness
Now that you’ve dialed in time and temperature, focus on a few simple tricks that kick the crust from good to gloriously crisp. Start with a thin, even butter layer so it browns without steaming, and use crust scoring to let steam escape and edges blister. Preheat the basket and don’t overcrowd — air needs to rush. Flip once midway for golden symmetry. Finish with a quick spray of oil for extra sheen. Let the bread sit a couple minutes during post bake resting to firm the crumb and keep crust snappy. You’re in control: small tweaks make a big crunch.
- Score shallow crosscuts to boost crisp, dramatic texture.
- Brush butter with garlic evenly for balanced browning.
- Don’t pile slices; give each piece space to breathe.
- Use a high temp burst at the end for a gorgeous finish.
- Rest briefly before slicing to lock in crispness.
Enjoy the crunch.
Variations and Flavor Twists
Ready to mix things up? You can brighten garlic bread with herb-and-citrus infused butter, experiment with different cheeses for melty pull, or add a spicy kick or a sweet glaze for contrast. Don’t forget regional twists—think za’atar, chimichurri, or miso—to give your air fryer loaf unexpected flavor.
Herb and Citrus Infusions
Experimenting with herbs and citrus brightens classic air fryer garlic bread and gives you quick, bold variations that’ll keep people asking for more. You’ll play with Aromatic Pairings: rosemary, thyme, basil, and use precise Zest Extraction to lift brightness without bitterness. Mix chopped herbs into melted butter, add a touch of lemon or orange, and spread evenly before frying for crisp edges and fragrant steam.
- Feel the warmth of rosemary-kissed butter.
- Taste lively lemon sparks against rich garlic.
- Smile at basil’s sweet, sunny finish.
- Enjoy thyme’s earthy reassurance in every bite.
- Delight in orange zest’s surprising sweetness.
Try small batches to dial intensity; you’ll nail the balance fast. Share your favorites at the table and watch guests light up with each bright, herby bite.
Cheese Variations and Melts
When you top your garlic bread with the right cheeses, it turns from tasty side into a showstopper you’ll actually brag about. Pick a base of mozzarella for gooey stretch, then scatter Parmesan for sharpness and a golden crust; note Melting Points—mozzarella melts low and smooth while aged cheeses stay firmer. Add a sprinkle of fontina or provolone for buttery depth, or crumbled ricotta to keep pockets of creamy richness. Balance is everything: combine soft, melty cheeses with something that gives Texture Contrast so every bite alternates ooze and bite. Toast briefly in the air fryer until edges crisp and cheeses bubble. You’ll learn quick how small swaps change flavor, mouthfeel, and visual wow. Experiment boldly — your favorite combo might become signature for sure.
Spicy, Sweet, Regional Twists
If you want to kick your air fryer garlic bread into new territory, spice, sweetness, and regional twists are your best friends — they turn a simple side into a signature bite. You can layer chili honey for a sweet-heat pop, smear harissa for smoky North African vibes, or sprinkle chaat masala and lime for Regional streetfood flair. Play with Heat gradations: start mild, ramp to smoky, finish with tongue-tingling fire. Try maple-sriracha glaze, gochujang-butter, or a za’atar-cinnamon combo to surprise guests. Pick one bold twist and commit — it’ll define the loaf.
- Sweet heat that makes you grin
- Smoky spice that hugs your palate
- Tangy regional zing that surprises
- Gradual burn that builds confidence
- Comforting sweetness with an edge
You’ll love the bold results.
Storage, Reheating, and Leftovers
Because garlic bread tastes best fresh, let it cool to room temperature for 10–15 minutes, then stash any leftovers airtight: use foil or a resealable bag in the fridge for 3–4 days or freeze for up to 2 months. When you reheat, aim for Crisp Recovery: preheat your air fryer to 350°F and heat 3–4 minutes; the crust revives fast. For freezer storage, wrap slices tightly and label date.
| Mood | Method | Result |
|---|---|---|
| Joy | Air fryer 350°F, 3–4 min | Crunch |
| Comfort | Oven 375°F, 6–8 min | Even warmth |
| Quick fix | Microwave 20–30s, then crisp | Soft center |
If you thaw, skip soggy traps: reheat straight from frozen at 325°F for 6–8 minutes. Grab leftovers with confidence — they’ll still sing. Toss herbs or a light sprinkle of cheese before reheating to freshen flavor, and avoid overcrowding the basket so each slice crisps evenly; small tweaks make a big difference and smile always.
Conclusion
You’ll love how this buttery air-fryer garlic bread turns simple slices into crispy, golden bites you’ll want at every meal. You’ll whip up the quick garlic-butter, pop the bread in the air fryer, and watch it transform faster than a knight could blink at a modern tailgate. Serve it hot, tear it apart with your hands, and enjoy—because once you try this, it’s the side dish you’ll keep making again and again every single time.