We’re walking you from freezer to bun—no fuss, big flavor, right on time for weeknight dinner. We keep this simple and friendly so you can cook with confidence. Follow quick-start temps that work across brands and learn when to flip or skip it for juicy middles and crisp edges.
Start points: try 375°F for about 15 minutes with no flip (per Karly Campbell) or 390°F for 15 minutes with one flip at 10 minutes (per Samantha Rowland). Aim for a safe 165°F inside. Patty size matters—1/4 lb cooks quicker than 1/3 lb.
We’ll show spacing, spray, and oil basics so your patties cook evenly without sticking. You’ll also get two easy ways to melt cheese, toast buns fast, and smart storage tips for leftovers. Bookmark and print this recipe—supper’s about to get real easy, y’all!
Key Takeaways
- Use 375–390°F and 15 minutes as a starting plan for frozen patties.
- Flip at 10 minutes only if your model or patty needs it.
- Check for 165°F internal temp for safe eating.
- Adjust time for 1/4 lb vs 1/3 lb patties to avoid overcooking.
- Simple oil, spacing, and liners keep cleanup quick and protect nonstick baskets.
Why make turkey burgers from frozen in the air fryer
Pop a patty in the basket and let fast, hot air do the heavy lifting. It saves us time—no thawing, no mess—and you get dinner on the table quicker.
The circulating heat crisps the outside and keeps the center juicy. That texture beats reheating in a pan or microwave. It’s consistent, too: set temp, set time, and walk away with repeatable results.
- Quick cook: Most brands finish in about 12–17 minutes.
- Diet-friendly: Many store options are simple-ingredient and often gluten free.
- Flexible portions: Make one or make a few—great for different schedules.
| Benefit | Why it helps | What to expect |
|---|---|---|
| Speed | No thawing; fast preheat or no-preheat | Short total time for weeknight meals |
| Texture | Hot air circulation crisps edges, seals juices | Better than stovetop steaming or microwave |
| Cleanup | Basket liners reduce splatter and sticky pans | Less scrubbing after dinner |
Bottom line: this method is a reliable way to get lean protein on the table when you’re not up for a big cook. We’ll show the easy timing next.
Quick answer: Time, temperature, and texture
Let’s get practical: here’s the fast rule of thumb for time and temps that actually work. Pick a start point and tweak from there—simple as that.
Recommended starting points
375°F — about 15 minutes: Many 1/3 lb patties do fine with no flip if your basket heats evenly.
390°F — roughly 15 minutes with one flip: Flip around minute 10 for extra browning without drying the center.
380°F — about 20 minutes (10+10): A middle ground that helps thicker patties or cooler units finish through.
What to expect
- Aim for 165°F inside — that’s the doneness and safety cue.
- Expect a lightly crisp, browned exterior with a juicy center.
- Don’t crowd the basket — good air circulation equals even browning and steady time.
- If the outside runs ahead, lower the temperature and add a couple of minutes to finish gently.
- Rest a minute before serving and use a quick-read thermometer so you’re checking temp, not guessing.
| Start Temp | Typical Minutes | Flip? |
|---|---|---|
| 375°F | ~15 minutes | No (if basket heats well) |
| 390°F | ~15 minutes | Yes — flip at ~10 minutes |
| 380°F | ~20 minutes (10+10) | Yes — two-sided cook |
Essential equipment and setup for your air fryer
Start smart: the right tools and a tidy basket set the stage for even cooking every time.
Basket models and capacity
Basket-style units shine for frozen patties because airflow is strong and direct. Check your air fryer basket capacity so patties don’t overlap.
If your fryer basket is small, do batches. Crowding delays cook time and gives uneven browning.
Oil, sprays, and safe handling
Use air-fryer-safe spray or a light brush of oil to cut sticking. Skip aerosol propellants—they can harm nonstick coatings.
Choose pump sprays or avocado/olive oil on a brush. Keep silicone-tipped tongs on hand to flip without scratching the coating.
- Linens: perforated liners or silicone mats make cleanup easier—confirm airflow holes.
- No preheat for many frozen patties helps centers warm evenly while outsides brown.
- Quick-read thermometer and thin spatula make lifts and temp checks simple.
| Item | Why it helps | Tip |
|---|---|---|
| air fryer basket | Strong circulation for crisp edges | Don’t overlap patties |
| spray / oil | Prevents sticking without pooling grease | Use pump spray or brush of olive/avocado oil |
| Silicone-tipped tongs | Protects nonstick finish | Flip gently; avoid metal tools |
| Liners & thermometer | Faster cleanup and safe doneness checks | Perforated mats + quick-read probe |
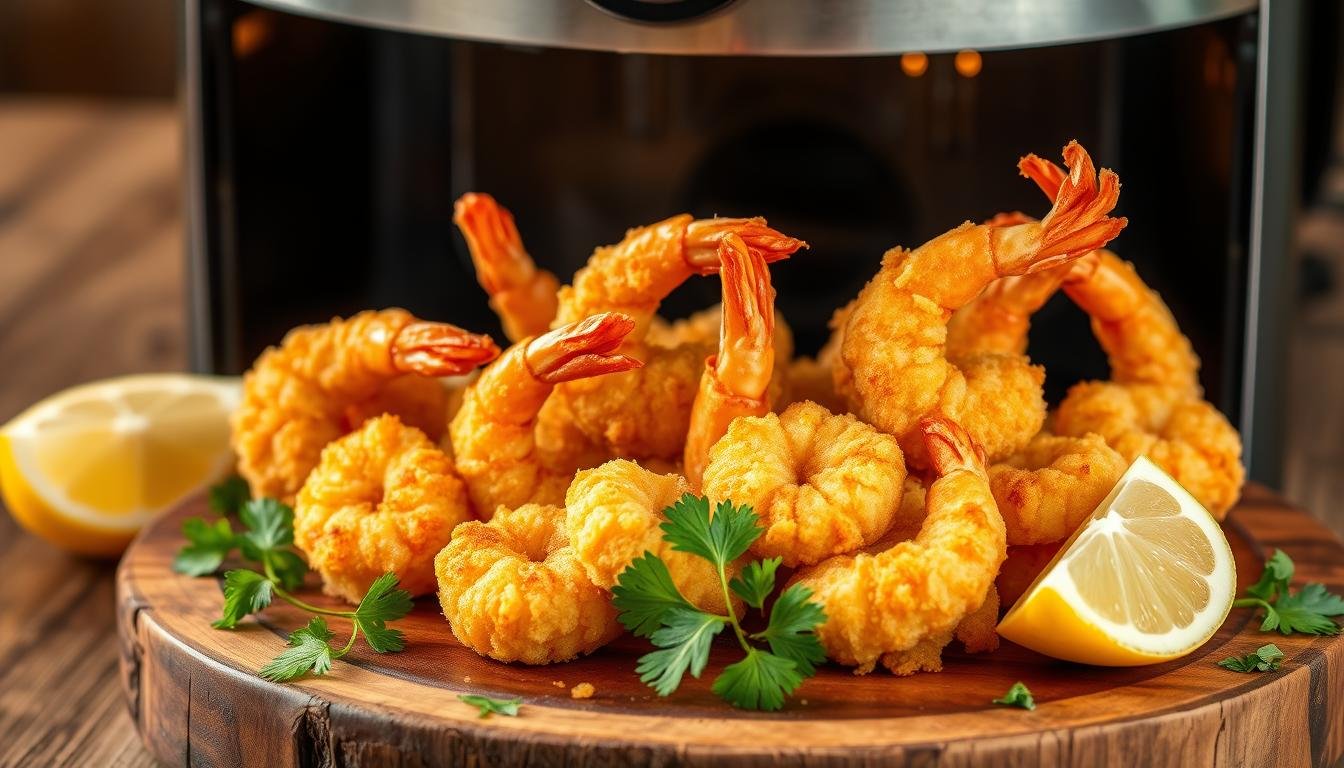
What you’ll need: Frozen turkey patties, buns, and simple add-ons
Start with good basics—knowing your patty size and toppings makes the whole cook smoother. “Simple gear and smart choices make weeknight meals a breeze.”

Grab a pack of frozen turkey patties and check the weight. Many brands sell 1/3 lb patties; Trader Joe’s offers 1/4 lb versions and Jennie‑O or Butterball often land around 1/3 lb but can be thinner.
- Buns: classic, brioche, or gluten‑free—butter lightly for toasting.
- Cheese: American, cheddar, Swiss, or provolone melts fast.
- Toppings: lettuce, tomato, onion, pickles, ketchup, mayo—easy and quick.
- Keep salt, pepper, garlic/onion powder, and your favorite sauce nearby—BBQ, ranch, pesto, or tzatziki.
- Tools: quick‑read thermometer, silicone‑tipped tongs, and a perforated liner for cleaner cooks.
- Optional add‑ons: bacon or a fried egg for a heartier plate. Don’t forget napkins!
| Patty size | Common brands | Note |
|---|---|---|
| 1/4 lb | Trader Joe’s | Shorter cook time |
| 1/3 lb | Jennie‑O, Butterball | Start near 15 minutes |
| Varied | Store brands | Check thickness and adjust |
Step-by-step: frozen turkey burger air fryer method
Here’s a clear cook path — from loading the basket to the short rest before serving. We keep things simple so you can grab dinner without fuss.
No-preheat setup and spacing in the fryer basket
Load patties straight from the freezer; no preheat. That helps centers warm while the edges brown. Space them with a little breathing room in the air fryer basket. Avoid stacking; slight overlap is OK if they shrink quickly.
Cook-path options
- Option 1: 375°F — about 15 minutes, no flip. Check 165°F at the thickest spot.
- Option 2: 390°F — roughly 15 minutes. Flip once at ~10 minutes for extra browning.
- Option 3: 380°F — ~10 minutes per side (10+10). Great for thicker patties or cooler units.
If the outside darkens too fast, drop temp and add 2–3 minutes. Flip with silicone-tipped tongs to protect the coating. Always test for 165°F — doneness, not just minutes. Rest patties 1 minute before building burgers. Keep batch two warm under foil while buns toast, then serve hot and happy.
| Step | Temp | Notes |
|---|---|---|
| Load | n/a | no-preheat; space in basket |
| Cook | 375–390°F | choose no-flip or flip-once |
| Finish | n/a | check 165°F; rest 1 minute |
Doneness and food safety
We keep safety simple—know your target temp and trust the probe, not the clock. A quick-read thermometer takes the guesswork out of cooking and keeps dinner safe and juicy.

Use a quick-read thermometer
Aim for 165°F in the center of the patty. That’s the safe internal mark for turkey every single time. Slide the probe sideways through the edge for thinner patties to get a truer read.
Avoid overcooking and dry meat
Overcooked meat turns chalky and dry. If you’re a few degrees shy, pop the basket back in for a minute or two rather than overshooting. If the outside is dark before it hits 165°F, lower the temperature and finish more gently.
- Check the middle of the patty — 165°F is non-negotiable.
- Use separate tools for raw and cooked pieces — clean tongs after flipping.
- Serve hot or refrigerate within two hours to stay safe.
- When in doubt, take a second reading — peace of mind is worth it.
| Check | Target | Quick tip |
|---|---|---|
| Internal temp | 165°F | Probe from the side for thin patties |
| If under | +1–3 minutes | Return to the basket; short bursts beat overshooting |
| If outside dark | Lower temp | Finish at gentler heat until 165°F |
Dialing in time and temperature for your patties
A little tweak to time and temp makes a big difference when patties vary in thickness. Start with a trusted baseline, then adjust in small steps until the center hits 165°F and the crust looks right.
Adjust for thickness, brand, and wattage
Thicker or denser patties need a touch more minutes. Try a longer cook at a moderate temperature (about 380°F) so the inside finishes without drying.
Thinner 1/4 lb patties—like Trader Joe’s—usually finish a few minutes sooner. Check a bit early so you don’t overcook.
High-wattage units run hotter and finish faster. If your model tends to brown quickly, test a minute or two early. If it runs cool, add a couple of minutes.
Trader Joe’s 1/4 lb vs. typical 1/3 lb patties
- For most 1/3 lb patties, about 15 minutes is a solid ballpark (many brands fall in the 12–17 minute range).
- Start checking 1/4 lb patties a few minutes sooner—they often need less time.
- If you like more browning, bump the temperature briefly and check early to avoid overshoot.
- Flip once on hotter runs; skip the flip on steady baskets set near 375°F.
| Patty | Start Temp | Typical Minutes |
|---|---|---|
| 1/4 lb (Trader Joe’s) | 375–390°F | 10–13 minutes |
| 1/3 lb (typical) | 375–390°F | 13–17 minutes |
| Thick / dense | 380°F (moderate) | 18–20 minutes (10+10) |
Keep notes on brand, size, and your model’s sweet spot. If you cook multiple batches, remember the second batch may finish faster once the basket is fully hot. Always go by internal temperature first—then fine-tune minutes for texture you love.
Cheeseburger finish and bun toasting

Two simple ways to melt cheese: place slices on hot patties, close the basket and turn the unit off—residual heat melts nicely in about a minute. This keeps the center warm and the edges from overcooking.
If you want a drapey, extra‑gooey finish, run the air fryer at 390°F for 30–60 seconds. Watch closely so the cheese softens without running off the patty.
Toast those buns right
Pull cooked patties and tent loosely with foil while you toast buns at 375°F for 2–3 minutes. A tiny spray or light brush of oil or butter on cut sides gives bakery‑style color and crisp.
- Stack cheese slightly off‑center to avoid sticking to the basket when lifting.
- American, cheddar, Swiss, provolone—all melt great; pick your fave.
- For gluten‑free buns, toast gently—shorter time keeps them from drying.
| Finish Task | Temp | Timing & Tip |
|---|---|---|
| Residual melt | unit off | ~1 minute; gentle melt, less browning |
| Quick, gooey melt | 390°F | 30–60 seconds; watch closely |
| Bun toast | 375°F | 2–3 minutes; spray or brush oil for color |
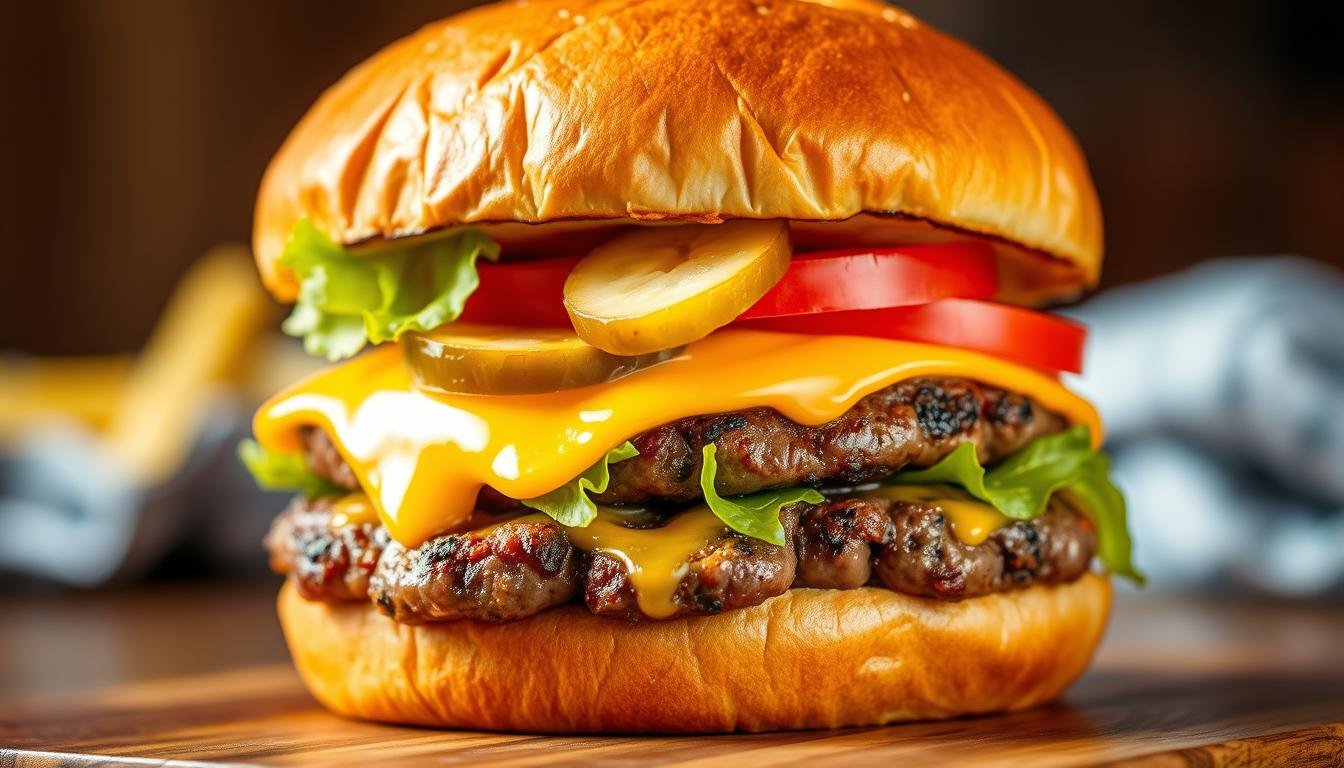
Build fast while everything’s warm—bun, patty, cheese, and toppings—and enjoy that sweet, melty bite together!
Toppings and flavor upgrades that boost protein-packed dinners
Pile on toppings that turn a simple patty into a full-on, protein-packed supper. We like fast builds that still taste like you fussed all afternoon. A few smart additions lift texture and flavor without slowing the meal down.
Classic American
- Go classic with crispy bacon, sharp cheddar, ketchup, mayo, shredded lettuce, and a juicy tomato slice.
- These staples make burgers feel familiar and downright satisfying for dinner.
Greek style
- Dress it with feta crumbles, cool tzatziki, and sweet red peppers—fresh or roasted.
- This combo adds bright tang and a nice herb note to lean patties.
Barbecue style
- Lean into smoky BBQ sauce, crunchy onion rings, and sharp cheese for sweet‑savory goodness.
- Add pickles or jalapeños if you want a kick.
Zesty sauces & finishing ideas
- Spoon on lemon‑dill aioli, ranch, pesto, buffalo, or chimichurri for bold twists.
- Try a fried egg or avocado for extra richness, or wrap in lettuce to keep things lighter.
“Keep sauces handy so everyone can build their dream burger.”


Seasoning ideas for the patties
Let’s talk quick rubs and sprinkle blends that give good crust and big flavor.

We keep it simple—light layers of spice do the heavy lifting. Season both sides lightly so the meat stays the star and gets a nice crust.
Sprinkle-on blends to try
- Garlic & onion powder — builds savory backbone fast without overpowering.
- Taco or Cajun — gives warm heat and bold notes for folks who like a kick.
- Italian herbs — oregano, basil, and thyme for a garden-fresh lift.
- Homemade ranch blend — dill, chives, and parsley for cool, herby tang.
- Smoked paprika — a pinch adds smoky depth without a grill.
A tiny spray or brush of oil helps spices stick and promotes even browning. If your patties came pre-seasoned, salt after a few minutes of cook time to taste.
“Season lightly—let the meat shine, then add sauce or cheese for balance.”
| Blend | Primary notes | When to use |
|---|---|---|
| Garlic & Onion | Savory, classic | Everyday cooks, kids-friendly |
| Taco / Cajun | Spicy, warm | Bold meals, serve with peppers |
| Italian Herbs | Herby, bright | Light toppings, tomato-based sauces |
| Ranch Blend | Creamy-herb, fresh | Great with cheese or cool slaws |
Mix and match across a batch so everyone gets what they like. Jot down your favorite combo and you’ll be shaking and goin’ next time.
Serving ideas and sides to round out the meal
A few smart plating moves and the right sides make weekday dinners feel special. We like choices that are quick to build and pleasing to the whole table—no fuss, plenty of flavor.
On buns, lettuce wraps, or over salads
Serve on toasted buns for a classic handheld. Toast at 375°F for 2–3 minutes in the basket so buns get golden and stay warm while you build.
For a lighter swap, wrap patties in crisp lettuce—a fresh, crunchy option that keeps things low-carb and lively. You can also slice patties and lay them over a big salad with tomatoes, cucumbers, and a drizzle of ranch or chimichurri.
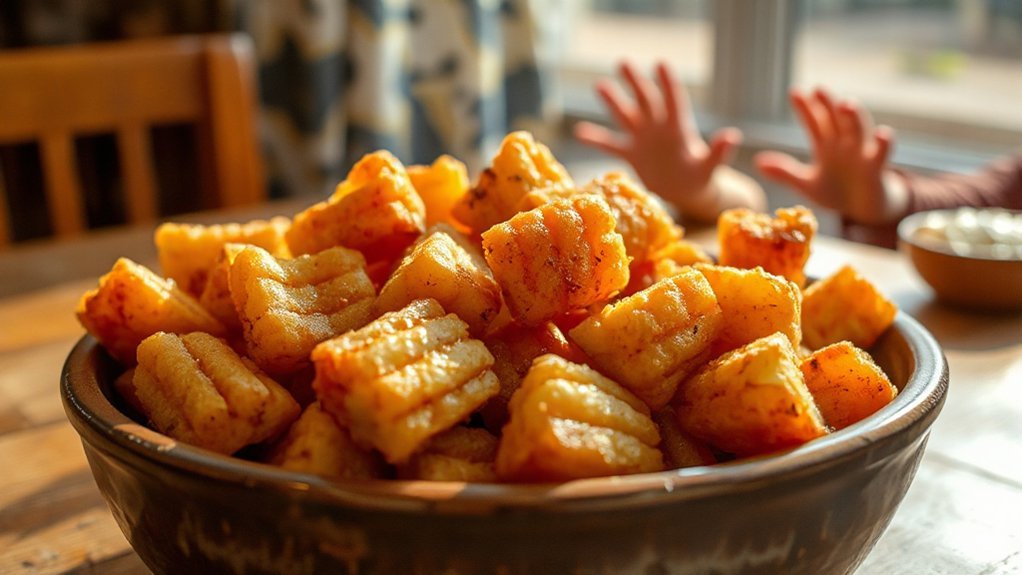
Side pairings: Veg fries, tots, slaws, and greens
Pairings make the plate pop. Try sweet potato wedges, parsnip fries, or roasted radishes for a fun twist that still feels like comfort food.
- Broccoli tots or cauliflower “potato” salad keep things lighter but satisfying.
- A crunchy slaw—red cabbage or cruciferous mix—adds tang and texture.
- Keep extra sauces on the side so folks can customize every bite.
Quick tip: Warm buns in the basket and build fast so everything stays hot and perky. Add a small bowl of sliced melon or berries for a fresh finish and iced tea or lemonade to round out the spread.
“This setup is weeknight-easy but weekend-worthy—call it a backyard supper without the grill.”
Clean-up made easy
Cleaning up should not steal your joy. We keep it quick so dinner stays fun and the gear lasts longer.
Small habits go a long way. Line your air fryer basket with perforated parchment liners or a fitted silicone mat. Drips land where you want them and air flow stays strong for even cooking.
Liners, tools, and safe sprays
A light brush of oil on the liner helps cheese or sauce drops release cleanly. Use silicone‑tipped tongs to flip and lift — they protect that nonstick finish so it lasts.
- Skip aerosol propellant spray; it can gum up coatings. Use a pump bottle or brush instead.
- Wash the fryer basket and tray in warm, soapy water once cooled — avoid harsh scrubbers.
- For stuck bits, soak briefly; don’t scrape with metal tools.
Keep the unit happy
Wipe the heating chamber and fan area per your manual. Good air circulation means better browning and fewer headaches next time.
| Task | Why | Quick tip |
|---|---|---|
| Line the basket | Catch drips, keep airflow | Use perforated parchment or silicone mat |
| Use silicone tools | Protect nonstick finish | Silicone‑tipped tongs for flipping |
| Avoid aerosol spray | Prevents coating damage | Choose pump or brush oil |
Store liners and mats next to the unit so you actually use them on busy nights. A tidy setup means your next run in the air fryer starts smooth as butter — and we can get back to good eats fast.
Leftovers, reheating, and nutrition notes
Save time and stress: store cooked patties smartly and you’ll have dinners ready in minutes. Cool them to room temp, then move into an airtight container so flavor stays locked in.
Storage: Up to 3 days refrigerated
Refrigerate cooked pieces for up to 3 days. Keep buns and toppings separate—this keeps textures fresh and prevents soggy bread.
Reheat: 350°F for 5–7 minutes
Warm leftovers in the air fryer at 350°F for about 5–7 minutes. If your patties are extra cold, add a minute or two. Add cheese in the final minute for a melty finish. Always check the center—reach 165°F for safety.
Nutrition snapshot
Lean and satisfying: these patties deliver solid protein with less saturated fat than beef. Watch sauces and cheese though—they add flavor and extra fat. If you need longer storage, freeze cooked patties tightly wrapped and reheat gently to avoid drying.
- Cool, seal, refrigerate—3 days max.
- Reheat 350°F for 5–7 minutes; check 165°F.
- Keep buns separate; re-toast before serving.
- Lean protein, lower saturated fat than beef—feel‑good dinners.
“A little planning saves dinner in a snap—keep a couple of cooked patties handy for hectic nights.”
Conclusion
Time for a tidy summary—your go-to timing and finish moves in one place.
Use 375°F for about 15 minutes with no flip, or 390°F and flip once at ~10 minutes. Try 380°F as a two-side cook for thicker patties. Aim for 165°F inside and rest a minute before melting cheese.
Toast buns at 375°F for 2–3 minutes. Stash leftovers up to 3 days and reheat at 350°F for 5–7 minutes. This recipe keeps weeknights easy and tasty.
Mix toppings to match your mood—classic, Greek, or barbecue—and keep cleanup simple with liners and soft tools. Save and print this guide so your next burgers air cook is smooth as Sunday supper.
We’re cheering you on—happy cooking from our kitchen to yours with this handy air fryer turkey and turkey burger roadmap.