We’re making weeknight magic—quick, flaky fish that lands on the table in minutes and keeps stress low. No fuss, just smart seasoning, a little lemon under the fillets, and hot air doing the heavy lifting.
Small fillets usually cook in about 12 minutes at 390°F; larger pieces may need 14–15. You can skip preheat with one method or preheat to 400°F and cook 10–13 minutes with another. Cook to 145°F until the flesh is opaque and flakes.
Our friendly, no-fuss guide shows ingredients, tools, timing, and simple tips for sticking and reheating. Expect tender centers, lightly crisp edges, and a bright lemon aroma that smells like supper done right. Ready? Let’s get you from freezer to feast in no time.
Key Takeaways
- Cook small fillets ~12 minutes at 390°F; larger ones 14–15 minutes.
- Lemon slices under the fish prevent sticking and add aroma.
- No preheat works, or preheat to 400°F for a 10–13 minute cook.
- Finish at 145°F internal temp—fish should flake and turn opaque.
- Store leftovers 3–4 days; freeze up to 4 months and reheat at 400°F for a few minutes.
Why This Air Fryer Frozen Tilapia How-To Works Right Now
This method turns a frozen bag into dinner quicker than you think—no thawing required.
We pick tilapia because it cooks fast, tastes mild, and keeps the grocery bill friendly. Cooking straight from the freezer saves serious time. The results stay flaky and juicy while the edges crisp up without breading.
Fast, flaky, and budget-friendly for busy weeknights
Two simple routes get you there: preheat to 400°F and cook 10–13 minutes, or skip preheat and set 390°F for about 12 minutes. Either way, aim for an internal temp of 145°F for safe, flaky fish.
- Quick protein for dinner with minimal fuss.
- Less oil, more crisp—great flavor with simple seasonings.
- Adjust minutes by fillet thickness so you nail doneness the first time.
“We call this our go-to when we need dinner now—high protein, low fuss, and downright tasty.”
| Method | Temp | Time | Notes |
|---|---|---|---|
| Preheat method | 400°F | 10–13 min | Best for extra-crisp edges |
| No-preheat route | 390°F | ~12 min | Simple, dependable weeknight win |
| Safety target | 145°F | N/A | Fish should be opaque and flake |
What You’ll Need: Air Fryer, Basket, and Basic Tools
We’ll keep this short and sweet—just the things that matter. Gather the gear so you’re not scrambling when the cook time starts. A clean air fryer and a well‑ventilated basket make the biggest difference for crisp edges and even heat.

Basket and equipment essentials
- Check the fryer basket—clean, dry, and set for a single layer.
- Lightly spray the basket with oil, or tuck lemon slices under fillets to prevent sticking.
- Use tongs for gentle placement; we usually leave the fish alone—no flipping needed.
- Have an instant‑read thermometer ready to hit 145°F in the thickest spot.
Small helpers that matter
Paper towels to pat dry, a small bowl for mixing seasonings, and a brush or spray for a light coat of oil. Liners are fine, but keep holes open so hot air moves freely.
“A tidy basket and a quick pat‑dry go a long way toward perfect fillets.”
Ingredients and Seasoning Options for Maximum Flavor
Let’s talk ingredients—simple things that add big flavor. We keep the pantry list short so you spend more time eating and less time fussing. Grab mild tilapia and a few basics and you’re already halfway there.
Core list
- Tilapia fillets — mild, quick-cooking fillets work best.
- Oil spray or a light brush to help seasoning stick.
- Salt and freshly ground pepper for clean seasoning.
- Lemon — slices or a quick squeeze to finish.
Flavor boosters
Tilapia loves flavor, so we reach for garlic powder and onion powder. A teaspoon of garlic powder and a teaspoon of onion powder will season a small batch just right.
- Dried thyme and parsley for a herb-forward note.
- Paprika for color and a gentle warmth.
- Melted butter brushed on top for a richer finish.
Season one side for speed or both for boldness. Mix spices in a small bowl first so you don’t get clumps. Keep oil light—just enough to brown and hold the seasoning. Finish with a bright squeeze of lemon to wake the whole fish up.
“A little seasoning goes a long way — simple ingredients, big dinner.”
Prep Steps: From Freezer to Basket in Minutes
We pull the fillets from the package first—then a few small tricks make seasoning stick like a charm. Quick prep saves time and gives better browning.
Unpack and deglaze (optional): Hold each fillet under cold water for a quick rinse if surfaces have ice. This deglaze helps your spice mix cling. Pat each piece dry until the surface feels tacky, not wet.
Lemon slice trick: Lay thick lemon rounds across the basket so the fish sits on citrus. The slices stop sticking and scent the kitchen while the fish cooks.
Lightly mist or brush a thin coat of oil on the fillets, then sprinkle your seasoning mix evenly. If you set lemon rounds on top, use thicker slices or secure with toothpicks so small pieces don’t get carried away by the air stream.
- Arrange fillets in a single layer in the fryer basket—no overlap.
- Save any extra lemon juice to finish after you cook so edges stay crisp.
- This whole step takes only a few minutes and sets you up for an even cook.

“Simple prep, big payoff—clean fillets, bright lemon, and even seasoning set us up for success.”
| Prep Step | What to Do | Why it Matters |
|---|---|---|
| Unpack & rinse | Remove from package; quick cold-water deglaze | Helps seasoning stick and removes ice glaze |
| Pat dry | Dry surface thoroughly with towels | Better browning; spices stay put |
| Lemon base | Line basket with thick lemon slices | Prevents sticking; adds aroma |
| Oil & season | Light spray of oil; even spice mix | Promotes color and flavor |
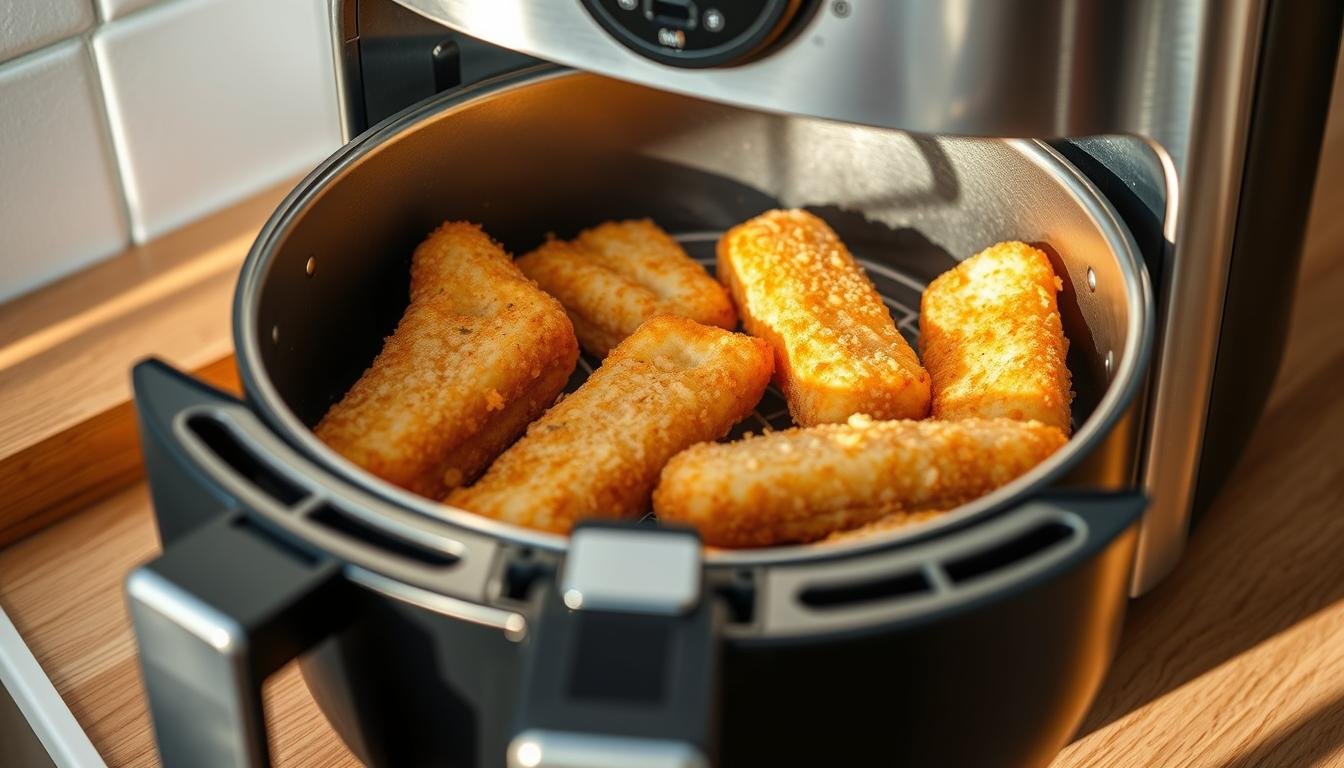
air fryer frozen tilapia: Step-by-Step Cooking Guide
Start here: temperature, placement, and timing—those three things make this method a winner every time.
Two easy paths let you cook frozen fillets with confidence. Preheat to 400°F, spray the basket lightly with oil, lay fillets in a single layer, and cook 10–13 minutes. Or skip preheat—set 390°F and cook about 12 minutes.
Give each piece a light mist of oil and season with salt, pepper, and garlic powder. Keep spacing so hot air can swirl—no crowding. That single layer is the secret to crisp edges and even cooking.
When to flip (and why you usually don’t)
We rarely flip—these fillets are delicate and can break. Leaving them alone keeps them pretty and intact.
- Pull thinner pieces at the earlier minute mark; let thicker ones finish a bit longer.
- Use a thermometer to verify 145°F in the thickest spot—flesh should be opaque and flake easily.
- Watch the last few minutes—every fryer cooks a tad different, so your sweet spot may be 10, 11, or 12 minutes.
Tip: If you add melted butter, drizzle lightly to prevent smoking and keep flavor bright. Rest the fillets one minute before serving so juices settle.
| Method | Temp | Time | Key Notes |
|---|---|---|---|
| Preheat path | 400°F | 10–13 minutes | Single layer, spray basket, crisp edges |
| No-preheat route | 390°F | ~12 minutes | Simple, steady results for most frozen fish |
| Doneness check | 145°F target | N/A | Opaque flesh that flakes with a fork |
“Keep the basket loose and trust the heat—less fiddling, more flaky goodness.”
Temperature and Time: 390°F vs 400°F Explained
We tested two temps so you don’t have to—here’s the quick breakdown.
390°F is our steady, no‑fuss choice. Plan for about 10–12 minutes for average fillets. It’s forgiving and works well when you skip preheat.
400°F speeds things up and gives crisper edges. Expect roughly 10–13 minutes with a brief preheat if you want extra color.
Quick reference
- 390°F → ~10–12 minutes for most fillets.
- 400°F → ~10–13 minutes; preheat for faster browning.
- Larger fillets? Add 2–3 minutes and check early.
Adjusting for your model
Every machine has its own personality. Note your sweet spot by timing one batch and jotting minutes for that size.
Use a thermometer as your compass—target 145°F so the fish turns opaque and flakes nicely. Keep the fryer basket single-layered for even circulation.

“Start with our window, then write down the minute that works for your setup—small changes make perfect dinners.”
| Temp | Minutes | Notes |
|---|---|---|
| 390°F | 10–12 | No preheat; gentle, reliable cook |
| 400°F | 10–13 | Preheat for crisper edges; watch thin spots |
| Large fillets | +2–3 min | Check early with thermometer |
Preheat or Not? Best Practices for Even Cooking
Deciding whether to heat the basket first changes how fast the edges brown — and that’s the only real debate here.
We’ll keep it simple: some of us like a hot start at 400°F to get extra color and crisp. Others set 390°F and skip preheat for a no‑fuss route that still yields flaky fish that hits 145°F.
Either path works — pick what fits your rhythm. Arrange fillets in a single layer so hot air can circulate and do its job. With delicate tilapia, we skip flipping to avoid breakage.
- Preheating jumpstarts browning — hot basket, faster color.
- No‑preheat at 390°F gives steady cooking and saves a step.
- Try both and note which minutes and temps your fryer prefers.
- Light oil spray is enough — preheated baskets brown quick, so go easy.
- Watch the last few minutes; a hot basket can finish sooner than you think.
- Always aim for 145°F internal temp — safe, juicy, and flaky every time.
“Preheat for speed, skip it for simplicity — either way, single layer and a light mist are your friends.”
| Method | Temp | When to Use |
|---|---|---|
| Preheat path | 400°F | For crisp edges and quicker finish |
| No‑preheat route | 390°F | Simple, steady cooking with less fuss |
| Doneness check | 145°F | Opaque flesh that flakes with a fork |
Doneness and Food Safety: Use a Thermometer
Trust the temp, not the clock, when you want flaky, juicy fillets. We aim for a target of 145°F in the thickest part of the fish. That temp gives opaque flesh that flakes easily and keeps dinner safe.


Grab an instant-read thermometer and poke the thickest spot. If you hit 145°F, you’re done. If not, give it another minute or two and check again.

- We’re aiming for 145°F inside—probe the thickest spot with your instant-read thermometer.
- Cooked tilapia turns opaque and flakes with a gentle nudge—no glassy spots.
- Pull thinner fillets earlier; let thicker ones finish for a minute more.
- Most batches don’t need flipping—less handling keeps the delicate fish intact.
- Watch your minutes and check early—add time in small bursts to avoid drying out.
“Safety first, flavor always—done just right means juicy bites from tip to tail.”
Flavor Variations to Try Tonight
Want to shake up dinner? Try one of these quick flavor twists that take minutes to pull together. We picked four easy routes that fit the same simple cook and keep cleanup light. Each one leans on bold seasoning or a quick sauce to change the whole plate.
Lemon-garlic herb rub
Mix garlic powder, onion powder, thyme, parsley, salt, and pepper. Brush fillets with a touch of oil, rub on the mix, and finish with a squeeze of lemon juice after cooking. Bright, classic, and fast.
Cajun / blackened with butter drizzle
Coat generously with Cajun spice, cook until flaky, then drizzle melted butter for a rich, spiced kick. Add smoked paprika if you want smoky depth.
Taco-style strips
Dust with taco seasoning, cook, then slice into tender strips. Tuck into warm tortillas with slaw, a squeeze of lime, and your favorite sauce for an easy handheld supper.
Creamy seafood sauce finish
Warm a simple cream sauce with a little lemon and herbs. Spoon it over the cooked fillets for a restaurant-style plate at home.
- Most variations add zero extra minutes—just change the spices or drizzle.
- Love heat? Toss in extra pepper or cayenne, then balance with lemon.
- Pair any option with a light side and call supper done.
“Tilapia’s mild nature lets seasoning sing—don’t be shy with your blend.”
Cooking by Fillet Size and Thickness
Size changes everything—what fits three fillets will cook far quicker than a single big piece. Let’s walk through simple timing and placement so you hit flaky, juicy fish every time.
Small fillets (fit 3–4)
Smaller fillets usually sit three or four across the basket and cook closer to 10–12 minutes at 390°F. They heat through fast and crisp nicely at the edges.
Arrange similar sizes together so thin pieces don’t overcook while you wait on thicker ones.
Larger fillets (fit 1–2)
Bigger pieces need space. Expect about 14–15 minutes total — usually 2–3 extra minutes over small fillets to reach 145°F in the thickest spot.
Check large fillets at 12 minutes and add time in one-minute bursts until the thermometer reads 145°F.
- Keep the basket single-layer — crowding stretches your cook time and softens edge crisp.
- No flipping protects delicate fillets — less handling, better plate presentation.
- Heavier seasoning on big pieces shines — a dusting of paprika and a pinch of garlic powder gives color and flavor without burning.
- Let fillets rest a minute before serving so juices settle and texture evens out.
“Size matters — once you clock your usual fillet thickness, you’ll nail timing every single time.”
| Size | Fit in basket | Typical time | Tip |
|---|---|---|---|
| Small | 3–4 fillets | 10–12 minutes | Pull thin pieces early |
| Large | 1–2 fillets | 14–15 minutes | Check at 12 min; add 1 min increments |
| Doneness | — | Target 145°F | No flipping; single layer |
Basket Setup Tips for Crispy, Intact Fillets
We want your supper to look as good as it tastes. Set the stage so heat can move freely and the fish finishes with crisp edges and tender centers.
Start with a single layer. Place fillets in the air fryer basket so each piece has a little elbow room. Spacing lets hot air swoop around every edge for even browning.
Give a light mist of oil on the tops—just a whisper. That thin coat helps color and prevents sticking without smoking up the kitchen.
Smart little moves that pay off
- Set lemon slices under the fillets to stop sticking and add a sunny aroma.
- Skip stacking—crowded fish steams, it doesn’t crisp.
- If you use a liner, keep perforations open so circulation stays strong.
- Season evenly before placing in the basket so spices don’t clump in tight spots.
- Don’t flip—the tilapia is delicate and looks better left alone.
- Adjust spacing for size—put larger pieces toward the outside to brown evenly.
- Wipe the fryer basket after oily batches so next time starts fresh and nonstick.
“A little thought before you cook saves time and makes dinner proud.”
Serving Ideas and Sides that Pair with Tilapia
A few simple sides can change the whole mood of supper in under 20 minutes. We like combos that balance bright, fresh bites with a little comfort on the plate.
Keep it light: a big side salad, garlicky green beans, or cauliflower rice makes for a low-carb, speedy dinner. Drizzle a touch of oil and herbs over the veg to tie flavors together without heavy fat.
Comfort options: Spoon fillets over white or brown rice, or creamy mashed potatoes—the starch soaks up juices like a dream. Roast sweet potato cubes for a sweet-savory match, or steam broccoli and toss with lemon juice and pepper.
- A quick tartar sauce or spicy remoulade brings zip—perfect for dipping flaky bites.
- Warm tortillas and slaw turn the fillets into taco night in minutes—add a squeeze of lemon and dig in.
- Leftovers make a mean protein bowl: grain, greens, crunchy veg, and a tangy drizzle.
“Garnish with fresh lemon and parsley right before serving—bright, pretty, and appetizing.”
| Side | Why it Works | Prep Tip |
|---|---|---|
| Green beans | Garlicky, crisp contrast to tender fish | Sauté 5–7 minutes; finish with lemon juice |
| Cauliflower rice | Low‑carb base that soaks up sauces | Quickly stir‑fry with garlic and pepper |
| Sweet potato cubes | Sweet‑savory foil to mild fillets | Roast 20–25 minutes; toss with herbs and oil |
| Rice or mash | Comforting, soaks up every drop | Serve warm; spoon juices over top |
Storing, Reheating, and Freezing Leftovers
Leftovers keep dinner easy—here’s how we store and revive those fillets so they taste fresh. A little care now saves you time and fuss later.
Short fridge life: Pop cooked fillets into an airtight container and refrigerate. They stay good for 3–4 days. Label with the date so you don’t guess.
Freezing and thaw-free reheats
Wrap pieces tight in a freezer bag or container and freeze up to 4 months. Tight wrapping keeps texture and flavor.
Best reheating steps
- Our favorite: heat in the air fryer at 400°F for a few minutes to bring back crisp edges—check after 2–3 minutes.
- From frozen? You can reheat in the air fryer—add a minute or two and test doneness.
- Microwave works for a fast fix—about 1 minute, but texture will be softer than using the basket.
- Give thick fillets extra minutes so the center warms through. Aim to hit a safe temp again.
Mist a light coat of oil before reheating, then finish with a pinch of salt and pepper and a squeeze of lemon. Quick step, big payoff—leftovers that feel brand-new.
“Smart storage and a short reheat make last night’s fish sing again.”
Conclusion
From package to plate: the tilapia air fryer method gets dinner on the table fast with flaky fish, bright lemon, and crispy edges. Stick to a single-layer basket, light oil, and the 390–400°F window for best results.
We keep it simple: no flip, aim for 145°F, and check doneness by that easy flake. If you cook frozen tilapia, plan about 10–12 minutes at 390°F or 10–13 minutes at 400°F depending on thickness.
Store cooked pieces 3–4 days or freeze up to 4 months. Reheat at 400°F for a few minutes to revive crisp edges. Change the flavor—Cajun, lemon-garlic, tacos, or a creamy drizzle—without changing the method.
Thanks for cooking with us—grab a lemon wedge, sprinkle fresh herbs, and pass a plate. Come back anytime for more easy, neighborly recipes that make supper a breeze.