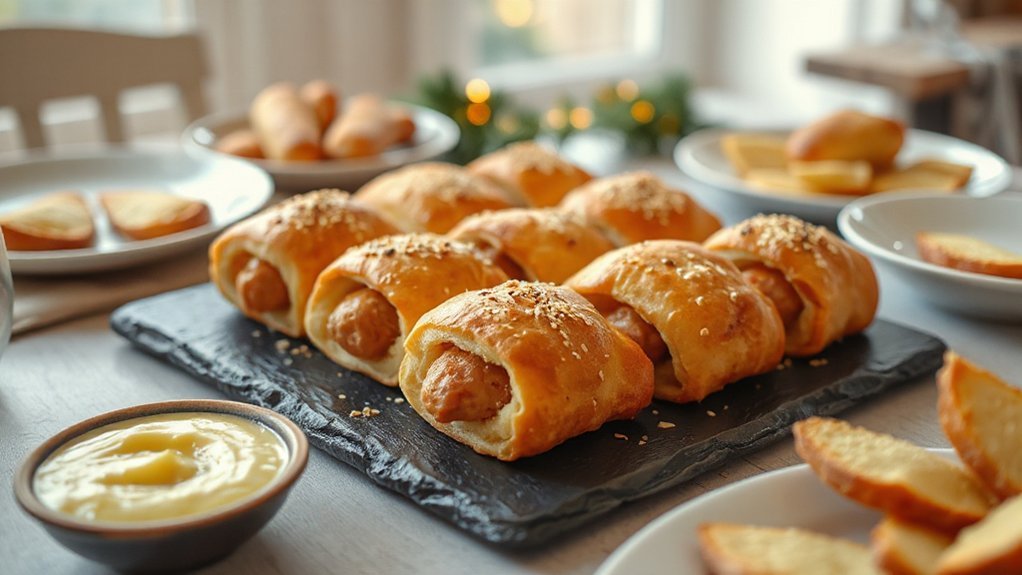
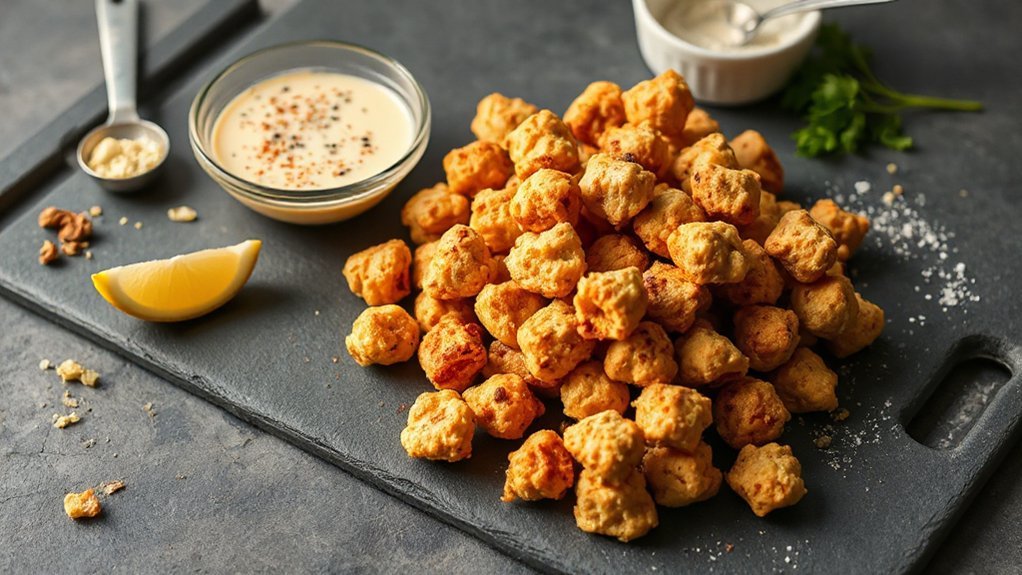
You’ll get crunchy, juicy bite-sized chicken popcorn in your air fryer that rivals KFC: marinate pieces in buttermilk or yogurt, season, double-coat with flour and panko (add cornstarch for extra crisp), preheat the basket, and air-fry single-layer at 400°F, shaking halfway and cooking until 165°F. Use a light oil mist for golden color, rest briefly, and serve with tangy dips. Keep going to learn timing, coating tricks, and sauce ideas for better-than-KFC results now today.
Ingredients and Marinade
Grab bite-sized chicken pieces (breast or thigh, trimmed) and season them simply: salt, pepper, garlic powder, and a hit of paprika for color. For the marinade, you’ll want something that tenderizes and adds tang; traditional buttermilk is great, but you can use buttermilk alternatives like yogurt thinned with milk, kefir, or a lemon and milk mix. Keep the soak short, 30 to 60 minutes, or up to overnight for deeper flavor. For the coating, combine all-purpose flour with cornstarch for crispness and build simple spice profiles: smoked paprika, onion powder, a touch of cayenne, dried oregano, and black pepper. If you like herb notes, add finely crushed thyme or parsley. Season each piece after dredging so nothing tastes bland. You’ll get juicy centers and well-balanced crusts without fuss; these ingredients and simple marinades do the heavy lifting for great popcorn chicken every time. Serve with your favorite sauces.
Equipment and Air Fryer Settings
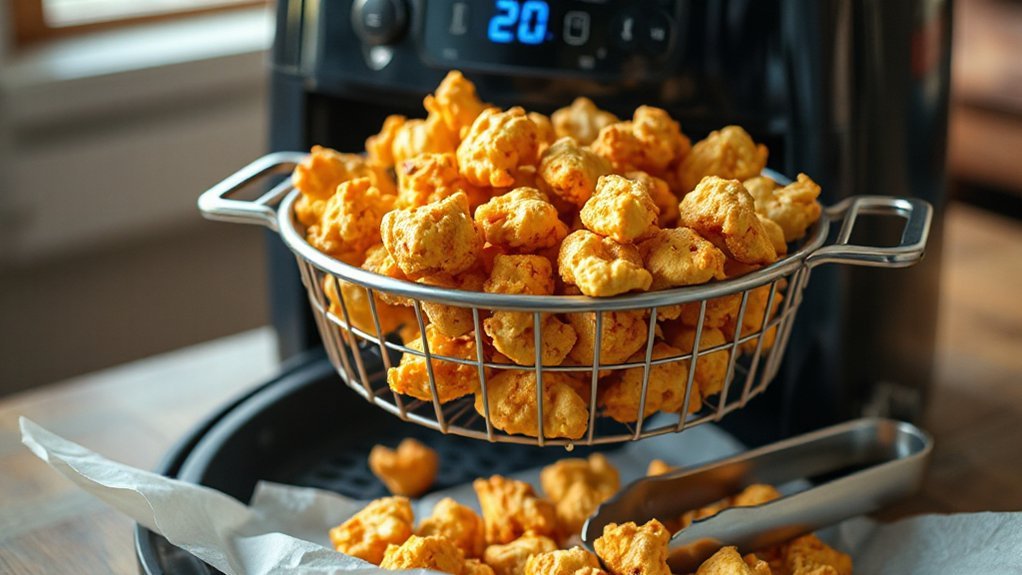
If you want reliably crisp popcorn chicken, use a medium (3–5 qt / 3–5 L) basket-style air fryer or a countertop model with a perforated tray so hot air can circulate around each piece; don’t overcrowd the basket—work in single layers or batches.
Pick a model that gives you stable temperature and adjustable fan speed; that helps browning without drying. Look for a 360° circulation pattern and a removable basket for easy shaking and even cooking. Plan a short preheat time—3–5 minutes is usually enough—to stabilize temperature before you add the chicken. Use a thermometer probe feature if available to monitor internal heat without guessing. Choose a unit with easy-to-clean nonstick coating and dishwasher-safe parts to save cleanup time. Keep tongs, a silicone brush for oil misting, and a small wire rack handy for resting finished pieces. Proper equipment choices mean consistent texture and faster results every time.
Step-by-Step Method
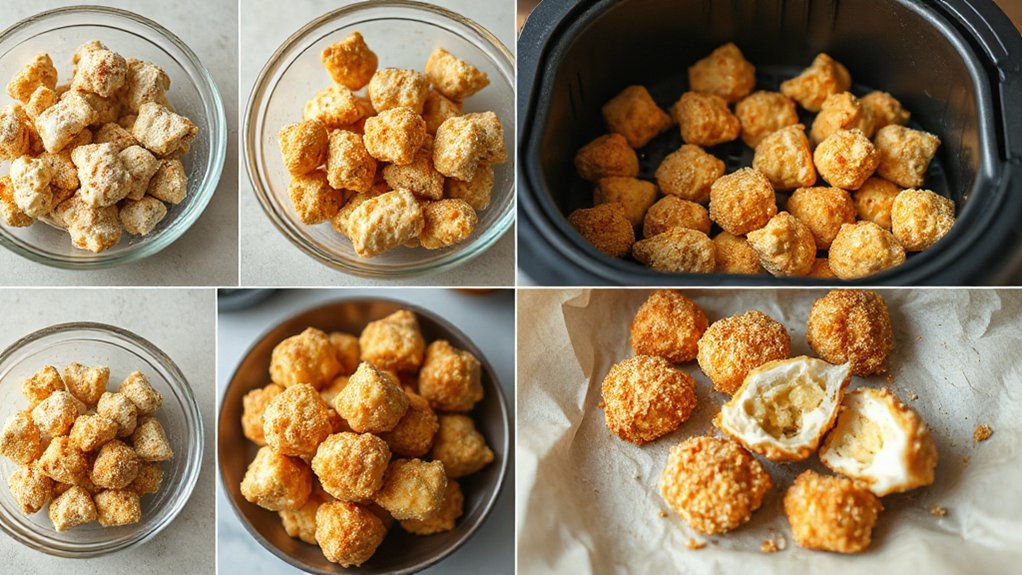
Now that you’ve got the right air fryer and tools, you’ll move through a clear sequence: prep the chicken, set up the coating station, preheat the fryer, and cook in single layers with short shakes for even browning. Cut chicken into uniform bite-sized pieces, pat dry, and season. Set up three bowls: flour, egg wash, and panko (or your preferred crumb). Dredge each piece, press crumbs on, and transfer to a tray while you work.
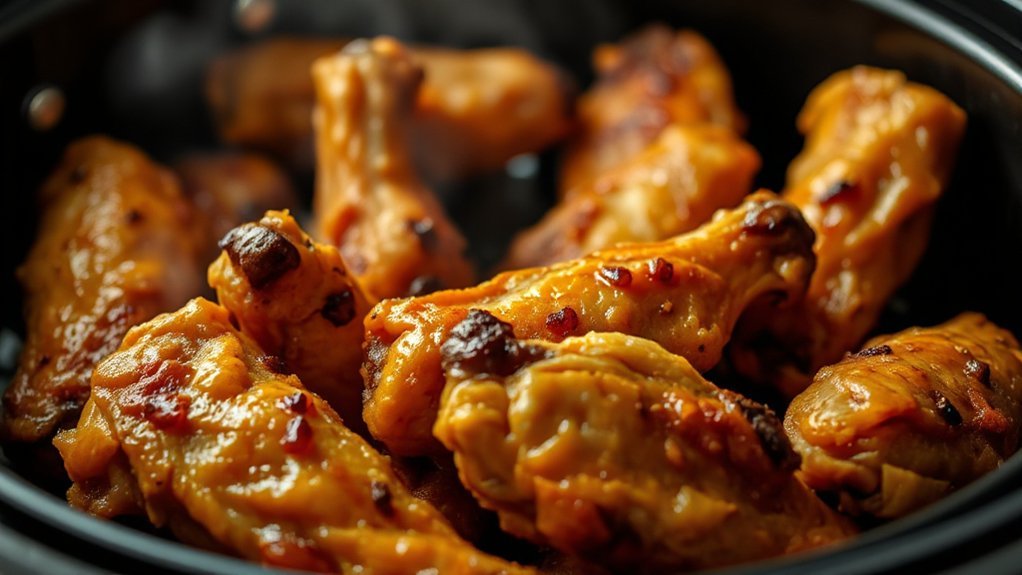
Preheat to the recommended temperature, then arrange pieces in a single layer without crowding. Start the timer and use timing cues—flip or shake gently at the halfway mark, check for a golden exterior, and confirm internal temperature reaches 165°F. Perform quick Safety checks: make sure basket locks, don’t overload, and use tongs and mitts to avoid burns. Rest briefly before serving so juices settle. Serve immediately and enjoy those craveable, bite-sized chicken pops now.
Tips for Extra Crispiness


For super-crispy chicken popcorn, try a quick double-coating—dip pieces in seasoned flour, egg wash, then press a second layer of crumbs so the crust clings better. Don’t crowd the basket; you need good airflow around each piece for even browning. Give them a light spray of oil and space them in a single layer, flipping halfway, and you’ll get a noticeable crunch boost.
Double Coating Technique
When you double-coat your chicken popcorn, you build a thicker, crunchier shell that won’t flake off in the air fryer. Start with seasoned flour, dip in beaten egg or buttermilk, then press into panko or cereal crumbs for the first layer. Let it rest briefly so the coating chemistry bonds; that sticky intermediate step makes the second coat cling. Repeat: egg wash, then another press into crumbs, focusing on even coverage and small seams. You’ll notice better texture layering—crispy outside, tender inside—without extra oil. Lightly spray between coats if needed. Cook at recommended temperature, flipping once for uniform color. The double coating takes minimal time but yields restaurant-quality crunch you’ll love every bite of. Try variations with spices and seeds to customize flavor today.
Airflow and Spacing
Because air fryers crisp by circulating hot air, you’ll get best results when pieces aren’t crowded—leave a little space around each nugget so heat can reach all sides. Think of your basket’s ventilation design: slots and fans push air, so arrange popcorn chicken in a single layer when possible. If you have more, work in batches instead of piling, and shake the basket halfway to reset crowd dynamics and expose any hidden spots. Use a rack or perforated tray to add vertical layers while preserving airflow. Don’t pack tightly even for a quick cook; a loose layout yields crisp edges and uniform browning. Small changes in spacing make a big difference to texture and cook time. You’ll notice better results every single time, guaranteed.
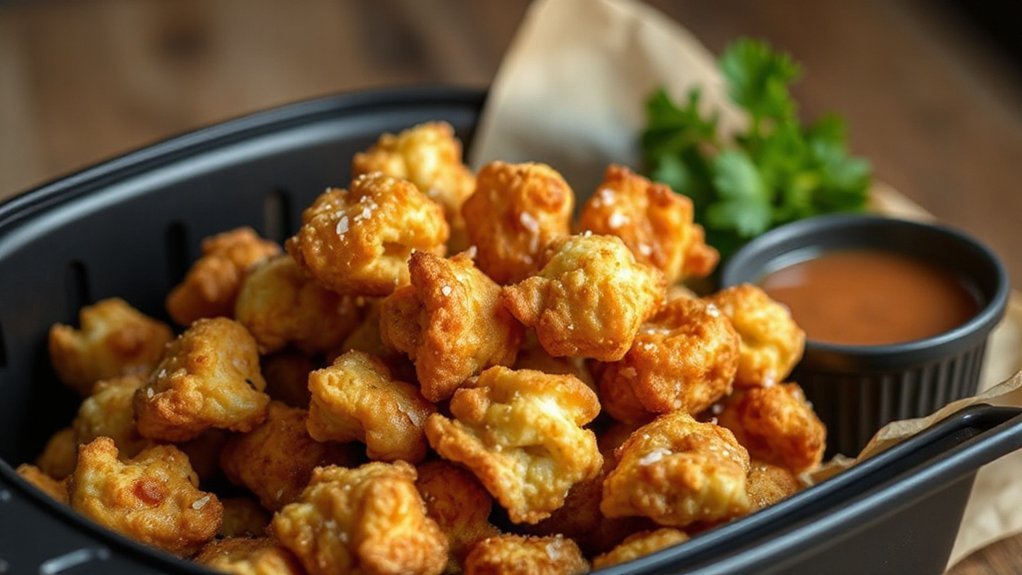
Quick Dipping Sauces
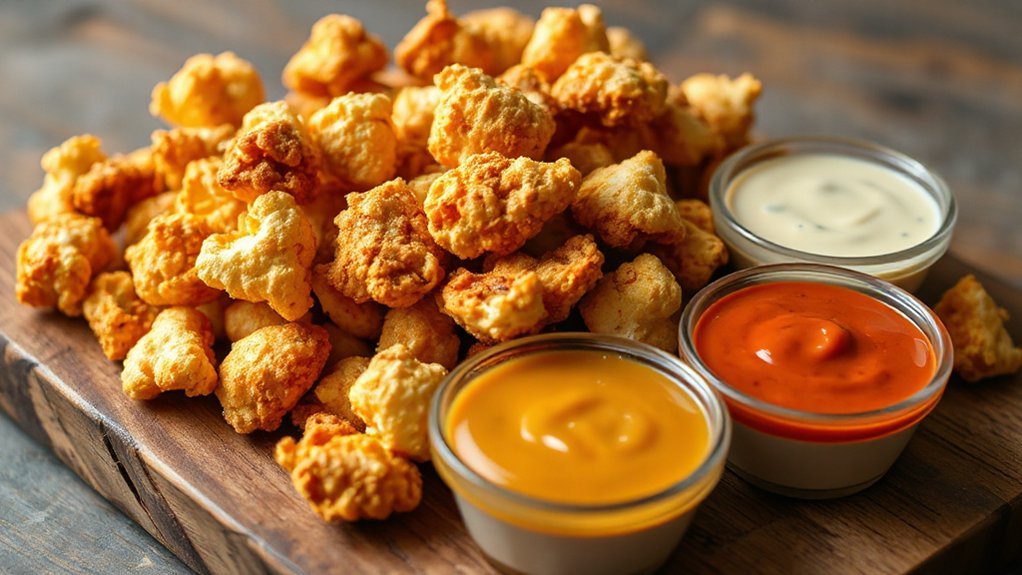
You’ll want two quick sauces to elevate your chicken popcorn: a tangy creamy garlic dip and a sticky sweet chili glaze. The garlic dip mixes mayo, yogurt, minced garlic, lemon, and a pinch of salt for instant richness. Warm the sweet chili sauce with a splash of soy and lime for a glossy, spicy-sweet finish.
Creamy Garlic Dip
A creamy garlic dip turns your air fryer chicken popcorn into something irresistible; it’s tangy, garlicky, and ready in minutes with just a few pantry staples. You’ll whisk together mayo, Greek yogurt, minced garlic, lemon juice, and a touch of Dijon for depth. Add chopped chives or parsley for freshness and a pinch of smoked paprika to highlight the crust. Taste as you go — Garlic pairing with lemon and herbs keeps flavors bright, while careful Spice balancing prevents heat from overwhelming the garlic. Serve chilled so flavors meld, and offer a small bowl per person for dipping. It’s flexible: swap yogurt for sour cream or add honey for a subtle sweet-savory twist. You’ll love how simple tweaks keep it vibrant, versatile, and crowd-pleasing every time.
Sweet Chili Glaze
Whisking together a quick sweet chili glaze lets you amplify store-bought sauce into something glossy, tangy, and perfectly clingy for chicken popcorn. You’ll heat a bit of the sauce, stir in honey, rice vinegar, minced garlic, and a touch of chili flakes, then simmer until it thickens to coat each bite. Taste and tweak—more acid if it’s flat, more honey if it’s shy on sweetness. Try regional variations by swapping palm sugar, lime zest, or gochujang for depth. For make-ahead, cool completely and refrigerate in a sealed jar; note preservation methods like refrigeration and brief reheating maintain texture. Drizzle warm over fresh popcorn chicken or serve as a dipping glaze for an instant crowd-pleaser. It’s quick, sticky, and elevates every crispy bite. You’ll love.
Storage, Reheating, and Nutrition
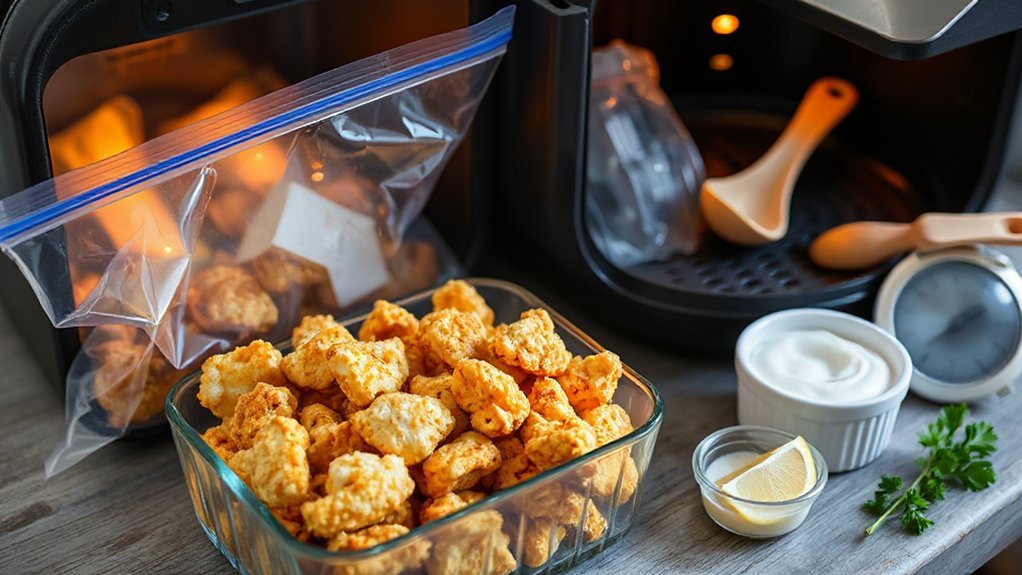
Storing your chicken popcorn properly keeps it safe and crisp: cool pieces to room temperature within two hours, tuck them into an airtight container, and refrigerate for up to 3–4 days or freeze in a single layer (then bag) for up to a month. For Leftover Safety, label containers with dates and thaw frozen portions overnight in the fridge. Reheat only what you’ll eat.
To reheat, preheat your air fryer to 350°F (175°C), spread bites in a single layer, and crisp for 3–5 minutes; they’ll regain texture without drying. You can also use a 375°F oven for 6–8 minutes or a microwave briefly then finish in the air fryer.
Quick Macro Breakdown: a typical serving (about 6–8 pieces) runs roughly 250–320 calories with 15–20 g protein, 12–18 g fat, and 15–20 g carbs—variables depend on breading and oil. Adjust portions and dips to hit your goals. Enjoy warm, crunchy bites.
Conclusion
You’ve just mastered air-fryer chicken popcorn that beats takeout and slips into weeknight life like a tiny flavor bomb. You’ll crisp, pop, and dunk with confidence, tweaking spices or sauces to match your mood. Keep a few practical tricks handy — pat dry, don’t overcrowd, shake the basket — and you’ll get reliable results every time. Store and reheat wisely; leftovers come back almost as good as fresh, practical and satisfying for quick weeknight wins.