You’ll get crispy, tender shrimp with a bold buffalo kick using an air fryer and a few precise techniques. You’ll learn exact seasoning, coating, timing and sauce ratios that work. Follow the steps and you’ll skip soggy results—but first, there’s a single tweak that changes everything.
Ingredients

You’ll need peeled, deveined medium or large shrimp (tail‑on or off per preference), a few tablespoons of buffalo sauce, a neutral oil spray or a teaspoon of oil, an egg for binding, and a dry coating such as panko or a mix of flour and cornstarch.
Add kosher salt, freshly ground black pepper, and a pinch of smoked paprika for depth. For controlled heat, include a teaspoon of cayenne or chipotle powder.
To experiment, prepare small batches with alternative buffalo blends, citrus zest, or minced garlic to explore flavor variations. For crunch contrast, toss some cornmeal into the coating.
Provide at least two dipping sauces—blue cheese and a yogurt-honey-herb—plus a zesty ranch alternative. Measure precisely; innovation thrives within clear constraints and document your adjustments.
Equipment Needed
You’ll need a 5–6 quart air fryer to cook an even batch of shrimp without overcrowding. Use long-handled tongs to turn shrimp safely and keep your hands clear of hot air. Keep a heat-resistant basting brush on hand to apply buffalo sauce in the final minutes for an even glaze.
5–6 Quart Air Fryer
A 3- to 6-quart air fryer is the ideal size for buffalo shrimp: it gives you enough capacity to cook a single-layer batch without crowding while keeping countertop footprint manageable.
Choose a quart air fryer with adjustable temperature, a reliable timer, and a nonstick basket that releases breading. You want consistent airflow and precise temperature control so shrimp crisp evenly at 400°F without drying.
Match batch size to the unit’s cooking capacity; overcrowding causes steaming, not crisping. Look for a model with easy-to-clean components and solid build quality—durability matters when you’re experimenting with sauces and repeat cooks.
A compact digital interface and program memory speed up repeatable results, letting you innovate confidently while keeping technique straightforward. It should also fit your storage and power.
Tongs and Basting Brush
Pair long-handled tongs with a heat-resistant silicone basting brush for safe, precise handling and even sauce application. You’ll control shrimp transfers and apply Buffalo glaze without tearing delicate flesh. Master tongs techniques: pinch close to the hinge for leverage, cradle shrimp for flips, and use a light touch. Use basting strategies to layer sauce in short bursts, allowing adhesion between coats. Choose tools with ergonomic grips and detachable heads for quick sanitation and iterative experimentation. Practice consistent motion so coating and cook times stay predictable. These tools speed workflow and elevate texture while keeping cleanup minimal. Adopt them and iterate—innovation starts with reliable, repeatable technique.
| Tool | Purpose |
|---|---|
| Long-handled tongs | Secure handling, tongs techniques |
| Silicone brush | Even glaze, basting strategies |
| Detachable grip | Sanitation, ergonomic control |
Preparing the Shrimp

You should fully thaw shrimp in the refrigerator or under cold running water, then pat them completely dry to guarantee even cooking and proper adhesion of coatings.
Season or briefly marinate the shrimp — keep it short (a few minutes) so acid or salt doesn’t toughen the texture; basic salt, pepper, garlic powder, and a splash of hot sauce work well.
Finish with a light coating — panko, cornmeal, or a thin flour-egg-panko layer — to achieve a crisp, golden exterior in the air fryer.
Thawing and Patting Dry
Start by thawing frozen shrimp in the refrigerator overnight; if you’re short on time, submerge the sealed bag in cold running water for 10–15 minutes, flipping it occasionally until flexible. Once thawed, remove shrimp and drain any liquid immediately. Pat each piece dry with paper towels or a clean kitchen cloth, pressing gently to remove surface moisture—this promotes crisping in the air fryer and prevents sogginess. Work in batches so you don’t reintroduce water to previously dried shrimp. Inspect tails and veins; if residual ice remains, blot it away. Aim for shrimp that feel cool and matte rather than wet. Proper thawing techniques and thorough drying give you an efficient, innovative foundation for high-heat cooking and predictable results. You’ll get crisper, repeatable outcomes consistently.
Seasoning and Marinating Briefly
When seasoning shrimp, keep the marinate short so the flesh stays firm and doesn’t turn mushy.
You’ll want a light acidic anchor—lemon juice or a splash of rice vinegar—combined with a small amount of oil to carry spices. Use kosher salt, freshly ground pepper, smoked paprika and garlic powder for a classic profile.
If you want innovation, try seasoning alternatives like za’atar with lemon zest or a yuzu-kosho touch for brightness.
For uniform flavor, toss gently; avoid overworking. Pay attention to marinating times: 10–20 minutes for medium shrimp, no more than 30 minutes for large.
Rinse only if you used coarse salt and adjust seasoning after patting dry. Proceed promptly to the next step to preserve texture. Don’t over-salt; taste and refine as needed.
Coating for Crispy Finish
A light, dry coating is essential for crisp air-fried shrimp and keeps breading from sloughing off. You’ll pat shrimp completely dry, then dust in a thin layer of seasoned cornstarch or fine panko to create a reliable crispy coating.
Use a light egg wash or a quick mist of oil only when needed to bind; too much moisture defeats crispness. Season the dry mix with smoked paprika, garlic powder and a touch of cayenne for controlled heat and flavor enhancement.
For innovation, try superfine polenta or rice flour to alter texture without sacrificing crunch. Work in single layers on a tray so pieces don’t touch, and refrigerate briefly before air frying to set the crust.
This method yields consistent, crisp results and repeat regularly.
Breading and Coating Options
Although panko yields the crispiest crust, you’ll choose differently if you need better sauce cling or a lighter finish. For maximum crunch use a panko crust seasoned with smoked paprika and garlic powder; toss shrimp in beaten egg or tempura batter to lock crumbs.
If you want tropical notes and a delicate crisp, press finely shredded coconut flakes into a light flour or cornstarch dredge. For gluten-free options, combine rice flour with crushed cornflakes or almond meal for texture.
To boost adhesion without heaviness, use Greek yogurt thinned with lemon juice as a binder. For spicy buffalo, incorporate cayenne into the dry mix rather than the binder so heat stays on the crust.
Test batches to refine balance between coating thickness and sauce cling.
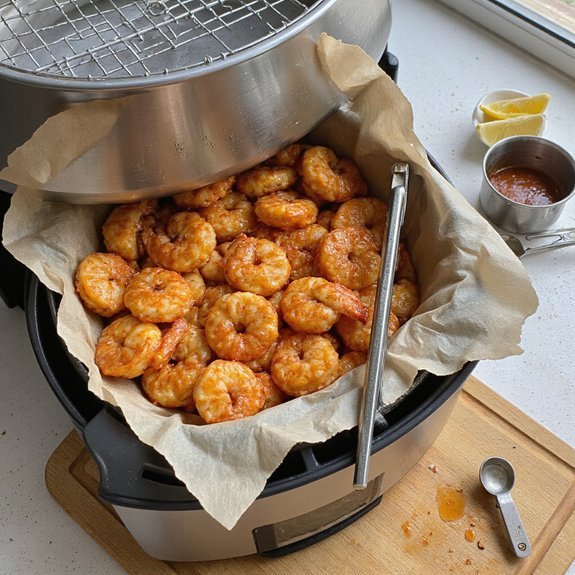
Air Frying Step-by-Step
Preheat your air fryer to 380°F and pat the coated shrimp dry so they crisp evenly; arrange them in a single layer without overcrowding.
Cook the shrimp 6–8 minutes, shaking the basket or turning once halfway through for even browning.
If your shrimp are large or frozen, add 1–2 minutes; finish by tossing them in buffalo sauce or brushing it on and giving them a final 1-minute air crisp for adhesion.
Preheat and Prepare


1. You’ll set the air fryer to the specified preheat temperature before loading the basket.
While it warms, prepare ingredients with intention: trim tails if desired, pat shrimp completely dry, and assemble your buffalo sauce, light coating mix, and a neutral oil spray.
Use a bowl or resealable bag to evenly coat shrimp; innovation comes from layering flavors – a touch of smoked paprika or citrus zest elevates the standard buffalo profile.
Arrange shrimp in a single layer so hot air circulates freely; don’t overcrowd. Use a perforated liner or lightly oil the basket to prevent sticking and simplify cleanup.
Confirm your station is organized, tools at hand, and timer ready so the shift to cooking is seamless. You’ll be set to innovate confidently.
Cook Times and Tips
Once the air fryer and shrimp are ready, set the basket at 400°F and time according to shrimp size: small (51–60) 6–7 minutes, medium (41–50) 7–8 minutes, large (31–40) 8–10 minutes, jumbo (16–20) 10–12 minutes, flipping or shaking once halfway through.
You’ll use cook time as your precision control: monitor the smaller end of the range for thinner tails and the longer end for denser pieces. Arrange shrimp in a single layer to guarantee even airflow; don’t overcrowd.
Spray lightly with oil to promote crisping and apply buffalo sauce after a short rest so coating adheres without steaming. Use an instant-read thermometer when innovating: 120–125°F for tender, opaque shrimp; remove promptly to avoid rubbery texture.
Timeline discipline yields consistent results. Repeat for second batches.
Homemade Buffalo Sauce
Sauce that’s bright, tangy, and properly emulsified makes the shrimp sing: combine equal parts hot sauce and melted butter, add a splash of white vinegar or lemon juice for brightness, and season with garlic powder, Worcestershire, and a pinch of cayenne to taste.
You’ll whisk until smooth, taste, and adjust acidity or heat; precise ratios keep the emulsion stable.
For innovation, experiment with smoked butter or fermented hot sauces to deepen spicy flavor without masking brightness.
If you want dairy-free options, substitute clarified oil and emulsify with a teaspoon of mustard.
Keep small-batch sauce variations to test profiles: herbaceous (tarragon), umami (soy or fish sauce), or citrus-chili.
Store chilled, re-whisk before use, and label confidently.
You’ll deploy it creatively across bites and dipping vessels.
Tossing and Glazing
After you’ve whisked and tasted your buffalo sauce, move quickly to coat the shrimp so the emulsion stays stable and the crust stays crisp.
Work in a shallow bowl: toss hot shrimp with measured sauce, turning once to make certain of even glaze. If sauce separates or feels heavy, make Sauce consistency adjustments — whisk in 1 teaspoon warm water or a splash of melted butter to rebind.
Use tongs to limit handling; excessive stirring softens the crust. For repeatable results, apply Shrimp marination techniques beforehand—brief acid and oil contact will season interior without breaking the fry.
Finish with a light rest on a rack so glaze sets and excess drains. You’ll preserve texture and deliver a sharp, modern buffalo profile. Maintain temperature control throughout tossing.
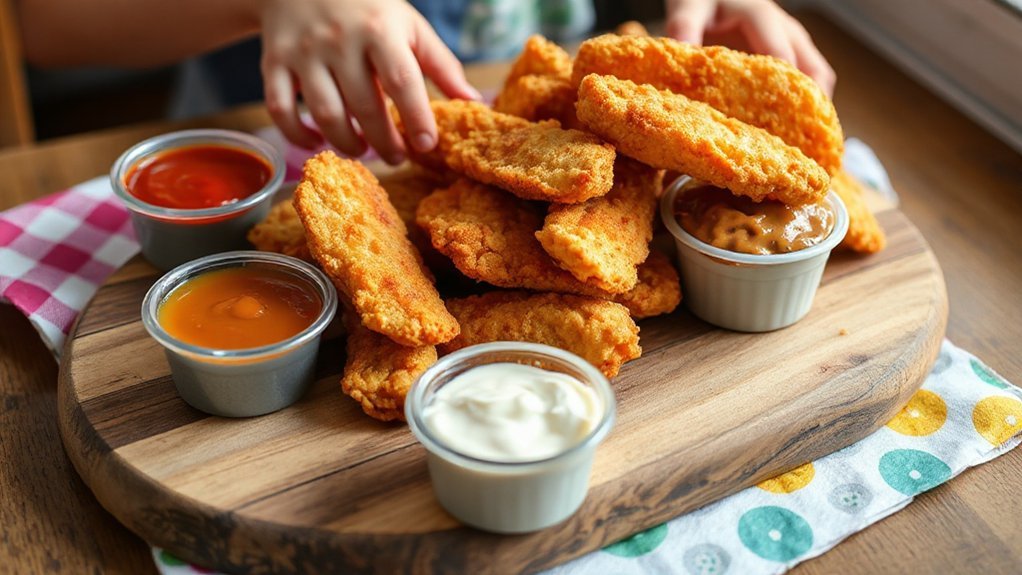
Serving Ideas and Pairings
When plating your buffalo shrimp, aim for contrasts in texture, temperature, and heat so each bite feels balanced. Serve them over crisp romaine or slaw for crunch, tuck them into warm tortillas or slider buns for handhelds, or pile them atop grain bowls with cool cucumber, avocado, and a yogurt- or blue-cheese–based drizzle to temper the heat.
Arrange shrimp on serving platters with segmented zones: hot shrimp, cooling dips, and crisp sides. Offer focused dipping sauces—ranch, cilantro-lime yogurt, and spicy honey—for layered flavor.
Pair with bright side salads featuring citrus and fennel to cut richness. For events, plan cocktail pairings that mirror heat and acidity: a citrusy gin fizz or dry Riesling elevates the profile.
Present deliberately; let guests mix textures and temperatures.
Make-Ahead, Storage, and Reheating
Plan ahead by cooling shrimp quickly and storing components separately: pat the shrimp dry, let them cool to room temperature for no more than two hours, then tuck them into an airtight container and keep the buffalo sauce in its own jar.
For meal prep, portion shrimp into single-serving containers with paper liners to preserve texture; label with date. Refrigerate up to 48 hours for best quality.
If you want longer storage, consider freezing options: flash-freeze shrimp flat on a tray, transfer to vacuum-sealed or heavy-duty freezer bags, and use within three months.
To reheat, thaw in the refrigerator, then revive crispness in the air fryer at 350°F for 3–5 minutes, tossing halfway. Reheat sauce gently on low and toss with shrimp before serving.
Troubleshooting and Pro Tips
If your shrimp turn out soggy, unevenly browned, or overcooked, treat the issue like a simple three-part diagnosis: moisture, crowding, and heat.
First, pat shrimp dry and use a light coating—excess sauce or wet batter collapses crispness; that fixes many shrimp textures problems immediately.
Second, don’t overcrowd the basket; air needs circulation so each piece crisps evenly.
Third, calibrate your air fryer and adjust cooking times by one to two minutes rather than guessing; small shifts preserve texture and prevent rubberiness.
For innovation, experiment with brief high-heat finishes or a quick oil mist to boost browning.
Keep notes: temperature, cook duration, and substrate changes will refine your results predictably. Document adjustments precisely so you can reproduce successful results and scale flavors consistently across menus.
Conclusion
You’ve got a reliable, quick method for air fryer buffalo shrimp that delivers beautifully crisp exteriors and juicy centers every time. Follow the prep, coating, and 380°F timing guidelines, adjust for shrimp size, and use a light spray to promote even browning. Toss immediately in warm buffalo sauce and serve with cooling dips. Store leftovers in an airtight container and reheat briefly at 350°F. With these steps, you’ll consistently produce restaurant-quality buffalo shrimp at home.