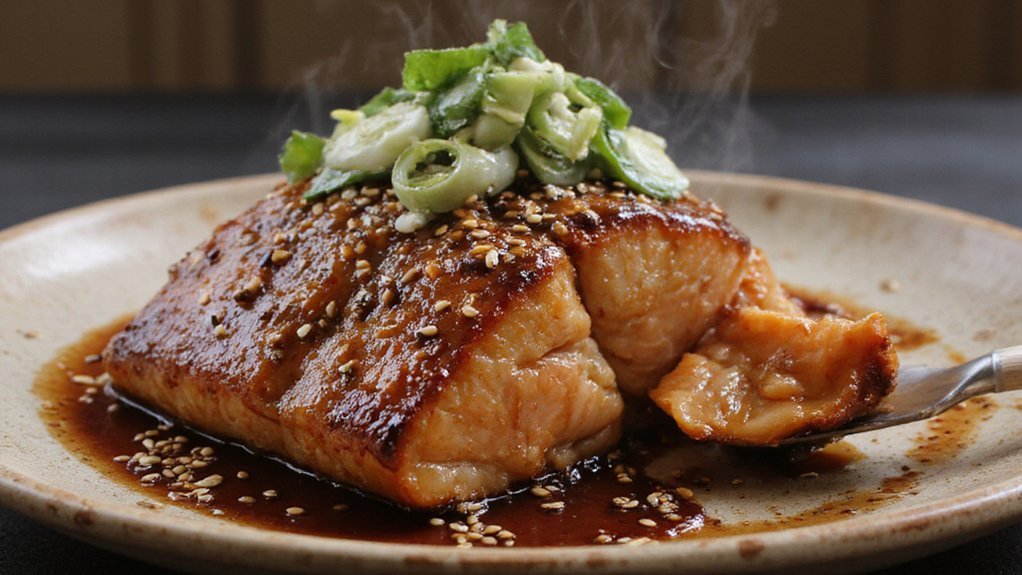
You’ll prep mixed vegetables with uniform cuts, reduce balsamic into a glossy glaze, and use precise air-fryer timing to achieve caramelization without sogginess. This guide gives knife specs, temperature windows, and load limits so you get consistent results, plus simple tweaks for sturdier or delicate veg…
Ingredients You’ll Need

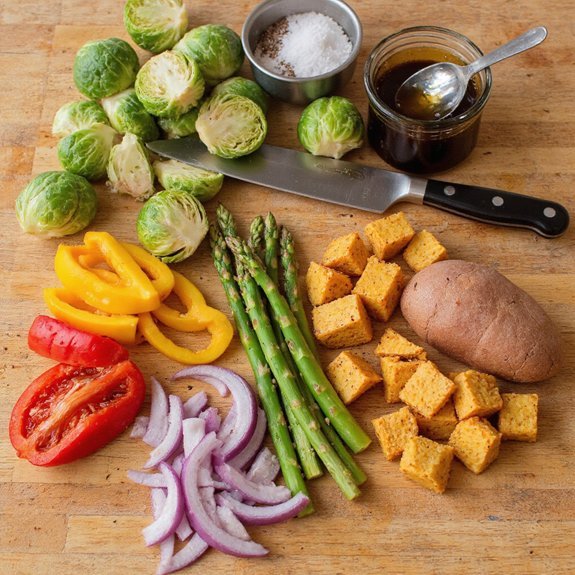
Before you start, gather the following: 1–1.5 lb mixed vegetables (e.g., bell peppers, zucchini, red onion, carrots, Brussels sprouts or asparagus) cut into uniform ~1-inch pieces; 1–2 tbsp olive oil; 2 tbsp balsamic vinegar; 1 tbsp honey or maple syrup; 1 small garlic clove, minced; ½ tsp kosher salt; ¼ tsp freshly ground black pepper; 1 tsp cornstarch (optional, to thicken the glaze) plus 1 tbsp water; and 1–2 tsp fresh thyme or rosemary (optional). Select vegetable varieties for balanced texture and surface area for glaze adhesion. Dissolve cornstarch in water before adding to vinegar and honey to avoid lumps. Mince garlic finely to guarantee uniform distribution. Measure salt and pepper precisely; they’ll amplify balsamic compounds and preserve health benefits while reducing excess fat.
Equipment and Air Fryer Basics
Choose an air fryer with capacity and wattage matched to your batch size and kitchen circuit to guarantee even cooking and consistent temperature.
You’ll need essential accessories—perforated parchment or a silicone mat, a heatproof spatula, and a basket or tray that permits unobstructed airflow for proper browning.
Verify removable parts are dishwasher-safe and that the unit has accurate temperature control and an adjustable timer before you start.
Choosing the Right Air Fryer
When selecting an air fryer for balsamic-glazed vegetables, focus on capacity, power, and airflow design so you get even browning without overcrowding. You’ll evaluate air fryer types and prioritize cooking capacity per batch; larger baskets yield fewer cycles but risk uneven circulation if poorly designed. Choose units with 1500–1800W for rapid recovery and proven convection paths or variable-speed fans for innovation-minded cooks. Inspect basket geometry and rack options to maintain a single layer. Opt for precise temperature control and a fast preheat profile. The table below summarizes key specs to compare models efficiently.
| Spec | Recommended |
|---|---|
| Power | 1500–1800W |
| Cooking capacity | 3–5 L |
Test a candidate by roasting a single vegetable type to verify browning uniformity, energy draw, and noise under real cooking loads and durability.
Essential Accessories and Tools
After selecting a suitable unit, assemble a compact toolkit that lets you control airflow, surface contact, and temperature precisely for repeatable balsamic-glazed vegetable results.
You’ll need core air fryer accessories: perforated parchment, silicone tongs, calibrated probe thermometer, and a metal mesh tray to modulate convection and prevent sogginess.
Add a small offset spatula for turning and a spray bottle for consistent oil and glaze application.
Keep nonstick silicone mats and heat-resistant gloves for cleanup and safety.
Choose a probe-compatible model or an external thermometer for closed-chamber temperature verification.
Label containers for pre-mixed balsamic reductions and record cycle parameters; iterating adjustments yields predictable caramelization.
These essential tools tighten process control, reduce variability, and accelerate innovation in your air-frying workflow.
Document results and refine timing rigorously.
How to Prep the Vegetables
Start by washing each vegetable under cold running water to remove dirt and residues, then pat them completely dry with a clean kitchen towel or paper towels so they won’t steam in the air fryer.
Trim stems, cores, and blemishes and remove seeds where applicable to promote uniform texture.
Chop vegetables to consistent sizes—roughly 1/2 to 3/4 inch for mixed cuts and larger for dense roots—so they cook and brown evenly.
Wash and Dry
Before rinsing, inspect each vegetable and trim bruises or woody stems. Then rinse under cold running water while using a stiff brush on carrots, potatoes, and other firm roots to dislodge soil.
You’ll apply targeted cleaning techniques: agitate surfaces, use food-safe brushes, and employ brief soaking (no more than two minutes) for leafy greens to loosen particulates. Drain thoroughly and transfer produce to a sanitized colander.
For ideal drying, use a high-absorbency microfiber cloth or a salad spinner set to low centrifugal force to avoid cellular damage. Pat dry immediately if using cloth; spin-dry and air-rest for five to ten seconds if using a spinner.
Verify containers and tools are dry before continuing to prevent recontamination and maintain processing efficiency and preserve flavor integrity.
Trim and Chop
Trim bruises, remove woody stems, and cut vegetables into uniform pieces so they cook evenly in the air fryer. You’ll select chop patterns based on texture and surface area: rounds for carrots, wedges for cauliflower, and batons for zucchini.
Apply consistent chopping techniques—rocking knife for precise slices, push-cut for batons—to achieve repeatable trim sizes. Target 3/4–1-inch pieces for root vegetables and 1/2–3/4-inch for softer items; adjust for personal crispness.
Discard cores and dense ribs that impede glaze adhesion. If you want innovation, experiment with bias cuts or micro-dicing to change caramelization rates. Keep a bench scraper and calibrated ruler nearby for control.
Transfer prepped pieces to a single layer to minimize contact and guarantee even airflow. You’ll then proceed to seasoning and glazing next.
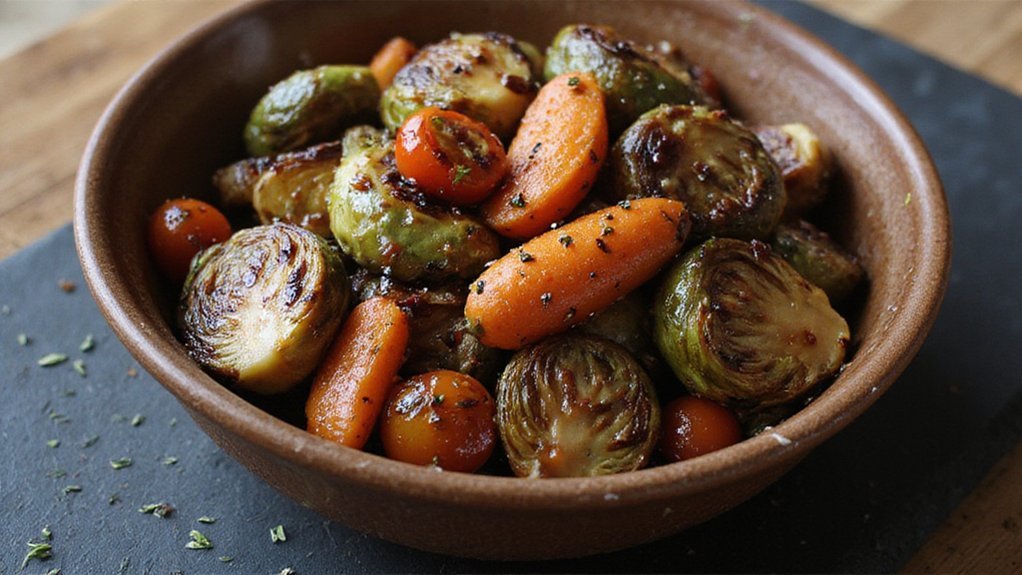
Making the Balsamic Glaze
When reducing balsamic vinegar to a glaze, you’ll use low, steady heat to concentrate flavor without burning: combine about 1 cup balsamic with 1–2 tablespoons honey or brown sugar in a small saucepan, bring to a gentle simmer, and maintain a low boil until the volume has reduced by roughly half (about 8–12 minutes).
Monitor temperature; keep it between 185–205°F (85–96°C) to avoid scorching. Deglaze with a splash of water if solids form.
Off heat, whisk in a teaspoon of Dijon or a pinch of salt to stabilize emulsion. For brightness, add a teaspoon of citrus zest right before cooling.
These balsamic reduction techniques and flavor enhancement tips let you produce a glossy, pourable glaze with controlled acidity and balanced sweetness and aromatic complexity.
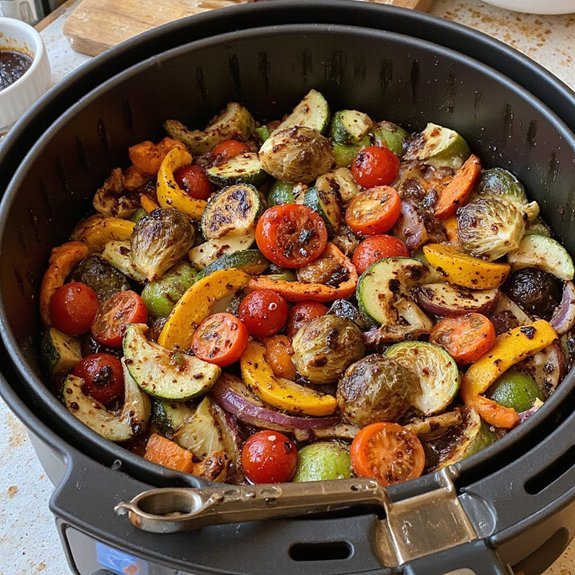
Step-by-Step Air Fryer Instructions
Once your vegetables are cut and the glaze is ready, preheat the air fryer to 375°F (190°C).
Then toss vegetables in a light, even coating of oil and seasoning so they brown evenly; you’ll load them in a single layer without overcrowding. Set the timer for 10–15 minutes depending on size, and shake or turn them halfway through to guarantee uniform crisping.
Place sized pieces together, use perforated parchment or silicone liner for delicate items, and avoid stacking to maintain airflow.


Use tongs or a basket shake to flip components.
After crisping, transfer to a tray, apply balsamic glaze while hot, and rest briefly.
Take advantage of air fryer benefits—rapid convection, reduced oil use, and vegetable seasoning.
Mind quick cleanup for consistent performance.
Timing and Temperature Guide
You should adjust cooking parameters based on vegetable size: halve or slice larger pieces to guarantee even heat penetration.
Set the air fryer temperature between 375–400°F for most vegetables, lower it to 350°F for delicate items and raise it to 425°F for dense roots.
Aim for texture targets—tender-crisp (8–12 min), fork-tender (12–18 min), fully soft (18–25 min)—and check midway, shaking or flipping to promote even browning.
Vegetable Size Matters
Vegetable size determines required time and sometimes temperature, so cut pieces uniformly to guarantee even cooking: aim for 1/2-inch florets or slices for quick-cooking veg and 1-inch cubes for sturdier roots.
You’ll standardize cut size to control surface area, thermal penetration and Maillard progression; consistent pieces yield predictable cooking time and texture. For mixed batches, segregate small and large pieces or stagger loading to avoid undercooking.
Use a scale or template to reproduce portions across runs. If you innovate with skewers or baskets, maintain uniform exposure and rotation intervals. Monitor with a probe or break-test rather than visual guesswork.
Record batch variables—piece dimension, load density, and starting moisture—to iterate and optimize repeatable results. Adjust glaze application timing to prevent sogginess and promote crispness consistently.
Air Fryer Temps
Match piece size and load density to specific temperature-time pairs to achieve predictable doneness and glaze behavior.
Choose air fryer temperatures based on mass and surface area: 375°F for medium-root and dense cruciferous pieces, 400°F for quick-sear tender vegetables, 350°F for delicate ingredients to protect glaze.
Don’t overcrowd; you’ll maintain airflow and consistent heat transfer. Preheat briefly to stabilize the chamber; you’ll reduce cycle variability.
Use calibrated probe or repeatable basket loads to reproduce ideal cooking results. Reduce temperature 10–15°F when glazing early to prevent caramel burn; raise 10–15°F for browning-only finishes.
Record load, temp, and time in a concise table and iterate — this systematic approach lets you innovate recipes while ensuring reproducible, efficient outcomes.
Adjust humidity control when available for surface finish.
Timing by Texture
Because texture depends on both internal gelatinization and surface Maillard reactions, plan cook cycles around target doneness—crisp-tender (6–10 minutes at 400°F for small, tender pieces), browned-crisp (10–16 minutes at 375–400°F for medium roots and dense crucifers), and soft-tender (12–18 minutes at 350–375°F for larger or delicate pieces), adjusting time ±15–25% for load density and piece thickness.
You’ll monitor internal feel and surface color, use single-layer baskets, and stagger batches to maintain consistent airflow.
For innovation, calibrate a repeatable test: halve a sample, log minutes to first brown, then map adjustments for batch scale. Record timing nuances and resulting texture varieties to build a micro‑cookbook of validated cycles.
Iterate with small temperature increments and brief rest periods to refine outcomes and document sensor readings precisely.
Flavor Variations and Add‑Ins
If you want to customize the glaze and toppings, choose additions that complement balsamic’s acidity and caramel notes and add them at the points specified: toss fresh or dried herbs (1–2 tsp dried or 1–2 tbsp chopped fresh per 1 lb veg) with the vegetables before air frying, sprinkle toasted nuts or seeds (1–2 tbsp) after cooking for crunch, fold in crumbled cheese (2–3 tbsp) immediately off heat so it softens without melting fully, and finish with a few drops of citrus juice or a pinch of red pepper flakes to brighten or add heat.
Test spice variations; cumin, smoked paprika or five-spice pair. For herb add ins, use rosemary for roots and basil for quick. Aim for crisp exterior, tender interior, contrasting toppings.
Serving Suggestions and Pairings
When plating, arrange the balsamic‑glazed vegetables so their caramelized surfaces are visible and serve them hot or warm; this preserves texture and maximizes flavor impact.
Position components to balance color, density, and moisture: root vegetables on one side, tender greens on the other. For innovation, pair with compressed fruits or toasted seeds to add acid or crunch.
You’ll use ideal pairings such as seared protein, herbed grains, or tangy cheeses to create modular plates. Specify serving sizes by weight or volume (120–150 g per person for vegetables as a side; 250–300 g as a main component) and present portions with calibrated scoops or molds.
Finish with a controlled micro‑drizzle of reduction and a herb sprig to signal precision and maintain plating symmetry for consistency.
Meal Prep, Leftovers, and Storage
After plating, plan how you’ll cool, portion, and store leftovers to preserve caramelization and texture.
Rapid cooling prevents continued carryover cooking: spread vegetables in a single layer on a shallow tray for 15 to 20 minutes, then transfer to airtight containers.
Portion into meal-sized servings to optimize meal prep efficiency and reduce reheating cycles.
For leftover storage, use glass containers with tight seals and label with date; refrigerate at ≤4°C for up to 4 days.
If freezing, flash-freeze on a tray, then consolidate in vacuum or zip-lock bags; limit to 2 months to retain quality.
Reheat gently at low power or in a preheated air fryer at 150–160°C for short intervals, checking internal temperature reaches 60–65°C before serving.
Track batches for iterative improvement monthly.
Tips for Crispy, Caramelized Veggies
Because surface moisture undermines crispness, pat vegetables dry and let them air-dry 10–15 minutes before oiling. You’ll apply thin, even oil coats and avoid overcrowding; use convection cycles and shake baskets every 5–7 minutes to expose edges for Maillard reactions. For caramelized tips, increase temperature by 10–20°F in final 3–5 minutes and add a light balsamic spray to concentrate sugars without sogginess. Implement these crispy techniques: single layer, calibrated oil, timed agitation, and stage searing. Use the table for quick reference:
| Action | Parameter | Outcome |
|---|---|---|
| Drying | 10–15 min | Reduce steam |
| Spacing | Single layer | Edge exposure |
| Shake | Every 5–7 min | Even browning |
| Finish | +10–20°F | Caramelized crust |
Record timings and temperatures; iterate small adjustments to optimize texture across vegetable types. Document results for reproducible innovation and scaling.
Conclusion
You’ll finish by removing the vegetables when they register 200°F (93°C) at the thickest pieces or when edges show deep caramelization and internal texture is tender-crisp. Let them rest 3–5 minutes to stabilize juices, then toss with reserved balsamic glaze to coat evenly. Serve immediately to preserve crust; refrigerate cooled leftovers within two hours in an airtight container for up to 4 days. Reheat at 375°F (190°C) 4–6 minutes for best texture, and serve warm.