We’re fixin’ to show you a simple, foolproof way to make golden, diner-style breakfast potatoes at home. Quick, hands-off, and full of Southern charm.
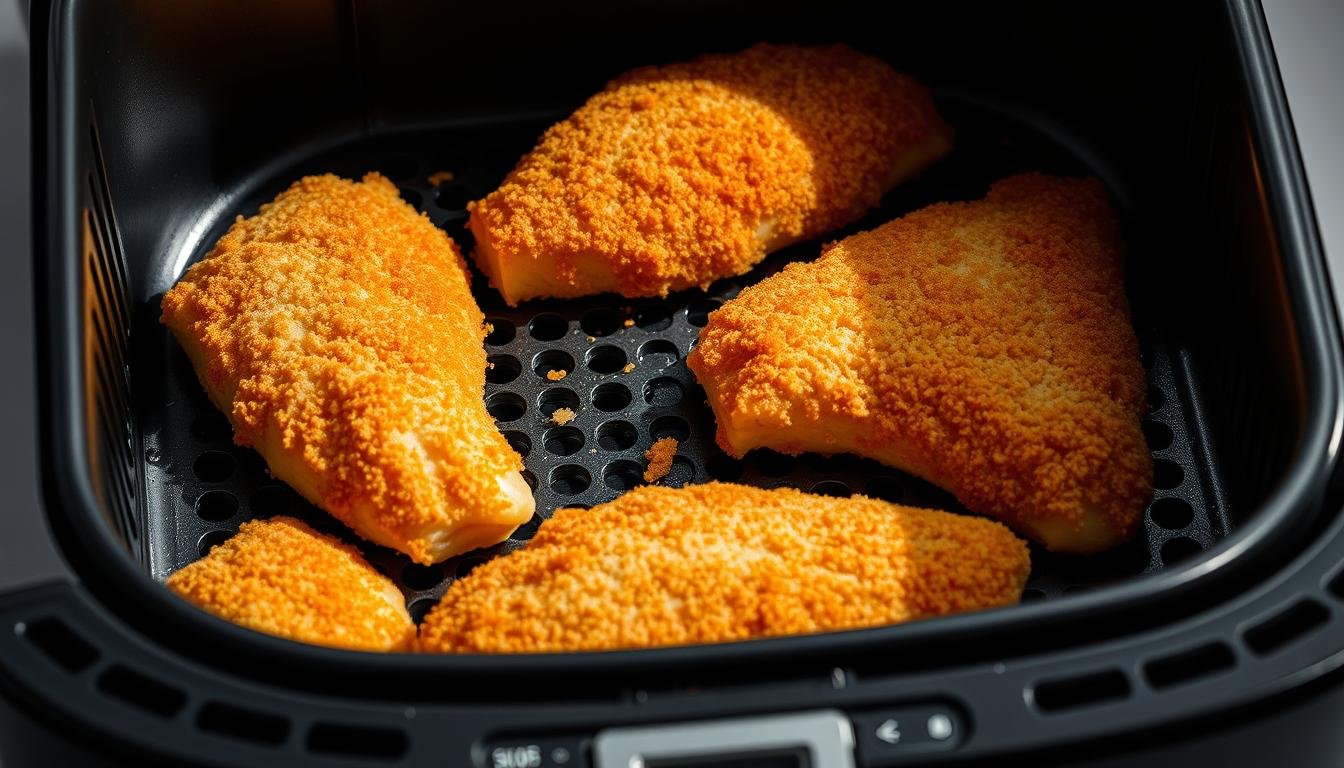
In about 20–25 minutes at 400°F you’ll get crisp outsides and tender centers. We recommend 1-inch cubes from red, Yukon Gold, or russet. No need to peel—just rinse, dry, and soak 30–60 minutes if you can for extra crunch.
Lightly spray with oil and don’t crowd the basket—cook in batches if needed. Shake the basket halfway and again near the end for even browning. A tablespoon of cornstarch helps them really get crispy.
We’ll cover ingredients, timing, and reheating so leftovers pop back to life at 375–400°F for 3–5 minutes. Stick with us and you’ll have a quick, tasty recipe that’s perfect for weeknights and lazy mornings alike.
Key Takeaways
- Ready in 20–25 minutes at 400°F for golden results.
- Use 1-inch cubes of red, Yukon Gold, or russet for best texture.
- Soak, rinse, and dry to boost crispiness; cornstarch adds crunch.
- Avoid overcrowding—shake the basket twice while cooking.
- Reheat in the air fryer 3–5 minutes at 375–400°F for crisp leftovers.
Why You’ll Love These Air Fryer Breakfast Potatoes
We’re smitten with how fast and forgiving these turn out. In roughly 20–25 minutes at 400°F you get that diner-style crisp outside and a tender inside with very little oil. That means less mess and more time for coffee — and that’s a win.
The seasoning game is easy. Use pantry spices to keep things classic or spice it up when the mood strikes. These work great as a hearty side or tucked into tacos and skillet plates.
- Quick: about 20–25 minutes from cube to crisp.
- Hands-off: shake the basket once or twice and you’re set.
- Budget-friendly: everyday spices, big flavor.
- Versatile: reliable recipes that become your go-to when folks are hungry.
We love that these give restaurant-style bite at home. Make them in batches to feed a crowd, keep them warm, and watch everyone dig in. It’s an easy make that keeps mornings calm and plates full.
Ingredients You’ll Need for Crispy Potatoes
Let’s gather the simple, pantry-friendly ingredients that make these crisps sing. We keep things humble—few items, big payoff. Grab what you already have and let’s get to it.

Best tubers to pick
We like Yukon Gold for a creamy middle, russet potatoes for sturdy edges, and red for pretty color. Peel if you want, but leaving skins on saves time and adds texture.
Seasoning essentials
Use garlic or garlic powder, smoked paprika, salt, and pepper as your base. Add onion powder, dried parsley, or rosemary for herb vibes. For heat, a pinch of cayenne does the trick.
Oil options and how much to use
Keep oil modest—about a teaspoon to a tablespoon of olive oil or avocado oil per pound. A light spray in the basket helps prevent sticking and keeps things crisp without excess grease.
“Simple ingredients, smart choices, huge flavor.”
- Cut into 1-inch cubes for even cooking.
- Season generously but sparingly with oil—less is more.
- This is an easy make that feels like weekend comfort.
Essential Equipment and Prep
Before we cook, let’s get the right tools and a hot basket—small steps, big payoff. A quick preheat and tidy prep keep things moving and make every batch crisp and proud.
Size, heat, and avoiding crowding
Preheat to 400°F for 5 minutes. That gives the air fryer basket a good, even heat so cubes hit hot metal and sizzle at once. Lightly spray the basket—just a kiss of oil—to stop sticking and help browning.
Smart prep habits
Don’t pile tubers deep. If they crowd, they steam instead of crisp. Smaller models under 3 quarts need batch cooking. A single, loose layer lets hot air circulate and browns edges while keeping centers tender.
- Shake the basket halfway and again near the end to even things out.
- Use a bowl to toss cubes with oil and spice—seasoning sticks better that way.
- Dry with a lint-free towel after soaking; less surface moisture means faster crisp in less time.
Mind your minutes—hot basket, light spray, and breathing room are the trifecta. Once you learn your fryer basket, you’ll feel like a short-order pro at your own counter.
Step-by-Step: How to Make Breakfast Potatoes in the Air Fryer
Here’s a straight-up, step-by-step plan to get crisp edges and soft centers every time. Preheat the unit to 400°F for 5 minutes so the basket is hot and ready.
Preheat, cube to even sizes, and season properly
Cube to about 1-inch pieces so everything cooks evenly. Toss the cubes with a drizzle of olive, a pinch of salt, smoked paprika, and freshly ground pepper. A teaspoon of oil per cup keeps them glossy without greasing the basket.
Load the basket, shake mid-cook, and finish golden and tender
Spread in a single loose layer. Cook for about 15–25 minutes depending on size and batch. Shake at the ten-minute mark, then again near the end for even browning.
Taste for doneness and adjust minutes to your model
Try one bite at the end. If it’s a bit firm inside, give it another 3–5 minutes. Repeat in batches for large servings—this keeps each round crisp and fresh.
“Hot basket, even cubes, and a little shake make all the difference.”
Breakfast Potatoes Air Fryer: Cooking Time and Temperature
Set your dial to 400°F and let’s talk timing—this is where golden edges happen fast. Preheat for 5 minutes so the basket’s hot and your pieces hit sizzle right away.
Baseline temps and how long to plan
For 1-inch cubes plan about 15–20 minutes. Smaller cubes finish closer to 15 minutes—so keep a watchful eye and taste a piece near the end.
Heavier loads or uneven cuts add time. Cut consistent, cook in batches if you’ve got a heap, and shake at the halfway point to brown evenly.
- We use 400°F because it browns fast without drying the middle.
- Yukon Golds get creamy inside; russets hold firmer—timing stays similar.
- If your unit runs hot, check at 12–14 minutes; lower-watt models may need extra minutes.
“Use flavor and a quick taste test to call it done—soft center, crisp edge.”
Pro Tips to Get Crispy Potatoes Every Time
A tiny routine—soak, dry, and space—gives you that prized crunch every batch.
Soak cubes in cold water for 30–60 minutes to wash away surface starch. Rinse and then dry thoroughly—moisture kills crisping. We mean dry like you mean it.

Mix a teaspoon of cornstarch into your seasoning powder for a thin, shattery shell. Toss just enough oil to coat; too much makes the outside soggy.
Single layer, batch cooking, and shake intervals
Spread in a single layer so hot air moves around each cube in the basket. Shake halfway and again near the end for even color. If you crowd the fryer, do quick batches—it’s worth the extra round.
- Soak 30–60 minutes, rinse, and pat dry.
- Add cornstarch to the spice mix for extra crunch.
- Salt right before cooking, then taste and adjust after.
- Use a hot, preheated air fryer and keep a loose single layer in the basket.
| Step | Why it helps | Quick tip |
|---|---|---|
| Soak & rinse | Removes excess starch for better browning | Cold water, 30–60 min |
| Dry well | Prevents steaming, speeds crisping | Use a clean towel, blot firmly |
| Cornstarch + spice | Creates a light, crisp coating | Mix into powder, toss lightly |
| Single layer & shake | Ensures even browning and texture | Shake at mid-cook and near finish |
“Preheat, dry, and treat each batch like its own little miracle.”
Seasoning Ideas, Variations, and Add-Ins
A few smart flavor combos make these a table favorite. We keep mixes simple so you can riff fast and feed folks happy plates.
Classic diner blend: smoked paprika, garlic or garlic powder, salt, and pepper. Sprinkle dried parsley or rosemary if you want that Sunday-brunch aroma.
Spicy upgrades


For heat, add a pinch of cayenne or chili powder to the mix. Finish with a drizzle of hot sauce on top for an extra kick that wakes up the plate.
Veggie boosters
Toss in diced onion and chopped green bell for color and sweetness. Scallions folded in after cooking give a fresh, bright bite.
Finishing touches
A whisper of olive oil helps seasoning cling and browns edges. Top with melty cheese, crisp bacon pieces, or fresh herbs for indulgence.
- Try steak seasoning when you want a bolder route—works great in breakfast tacos and burritos.
- Keep a teaspoon handy to measure spices, then tweak to taste—your house, your rules.
“Seasoning is where your batch really finds its voice.”
Serving Suggestions: Build a Full Breakfast Plate
Build a hearty morning plate by pairing these crisp bites with eggs and bold sides. We like to keep things simple and tasty—serve them right out of the air fryer for best texture.

Eggs every way: fried with crispy edges, soft-scrambled, gentle poached, or folded into a frittata. Each way brings a new texture and keeps folks smiling.
Turn ’em into tacos or burritos. Add diced onion and a few bell strips, fold in cooked eggs, and top with salsa. They also make a lovely side to bacon or sausage for a diner-style plate.
- Slide under a shakshuka or next to a ham-and-cheese frittata for color and comfort.
- Keep plates warm so the crunch stays—hold finished trays in a low oven when batch-cooking.
- Set toppings out family-style—cheese, herbs, and hot sauce—so folks dress their own.
| Dish | Best Pairing | Quick Tip |
|---|---|---|
| Fried eggs | Herbed cubes | Serve hot, sprinkle salt last |
| Tacos / Burritos | Onion + bell + salsa | Warm tortillas, fold tight |
| Hearty side plate | Bacon or sausage | Hold in 200°F oven |
“However you serve ’em, this is the way to hush the table—just a minute—before forks start flying.”
Storage and Reheating Without Losing Crunch
Leftovers can be just as good as the first round—if you reheat them right. Cool the batch completely, then tuck ’em into an airtight container. Refrigerate up to five days and keep plain until reheating.
When you’re ready, we like to re-crisp in the air fryer. Set it to 375–380°F and heat about 3 minutes. For extra snap, bump to 400°F for 3–5 minutes. Lightly spray the basket so nothing sticks and edges brown fast.
- Skip the microwave—steam kills crunch faster than you can say “yum.”
- Reheat only what you’ll eat—repeat trips add dryness and sap fat.
- Store plain; add cheese or bacon after reheating so toppings stay lively.
| Storage | Reheat Temp | Reheat Time |
|---|---|---|
| Airtight container, fridge | 375–380°F (gentle) | About 3 minutes |
| Up to 5 days | 400°F (for quick crisp) | 3–5 minutes |
| Do not microwave | Light spray basket | Let breathe 1 min before covering |
“Cool, store, and re-crisp—then serve as a proud side that tastes fresh-cooked.”
Nutrition Notes and Potato Choices
A few simple swaps and portion smarts make this plate kinder to your waistline and your taste buds. Keep servings in check and add protein so the meal holds you through the morning.
Fiber, iron, and lower-oil swaps
Potatoes bring natural fiber and some iron. Leave the skins on when you can—that boosts fiber and vitamin C while trimming prep time.

Cooking in an air fryer uses far less fat than pan-frying. A teaspoon of olive oil goes a long way to brown and flavor without heavy grease.
- Pick your tuber: yukon gold for creamy middles, russet for sturdy edges, red for color and tender bite.
- Balance the plate with protein—eggs or beans—to keep you full longer.
- Season with herbs and spices instead of piling on salt; salt lightly, taste, then finish with a pinch.
- Portion: about one cup per person is a hearty serving—add peppers and onions for bulk and color.
“Small choices—less oil, smart portions, and a bit of protein—make a big difference.”
Troubleshooting: Fixing Soggy or Uneven Potatoes
If your batch comes out limp or patchy, don’t sweat it—we’ve got fixes that work fast. These tips target cut size, moisture, and timing so your next run turns golden.
Cut size, moisture control, and salt timing
Aim for even 1-inch cubes. Mixed pieces mean mixed doneness. If you salted and let sit, that salt pulled moisture out and softened the crust.
Soak, rinse, then dry well. Wet surfaces steam and go soggy. Next time, try a teaspoon of cornstarch mixed into the spice blend for extra crunch.
Basket load, wattage, and timing fixes
Don’t crowd the air fryer basket or the fryer basket—give each cube room. Overcrowding traps steam and ruins crisp.
Units vary. Lower-watt models need extra minutes. Hotter machines brown faster—check early. Shake the basket midway and near the end.
- If a few pieces lag, pull the done ones and give stragglers a couple more minutes.
- Add diced onion late so it doesn’t scorch; season with garlic, pepper, or a little powder after tasting instead of over-salting.
“Fix the cut, dry well, space the load—and you’ll be back to golden in no time.”
Conclusion
One last note: a hot basket, steady shakes, and good timing turn humble tubers into a favorite side. Keep 400°F as your north star and plan about 15–20 minutes for 1-inch cubes.
Choose Yukon Gold for creamy middles or russet potatoes for sturdy edges. Toss with a splash of olive, season simply, and top with herbs, cheese, or bacon to match your mood.
We’ll say it plain—this air fryer method makes quick, reliable breakfast potatoes. Store leftovers up to five days and re-crisp in a few minutes at 375–400°F. Now go on, fire up that fryer breakfast and enjoy—these recipes make mornings easy, tasty, and full of chatter.