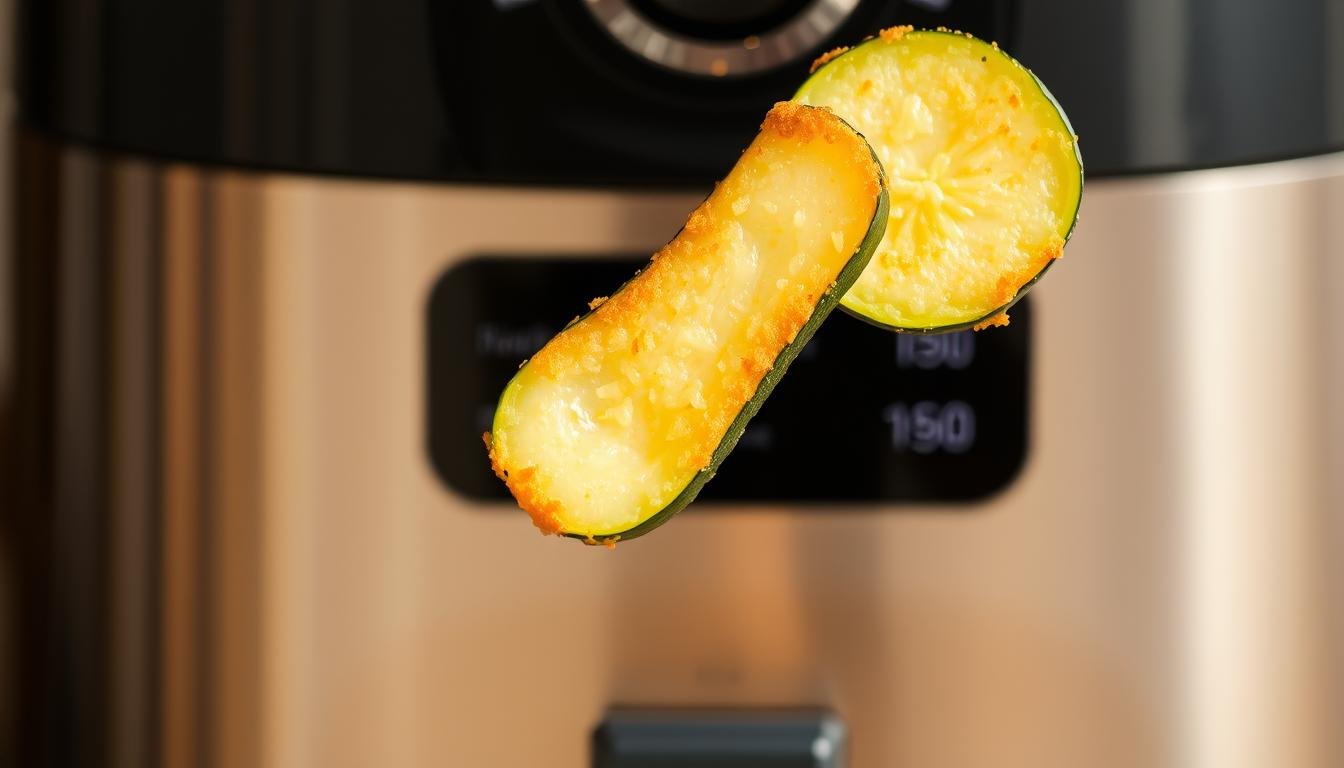
We’re making crisp-edged, tender-middle veg—no fuss, just big flavor. This quick recipe gets supper on the table fast. Cut size guides mean 7–15 minutes total: 380°F for rounds or cubes, 400°F for chunkier pieces. Keep things single-layer and give the basket a shake halfway for even browning.
We keep seasoning simple—oil, salt, pepper, and pantry spices. A sprinkle of parmesan or a squeeze of lemon turns this humble side dish into a whoa, y’all! moment. Want a twist? Make them like zucchini fries or add a little heat for bold flavor.
This dish fits weeknight dinners, meal prep, or snack plates. It pairs with chicken, steak, or pork and plays nice with most mains. We’ll walk you through cuts, timing, and tips so your fryer does the heavy lifting while you kick back.
Key Takeaways
- Cook time: about 7–15 minutes depending on cut size.
- 380°F for rounds/cubes; 400°F for 1-inch pieces.
- Use a single layer and shake halfway for even browning.
- Simple oil, salt, pepper—finish with parmesan or lemon.
- Versatile side dish that pairs with many proteins.
Why You’ll Love This Air Fryer Side Dish
This quick side turns humble squash into a golden, craveable bite in mere minutes. We toss slices with a touch of oil, salt, and favorite spices, then let hot air do the work. Results are reliable, fast, and fuss-free.
Crispy edges, tender centers in minutes
You get those crave-worthy brown edges with soft middles — done in minutes, not ages. A single-layer basket and a quick shake halfway give even browning and repeatable results.
Low carb, gluten-free, keto-friendly
Light on calories, heavy on taste. This vegetarian side fits gluten-free and keto plans naturally. Keep it simple or finish with a dusting of cheese and a squeeze of lemon for extra zing.
- No breading needed: just squash, salt, garlic, and hot circulating air for crisp texture.
- Scales easily: cook for a crowd or a single plate — just don’t crowd the basket.
- Meal-prep friendly: reheat a few minutes to revive the crisp.
| Benefit | Time | Diet Fit |
|---|---|---|
| Crisp outside, tender inside | 7–15 minutes | Vegetarian, gluten-free |
| Low oil, big flavor | Quick side | Keto-friendly option |
| Easy to scale | Batch cook | Family-ready |
What You Need: Ingredients at a Glance
One short shopping trip and a single bowl do most of the work. Gather the basics and a few pantry boosters and you’ll be set for a fast, tasty side.

Zucchini, olive oil, salt, pepper
Typical mix: 2 medium zucchini (about 1–1.5 lb), 1–2 tablespoons olive oil, a pinch of kosher salt, and black pepper to taste. Toss in a big bowl so everything gets an even coat.
Flavor boosters: garlic powder, onion powder, oregano, red pepper flakes, lemon
Keep the spice drawer handy—use 1/2 teaspoon each garlic powder and onion powder, 1/2 teaspoon oregano, and a light pinch of red pepper flakes for heat. A squeeze of lemon brightens every bite.
Optional finish: parmesan cheese for savory depth
Want extra umami? Finish with grated parmesan cheese—bottled or freshly shredded both work great. Prefer dairy-free? Skip the cheese and up the herbs and lemon.
- Keep it simple: veg, a drizzle of oil, salt, and pepper—budget-friendly and wholesome.
- Olive oil helps: it helps seasonings stick and gives those golden edges without heavy oil baths.
- Measure salt: too much draws moisture early—keep it light for best texture.
How to Cut Zucchini for Even Air Frying
Pick a shape that suits your mood: crisp coins, hearty chunks, or quick half-moons. The right cut makes the whole recipe cook evenly and taste better.
Chunked cubes, half-moons, or rounds
Options: 1/2-inch slices then quartered into cubes, half-moons, 1/4-inch rounds, 3/4″ chunks, or 1-inch pieces. Cubes give extra surface for seasoning to cling to and make for big flavor in every bite.
Uniform size for consistent browning
Aim for pieces that match each other. When pieces share size they finish in the same minutes and none come out rubbery or raw.
- Trim the ends and halve lengthwise for easy half-moons or slice into coin-style rounds.
- Thicker 3/4″–1″ pieces need about 12–15 minutes at 380°F; smaller chunks take 7–10 minutes at 400°F.
- Keep the peel on for texture and shape—trust us, it helps.
- If sizes vary, cook in separate batches so each batch browns evenly.
“Small knife work pays off—the more consistent the cut zucchini, the better the browning.”
| Cut Style | Typical Size | Cook Time (minutes) | Finish Tip |
|---|---|---|---|
| Coins | 1/4″ | 7–10 | Extra crisp—serve hot with grated cheese |
| Half-moons | 1/2″ | 8–12 | Great tossed with herbs |
| Chunks / Cubes | 3/4″–1″ | 12–15 | Hold shape—season well |
Step-by-Step: zucchini in air fryer no breading
We’ll guide you from bowl to basket so your batch comes out hot, seasoned, and picture-perfect. Follow these simple steps for a fast, reliable recipe that gets dinner done and makes folks smile.

Prep and season
Trim and cut to uniform pieces. Toss the pieces in a bowl with 1–2 tablespoons of oil, a pinch of salt, pepper, and garlic powder. Make sure every nook gets coated—seasoning sticks better when oil is even.
Preheat and load
Preheat air fryer to 380–400°F so hot air hits immediately. Place zucchini pieces in the basket in a single layer. Leave space between pieces to brown rather than steam.
Shake halfway and finish
Air fry at 380–400°F and shake the basket once about halfway through cooking. Start checking at 7 minutes. Most batches finish between 8–12 minutes.
For al dente pull at ~10 minutes. Want extra browning? Let it go a minute or two more.
- Sprinkle cheese the moment they come out—melts into those crisp edges.
- Work in batches if needed; crowding equals soggy results.
- Keep seasonings simple or add herbs and a pinch of heat.
| Step | Temp | Time Range | Tip |
|---|---|---|---|
| Prep & toss | — | 2–3 minutes | Even pieces, coat with oil and seasoning |
| Preheat & load | 380–400°F | — | Single layer in the basket |
| Cook & shake | 380–400°F | 7–15 minutes | Shake halfway; check at 7 minutes |
“A quick toss, a hot basket, and a shake—y’all, that’s the trick.”
Time and Temperature: Preheat Air Fryer, Then Cook
A hot start makes all the difference; preheat and you’ll shave minutes off cook time. We like a quick preheat so pieces hit a searing basket and brown fast.
- Smaller pieces: 400°F for about 7–10 minutes—check at 7 minutes.
- Chunks/rounds: 380°F for roughly 12–15 minutes for a meaty bite.
- Shake the basket halfway—this evens browning and speeds cooking.
Pull earlier for an al dente bite. Let it run a minute or two longer if you want extra crisp edges.
Watch out for overcrowding—too many pieces raise the minutes and steam the veg. Cook in single layers or small batches so each piece gets direct hot air and a nice sear.
| Cut Size | Temp | Time (minutes) | Tip |
|---|---|---|---|
| Small pieces | 400°F | 7–10 | Check at 7; shake halfway |
| Chunks / rounds | 380°F | 12–15 | Thicker cut = deeper browning, keep an eye |
| Mixed sizes | — | Adjust by batch | Cook similar sizes together for consistent results |
“Preheat, set the clock, and don’t crowd the basket—that’s how you get golden, not soggy.”
Pro Tips for Maximum Crisp Without Breading
A few tiny habits turn a soggy pan of veg into crispy, golden bites every time. These tricks are quick and kind to your time—do them and you’ll see the difference in minutes.

Salt briefly, then dry. Sprinkle a little salt and let it sit for a few minutes. Pat pieces dry with paper towels. That pulls off extra moisture and helps browning.
Keep space and heat working
Preheat air so the basket is hot. A hot start gives immediate sear and better color.
Use a single thin layer in the air fryer basket. Crowding makes steam—not crisp—so cook in batches if needed.
Oil, shake, and finish
Use a light mist of oil—just enough for spices to cling and for edges to brown. Shake or stir halfway so all sides get direct heat.
Finish with a small dusting of cheese after cooking for extra savory snap. If you use a fryer basket liner, pick a perforated one so hot air still flows.
“Work smart, not hard—these tiny tweaks make your results restaurant-good.”
| Tip | Why it helps | How to do it |
|---|---|---|
| Salt & dry | Removes surface moisture | Sprinkle, wait 3–5 minutes, pat dry |
| Single layer | Allows hot air contact | Spread pieces; cook extra batches |
| Light oil mist | Helps seasoning stick & brown | Spray or brush sparingly before cooking |
Seasoning Ideas and Easy Variations
A handful of spices turns plain pieces into something folks fight over at the table. Tossed with a whisper of olive oil, these mixes toast up quick and shine bright on the plate.
Want classic comfort? Go Italian—sprinkle garlic powder, onion powder, and oregano. Add a touch of salt and black pepper and you’ve got a cozy, kid-approved crowd pleaser.
Spicy kick
Crave heat? Mix smoked paprika with cayenne or red chili flakes for smoky, lively flavor. Use sparingly—start light and build to taste.
Finish and swaps
Finish hot pieces with grated parmesan or parmesan cheese for that melty, savory blanket. Prefer a punchier route? Swap in Ranch or Cajun seasoning for bold, one-bowl personality.
- Toss with oil: a thin coat of oil helps spices cling and toast under hot air.
- Brighten: a squeeze of lemon and a crack of black pepper wakes everything up.
- Mix & match: split a batch—half herby, half spicy—for two recipes at once.
- Garnish: fresh parsley or basil adds garden-fresh vibes at the end.
“Keep salt balanced—especially if your seasoning blends already pack sodium.”
| Variation | Main Spices | Finish |
|---|---|---|
| Classic Italian | Garlic powder, onion powder, oregano | Lemon, black pepper |
| Spicy Smoky | Smoked paprika, cayenne or red chili flakes | Parsley or a squeeze of lemon |
| Swap Bold | Ranch mix or Cajun seasoning | Parmesan cheese or fresh herbs |
Serving Suggestions: Make It a Meal-Ready Side
Serve these hot and they’ll steal the show beside any simple protein. This dish works as a true side or a snack—flexible and friendly for weeknights.


Pair it with juicy chicken breast, speedy steak bites, or classic pork chops for an easy plate. Keep the veg warm and serve right away so those crisp edges stay crisp.
Pairings
- Make a full plate—serve alongside chicken breast, steak bites, or pork chops.
- Tuck leftovers into grain bowls, omelets, or toss with hot pasta and cheese for a quick fix.
- Add to flatbreads or pizzas for a fast veggie topping that cooks well with other proteins.
Dips and Garnishes
- Keep it snacky: garlic yogurt, ranch, or marinara make great dippers.
- Garnish with lemon, fresh herbs, and a sprinkle of parmesan for a bright finish.
- Drizzle a little oil and crack fresh pepper at the table for shine and warmth.
Serve immediately—those first few minutes are pure magic.
Storage and Reheating
Store smart and you’ll get fresh-tasting leftovers all week long. Let the pieces cool a bit before packing—hot food steams and that ruins the texture.
Pop cooled pieces into an airtight container and line the bottom with a paper towel. That towel soaks up extra moisture and keeps bites perky. Store in the fridge for 3–4 days.
Best reheat: preheat air to 350–400°F, then rewarm in the air fryer for 2–5 minutes. Spread items in a single layer so hot air hits every side. Keep an eye on the clock—just a few minutes revives crisp edges.
- Skip the microwave if you want bite—it softens the veg fast.
- If things look dry, dot a little oil before reheating.
- Re-season after reheating—salt, lemon, or a pinch of garlic brightens the plate.
| Storage | Reheat | Best for |
|---|---|---|
| Airtight container, paper towel | Preheat air 350–400°F; 2–5 minutes | Meal-prep, quick sides |
| Refrigerate 3–4 days | Single layer in the air fryer | Keeps crisp edges |
| Do not freeze | Re-season after warming | Preserves texture and flavor |
“Freezing’s a no-go—high-water veg thaw mushy and won’t crisp back up.”
Nutrition Notes and Dietary Fit
This side keeps calories low and flavor high—perfect for quick weeknight plates.
Light and crisp, this veg is a low-calorie, low-carb choice. It fills a plate without heavy fats or long cook times.
Low calorie, low carb vegetable side
Small tweaks make it meal-worthy. One serving gives volume and fiber for few calories. That means you can eat more and still stay on track.
Vegetarian, gluten-free, keto-friendly options
We keep it simple so the dish suits many plans. Skip cheese or swap a plant-based option for a vegan finish.
- Light and filling: great volume for few calories.
- Low carb: fits keto without extra breading.
- Diet flexible: vegetarian and gluten-free by default.
- Flavor tips: add garlic, pepper, lemon, or herbs for punchy seasoning.
- Balance it: add a little protein on the plate for a full meal.
“Crisp, fast, and versatile—this air fryer zucchini keeps dinner light and happy.”
| Feature | Benefit | Quick note |
|---|---|---|
| Calories | Low | Good for volume eating |
| Diet fit | Veg, gluten-free, keto-friendly | Skip cheese for vegan |
| Cook time | Short | Tasteful in minutes |
Equipment and Setup
Good kit and a clean basket are the secret to golden, speedy results. We want you to get crisp edges and tender centers with the least fuss. Start smart and your batch will behave.
Air fryer and fryer basket basics
Size matters. Use a 4–6 quart unit for family-size batches so you don’t crowd the pieces. An Instant Vortex Plus 6-quart gave us 7–9 minute browning at 400°F for 1-inch pieces—yep, that quick.
Keep the fryer basket clean and dry. A wet basket steals crisp and invites steam. Preheat the machine so the basket surface sears fast and makes golden edges.
- Single thin layer cooks best—two layers only if your model moves air aggressively.
- Shake or stir halfway so every side sees hot spots.
- Use a perforated liner if you must—air still needs to whoosh around.
- Spritz oil from a spray bottle for light, even coverage; use tongs to spread pieces before cooking.
- Keep a little cheese handy—finish while hot for melty goodness.
| Item | Why it helps | Quick tip |
|---|---|---|
| 4–6 quart unit | Family batch without crowding | Cook in one or two small batches |
| Dry fryer basket | Prevents steam, boosts crisp | Wipe after washing; preheat empty |
| Perforated liner | Keeps food from sticking, keeps air flow | Use only perforated types |
“Note your model—some run hotter and finish faster. Adjust minutes and temp as you go.”
Troubleshooting: Soggy, Uneven, or Underdone
When your batch comes out limp or patchy, a few simple fixes usually get it right. We’ve seen the usual suspects—crowding, extra moisture, and time quirks from different machines. Take a breath and try these quick steps.
Fix crowding and moisture issues
Soggy? You likely crowded the basket—place zucchini in a single layer so hot air can circulate. Cook in batches for best browning.
Still wet? Salt briefly and pat dry in a clean bowl before cooking. Excess water is the crisp-killer, y’all.
Adjust time for different models
Different units run hotter or cooler. Start checking at the early end of the time minutes range and jot down what works for your machine. Shake the basket once halfway so all sides color up.
- Uneven browning? Cut zucchini uniformly and shake halfway.
- Underdone centers? Add a couple minutes or use slightly larger pieces to avoid mush.
- Too soft? Reduce time, raise temp a touch, and don’t overload the fryer basket.
- Bland? Season before and finish after cooking—layering seasoning and a fresh grind of pepper helps.
| Problem | Likely Cause | Quick Fix |
|---|---|---|
| Soggy | Crowded basket | Single layer; cook extra batches |
| Wet surface | Too much moisture | Salt, rest briefly, pat dry in bowl |
| Uneven color | Mixed sizes | Cut zucchini uniformly; shake halfway |
“A quick toss in the bowl before cooking helps coat edges evenly for better browning.”
If you’re batch-cooking, rewarm all batches together for 1–2 minutes so everything serves hot. Keep notes on the exact minutes and time that work for your device — you’ll nail it next round.
Print, Save, and Cook: Grab the Recipe Card
Grab the card, hit print, and tuck this recipe where you can reach it on a busy weeknight. We made the card short and sweet so you can jump right to prep and cooking.
Prep time, cook time, servings, and swaps
Prep time: about 5 minutes.
Cook time: 7–15 minutes depending on cut and your air fryer model.
- Serves: 4 as a side — scale up but don’t crowd the basket.
- Ingredient swaps: use avocado oil for olive, try Italian seasoning for oregano, or add red pepper flakes and lemon for heat and brightness.
- Keep cheese optional — parmesan is lovely, or skip for dairy-free.
- Quick boost: a little garlic and a squeeze of lemon lifts the whole plate.
| Item | Time | Note |
|---|---|---|
| Prep | ~5 minutes | Trim and slice uniformly |
| Cook | 7–15 minutes | Check at early minutes for doneness |
| Serves | 4 | Scale but avoid crowding |
Tap print and keep this recipe card handy — your future self will thank you on busy nights.
Conclusion
,
Fast, flexible, and forgiving — that’s how we like our weeknight sides. We did it, y’all: simple fryer zucchini with big flavor and no fuss, ready in about 7–15 minutes. A light drizzle of olive oil, a shake of garlic powder and pepper, and you’ve got a side dish that steals the show.
Keep the seasoning loose—Italian, spicy, or lemony all work. Jot your best time for your model so you nail the finish next round. Store leftovers in an airtight container for 3–4 days and reheat quickly in your air fryer for best texture.
Cheese fans, finish with parmesan for a savory sparkle. Craving a different vibe later? Try zucchini fries for a fun cut. Thanks for cooking with us—see you for more air fryer recipes and easy weeknight dishes. Happy cooking, friends!