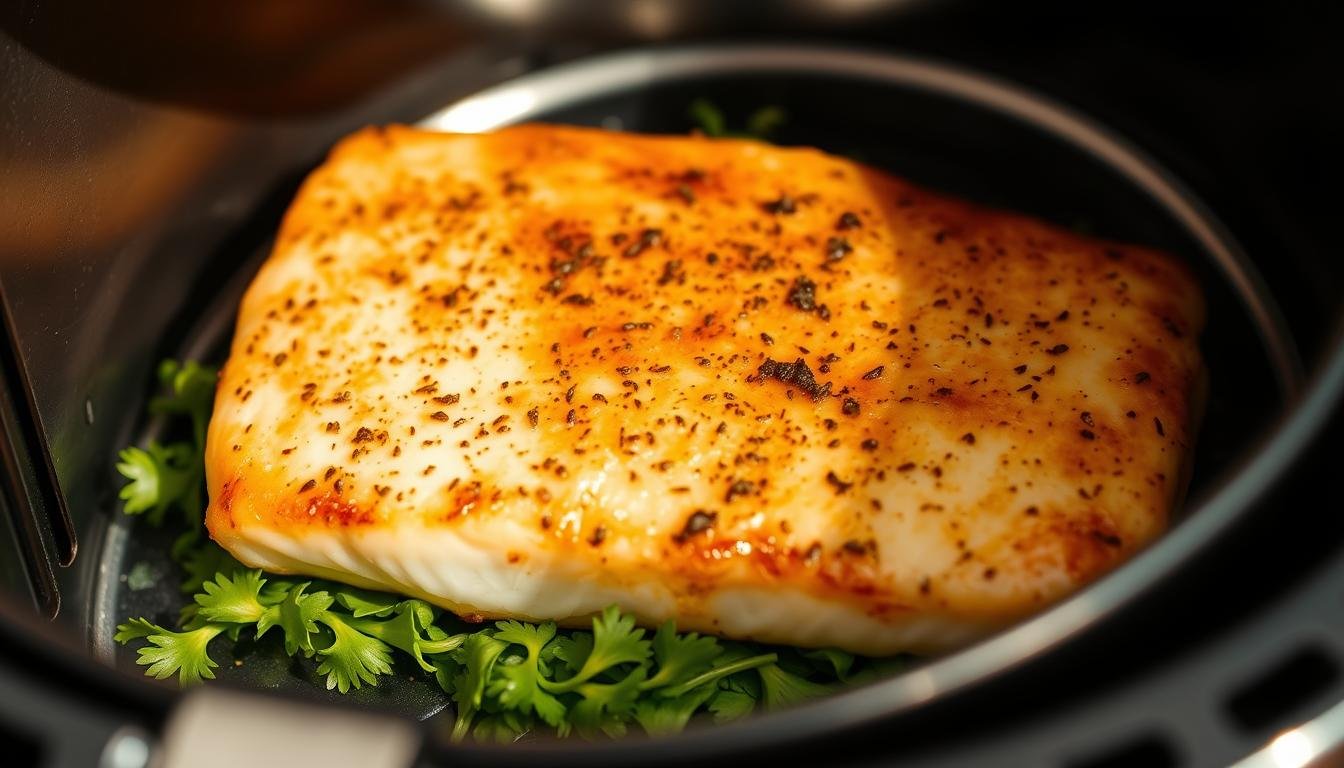
We’re kickin’ things off with a quick, dependable mahi mahi recipe that gets dinner on the table in minutes. This mahi mahi air fryer approach gives you a crisp outside and a tender, flaky center—no fuss, no guesswork.
We’ll show you the sweet spot for temp and time so you get consistent results. A high heat for about 8–10 minutes usually does the trick for standard fillets. Use a digital thermometer and look for a 145°F center and flakes that separate easily.
We’ll also share simple seasoning swaps—butter vs. oil, Cajun or lemon-garlic twists—and tips for fresh or frozen fillets. Little moves like patting the fish dry help keep that crust browned while the inside stays juicy.
Key Takeaways
- High heat and short time yield crisp, juicy fish every time.
- Use a thermometer to hit 145°F for safe doneness.
- Pat fillets dry and choose butter or oil for best browning.
- Season freely—Cajun, lemon-garlic, or Old Bay all work.
- Store leftovers 3 days in the fridge or freeze up to 3 months.
Why the Air Fryer Shines for Mahi Mahi
Hot, moving air is the secret that turns a plain fillet into a flaky, lightly crisp dinner in minutes. We love how consistent heat circulation means even cooking from edge to center. That makes it easier to avoid dry spots or burnt edges.
Quick weeknight wins: Most fillets finish in about 8–10 minutes. That short cook time gives you fast meals without sacrificing texture or flavor.
- Hot air moves all around the basket—your fish flakes nicely without charred edges.
- It’s easier to check doneness—no wrestling a skillet or fussin’ with a grill.
- Less oil needed, so you get big flavor with a lighter touch.
- Consistent timing helps you multitask—set it and finish a quick side while the fillets cook.
For home cooks, this is a forgiving way to cook seafood. We get tender, juicy protein that takes on spices like a charm—perfect for busy nights and simple recipes that still feel special.
mahi mahi air fryer: What You’ll Need
Good prep starts with a short shopping list and the right tools—nothing fancy, promise. We keep this simple so you can pull a weeknight winner together in minutes.

Ingredients
Keep it basic: mahi mahi fillets, melted butter or olive oil, lemon, garlic, paprika, kosher salt, and freshly ground pepper. Use garlic powder if you like a finer blend. Cajun or blackening spice is a great option for a bolder route.
Equipment
Grab an air fryer basket or fryer basket, paper towels, a small bowl to mix the spice, and a fork to check flakes. A digital thermometer takes the guesswork out—145°F is the target for safe, flaky fish.
“Pat the fillets dry—this small step helps oil and spice stick and gives you better browning.”
- Tip: thaw frozen mahi before seasoning for even cooking.
- Store leftovers in an airtight container to keep them fresh for reheating.
Prep Like a Pro: Dry, Season, and Load the Basket
A little prep work turns simple fillets into a dinner that tastes like you fussed all day. We keep this quick—five minutes and you’re set. Drying and smart layering of spice make a huge difference.
Pat dry and manage skin-on vs skin-off
First things first: pat each fillet bone-dry with paper towels so the crust browns instead of steaming. If you leave the skin on, you can peel it after cooking. Either way, dryness helps browning and even cook time.
Brush with melted butter or olive oil
Brush a thin slick of melted butter for richness or use a light brush of oil for clean browning. Don’t overdo it—just enough to help seasoning cling and edges crisp in the air fryer.
Layer spices for balanced flavor
Mix salt, pepper, garlic, and paprika in a small bowl so the blend is even. Sprinkle a gentle layer across the top—we want to taste the fish, not only the spice.
- Keep fillets similar thickness—thicker pieces may need an extra minute.
- Don’t crowd the basket; let hot air circulate for even crisp.
- If going bold, spread the spice mix from end to end for uniform color and flavor.
| Prep Step | Why It Matters | Quick Tip |
|---|---|---|
| Pat Dry | Prevents steaming, improves browning | Use paper towels; press gently |
| Light Oil/Butter | Boosts flavor and crust | Brush thinly—no puddles |
| Even Seasoning | Balanced taste, uniform cook | Mix in a bowl first |
Air Fry Step-by-Step: From Basket to Plate in Minutes
Let’s walk the fillets from basket to plate with a few simple steps that make dinner sing. This approach keeps things fast and predictable—perfect for weeknights.
Temperature & timing: Preheat if your unit runs cool. Set 380°F for most fillets and plan 8–10 minutes. Thicker pieces may do better at 400°F for about 10 minutes—watch that clock.
Give the basket room
Lay fillets in a single layer in the air fryer basket or fryer basket. Don’t crowd them—blocked air means soggy edges.
Check doneness the simple way
Start checking at 8 minutes. Use a fork to see if the fish flakes easily and the center looks opaque from edge to edge.
Use tools for confidence
Keep a digital thermometer handy. Pull fillets when the thickest spot hits 145°F for safe, juicy results.
- Spritz a little oil for extra browning—no puddles.
- Flip only if your unit cooks unevenly; otherwise one side usually crisps nicely.
- Work in batches rather than crowding the fryer mahi mahi—better texture every time.
| Step | What to Do | Why It Matters |
|---|---|---|
| Preheat | Set 380–400°F depending on thickness | Consistent temp shortens total time; promotes even browning |
| Space Fillets | Single layer in the air fryer basket | Allows moving hot air to crisp all sides |
| Check at 8 Minutes | Use fork test + thermometer | Prevents overcooking; ensures flaky, opaque center |
Time and Temperature Guide for Consistent Results
A little heat math goes a long way — here’s how to set temp and time for steady results. We’ll keep it simple so you get flaky, browned fillets without the guesswork.
380–400°F baseline: when to choose each
Choose 380°F for gentle cooking and more forgiving minutes — great for thinner pieces. Go 400°F when you want deeper color and a firmer edge. Watch the clock at higher heat so the center stays moist.
Cook time ranges: 8–10 minutes fresh
Most fresh fillets finish in 8–10 minutes. Thickness rules here — start checking at 8 minutes with a fork. If the outside is brown but center is shy, lower temp a smidge and add a minute.
Internal temperature targets and safe serving
Use a thermometer at the thickest spot. 145°F is the safe serving temp. Some cooks pull at 135–140°F and let carryover finish for silkier texture. Always look for opaque flesh that flakes easily.
- Brush a tiny amount of oil so paprika or garlic powder blooms and colors nicely.
- Keep fillets similar in size for even time — don’t mix thick and thin pieces.
- Note your machine’s quirks on your phone — those small tips save you next time.
| Setting | When to Use | Quick Result |
|---|---|---|
| 380°F / 8–10 minutes | Thinner fillets; forgiving cook | Evenly cooked, tender center |
| 400°F / ~10 minutes | Thicker pieces; crisp edge desired | Deeper browning, firmer crust |
| Pull at 135–140°F | Want silkier, slightly underdone finish | Carryover raises to safe temp; moister texture |
| Target 145°F | Food-safety finish | Opaque, flaky, safe to serve |
Seasoning Ideas: Cajun, Lemon-Garlic, and Old Bay
Seasoning changes everything—here are quick mixes that bring big flavor in minutes. We’ll show easy blends that suit bold eaters and the picky kiddos alike.

Blackened spice route for bold flavor
Cravin’ bold? Brush fillets with melted butter, dust with Cajun or blackening spice, and let that crust toast under hot air for a smoky bite.
Classic garlic, paprika, and pepper rub
Mix paprika, garlic powder, salt, and pepper in a small bowl. Rub a thin layer over both sides so each bite tastes even and bright.
Add a squeeze of lemon to finish
Finish with fresh lemon juice after cooking. That bright squeeze balances warm spices and lifts the whole plate.
Panko crunch option for a breaded finish
For extra crunch, fold your seasoning into panko crumbs. Press the mix onto the fillet, spritz lightly with oil, and air fryer until golden.
- Dial heat with cayenne if you like it spicy.
- Old Bay is a simple swap for classic seafood flavor.
- Layer seasoning thinly—no clumps, better browning.
| Style | Key Ingredients | Quick Tip |
|---|---|---|
| Blackened | Cajun spice, butter | Brush butter first; dust generously |
| Classic Rub | Paprika, garlic powder, salt, pepper | Mix in bowl; apply thin, even layer |
| Panko Crunch | Panko, seasonings, light oil spray | Press crumbs on; spray then cook until golden |
Fresh vs Frozen Mahi Mahi: Thawing and Cooking Tips


Whether you start thawed or straight from the freezer, timing and moisture make or break dinner. Quick thaw keeps texture friendly and seasoning happy. Seal fillets in a bag and submerge in cold water for 20–30 minutes, swapping water if it gets warm.
Many cooks prefer thawed fillets—seasoning and panko cling better and cook time stays predictable. Pat each piece dry before you add oil, salt, or powder so the coating hangs on.
If you must cook from frozen, plan for extra minutes. Expect about 15–18 minutes total at 400°F for standard frozen mahi mahi—add 10–12 more minutes compared to thawed pieces and check often.
- Fast thaw: bag and dunk 20–30 minutes.
- Pat dry after thawing to help oil and spices stick.
- Salt lightly before breading, then pat again for better adhesion.
- If coating slips, chill the fillets 10 minutes before you air fry.
Serving Ideas: Sides, Tacos, and Bowls
Let’s build plates that highlight the fish—bright, crunchy, and downright tasty. We keep it simple so you can turn those golden fillets into a full meal fast. Mix and match sides, starches, and a quick sauce and you’re good to go.

Veggie sides
Make it colorful. Try air fryer roasted broccoli or green beans for crunch. A crisp salad brings freshness and cuts the richness. These veggies take minutes and pair perfectly with the flakes.
Starches to add comfort
Jasmine rice, potato wedges, or a fluffy baked potato fill plates and bellies. These simple starches round out the meal and soak up a little lemon butter or sauce.
Taco night
Taco night is easy—flake the fillets, pile into warm tortillas with slaw, lime, and a pinch of pepper. Leftovers shine in tacos; add black beans or roasted corn for extra protein and color.
Simple dipping sauces
Whip a quick sauce in minutes: mayo, lemon, a touch of garlic, and chopped herbs. Tartar, lemon-garlic yogurt, or a mayo-herb dip all play nice. Keep flavors bright so the fish still sings.
“We love turning leftovers into bowls—rice or greens on the bottom, fish on top, drizzle with sauce and call it dinner.”
- Make it a meal: air-fried broccoli or a salad + starch.
- Tacos: flake fillets, slaw, lime, pepper.
- Bowls: rice, greens, fish, sauce—easy and portable.
Storage, Reheating, and Meal Prep
Leftovers make weeknights easy—store them right and you’ll have dinner in minutes. Cool fillets to room temp, then tuck them into an airtight container. The fridge will keep cooked fish fresh for up to 3 days.
For longer keeps: wrap pieces tightly and freeze. Properly wrapped fillets hold quality for 2–3 months. Use a layer of paper or parchment between pieces so they don’t stick.
Reheating the right way
We like the air fryer for reheating—preheat to 350–400°F and warm fillets 2–4 minutes until just hot. That restores crisp without overcooking. If the fish looks dry, brush a whisper of oil before warming.
Smart meal-prep tips
- Portion fillets with veg and rice for grab-and-go lunches.
- Label each container with the date so you know the time window.
- Keep sauces separate—add them after reheating to keep flavors bright.
- Avoid the microwave when you can; it toughens delicate fish fast.
| Storage | Temp / Time | Tip |
|---|---|---|
| Refrigerate | Up to 3 days | Use an airtight container |
| Freeze | 2–3 months | Wrap tightly; separate with paper |
| Reheat | 350–400°F, 2–4 minutes | Brush a little oil if dry; pull when warm |
Pro Tips and Common Mistakes to Avoid
A few smart habits will save you from common mistakes and deliver flaky, golden fillets every time. We keep these short and practical so you can fix things fast.

Don’t overcrowd the basket
Give fillets breathing room. One snug layer in the basket lets hot air move and crisps every edge. Crowding equals steaming — and nobody wants that.
Dry thoroughly to promote browning
Dry, dry, dry. Pat each fillet with paper towels before seasoning. Moisture kills crust and makes cook time unpredictable.
Watch thickness; adjust time
Thickness tells the time. Check early and often. Pull a thicker piece a minute later or a thin one a minute sooner so it stays juicy.
Use parchment liners wisely
Perforated, trimmed paper is fine. Never block vents in the fryer basket — airflow is the job that creates that crisp.
- Light oil helps seasoning stick — no puddles.
- Preheat if your unit runs cool for even results.
- Avoid too many flips — one at halfway is plenty.
“Trust your eyes and a quick fork test—opaque center and easy flakes tell the story.”
| Mistake | Fix | Why it matters |
|---|---|---|
| Overcrowding | Cook in a single layer | Ensures even air circulation and crisp |
| Too much moisture | Pat dry with paper | Promotes browning and shortens cook time |
| Blocked vents | Trim parchment; use perforated liners | Maintains airflow so fillets brown, not steam |
Conclusion
A quick rhythm—dry, season, and hit the basket—means dependable results every time. Follow the 380–400°F range and check at 8 minutes. Pull the fillets when they flake and reach safe temp.
Finish with a squeeze of lemon and serve right away. Leftovers make killer tacos or bowls the next day—easy lunches that still taste like a treat.
We loved cooking this with you. Save the recipe, share it with friends, and keep experimenting with spices. Good seafood and good company—can’t beat that!