You’ll make flaky, buttery British scones in your air fryer fast and reliably. Use chilled butter cut into pea‑sized bits, cold cream or milk, flour, baking powder, little sugar and salt, plus an egg. Pat dough to about 2 cm, chill then air fry at 180°C (350°F) until golden. Rotate if needed. Store wrapped with a paper towel and refresh at 160°C for a few minutes. Keep going to pick up pro tips and variations.
Ingredients and Measurements
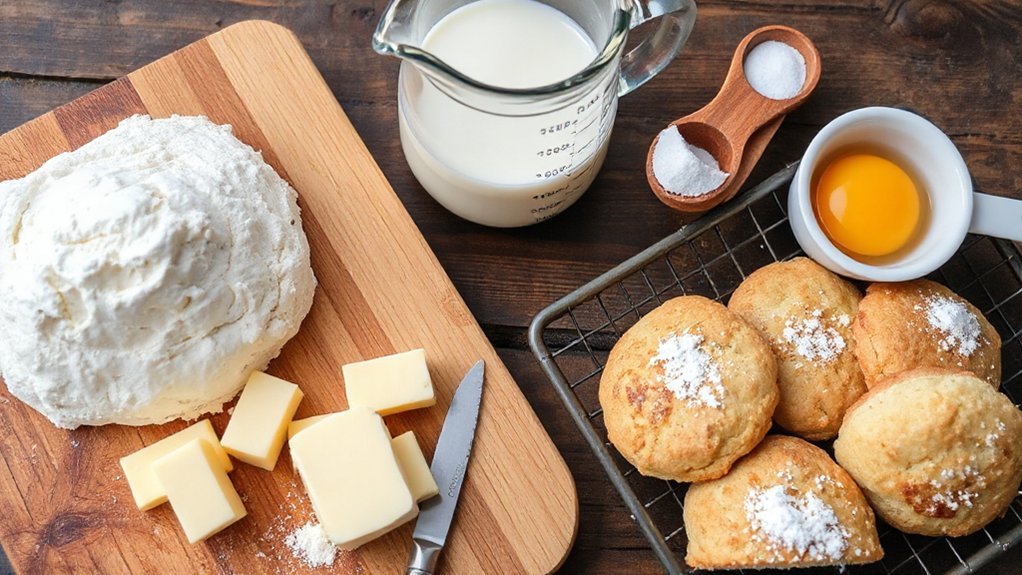
You’ll need a handful of simple, precise ingredients: all-purpose flour, baking powder, sugar, salt, cold butter, milk (or cream), and an egg—measured carefully so your scones rise and texture turn out right. Start by choosing quality flour and butter; ingredient sourcing matters because fresh butter and properly milled flour change taste and crumb. Scoop flour with a spoon and level it, weigh when you can, and keep sugar and salt exact. Cut cold butter into cubes and chill it—those cold bits create flaky layers. For liquids, pour milk or creamor creamand beat the egg lightly before adding. If you’re switching volumes, use reliable measurement conversions: tablespoons to grams, cups to grams, or milliliters for precision. Label ingredients, prep them in small bowls, and work efficiently. You’ll move faster, avoid mistakes, and end up with scones that’re tender, well-risen, and delightfully buttery. Serve warm with jam and clotted cream.
Air Fryer and Pantry Equipment
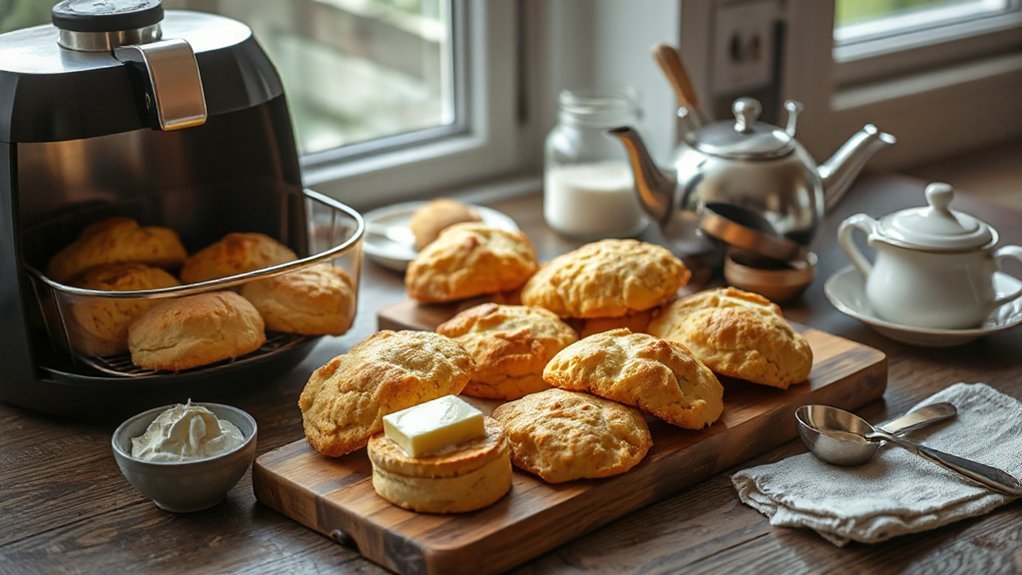
Countertop air fryer and pantry prep go hand-in-hand, so get your equipment organized before you mix: make sure your air fryer has a roomy basket or oven-safe pan that fits scones without crowding, and that you’ve got parchment rounds or reusable silicone liners to prevent sticking. Next, check capacity and heat range so you know how many scones you can cook per batch; 5–6 quart unit is versatile. Have digital timer and an oven thermometer to keep crisp edges consistent. Stash a nonstick spatula and tongs nearby for gentle transfers. Keep basket liners, a wire rack, and an oven-safe pan for varied textures. For pantry tools, line up accurate measuring cups, a kitchen scale, and nested mixing bowls for dry and wet staging. A fine sieve, whisk, and pastry brush finish the kit. Organizing these items now saves time and keeps your workflow smooth and cheerful.
Dough Preparation and Shaping
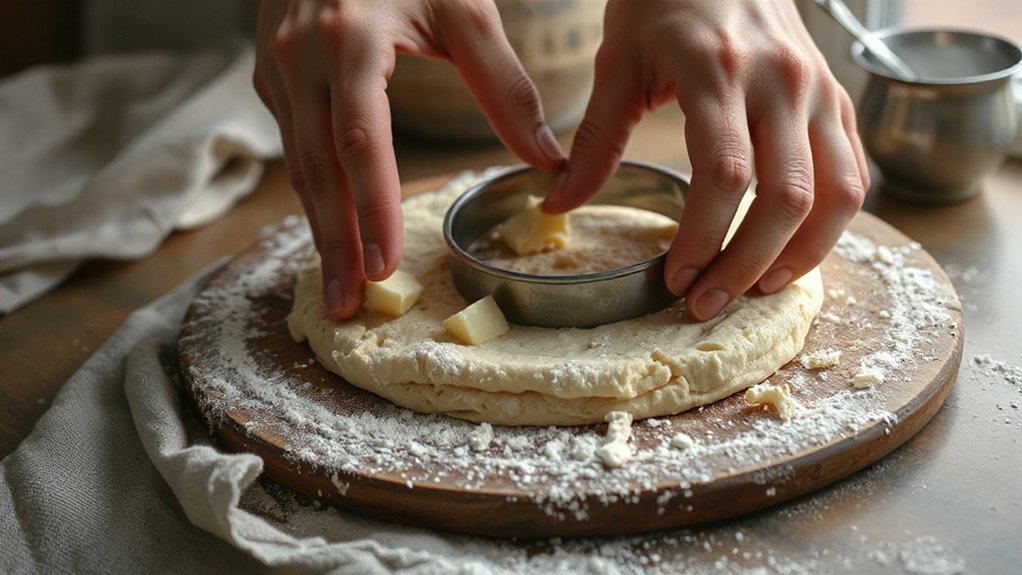
Keep your butter and liquids ice-cold and work quickly so the dough stays flaky; toss flour, sugar, baking powder, and salt together, grate or cut in chilled butter until pea-sized bits remain, then stir in cold cream or buttermilk just until the mixture holds. Pat the dough gently, don’t over-knead — you want visible layers from a simple lamination technique: fold the dough into thirds, press, rotate and fold again once or twice to build flakes. For Round shaping, press the dough to about 2cm thick and use a sharp cutter, avoiding twisting.
- Chill briefly (10–15 minutes) to relax gluten and firm butter.
- Brush tops with cream for color; don’t press the cutter down hard.
- Rework scraps lightly, rest, then shape.
You’ll feel the dough change as layers form; move briskly, keep surfaces cool, and handle with confidence so scones bake tender and layered, and slightly flaky too.
Air Frying Process and Timing
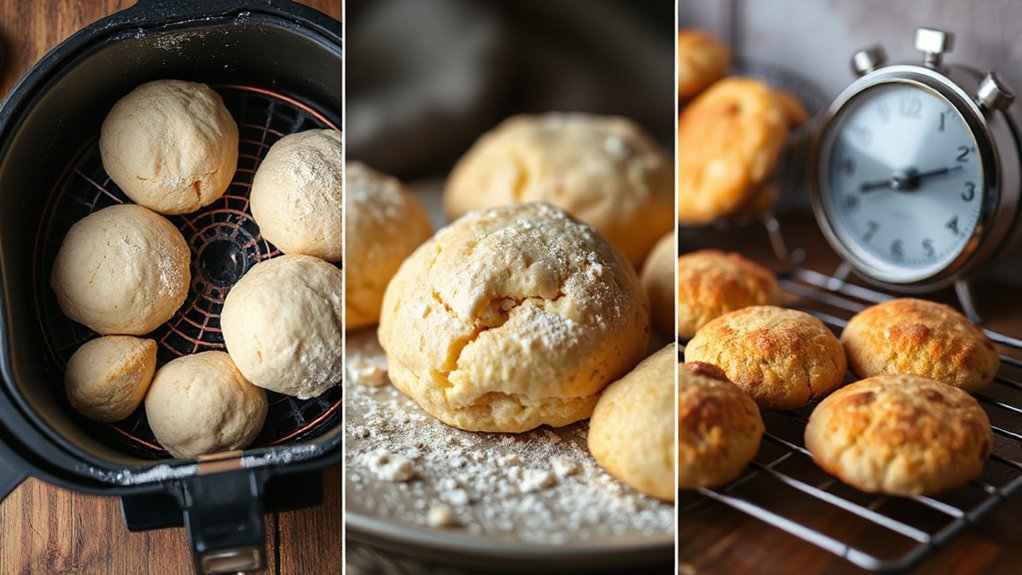
Often preheating the air fryer to 180°C (350°F) for 3–5 minutes gives scones a quick burst of heat that helps them rise and set. You’ll learn timing and airflow so you get golden tops and tender crumb. Remember Preheat importance: it jump-starts oven spring. Arrange scones spaced for even circulation and set basket at mid-height. Use a short cycle, flip halfway if needed, and watch for 12–15 minutes depending on size. Embrace Cycle synchronization: if you batch bake, keep cycles consistent so results match. Remove scones to a rack for a few minutes to finish setting. Below is a quick guide to common sizes and times.
| Size | Time | Temp |
|---|---|---|
| Mini | 8–10 min | 180°C |
| Standard | 12–15 min | 180°C |
| Large | 16–18 min | 180°C |
| Cut & chilled | 14–16 min | 180°C |
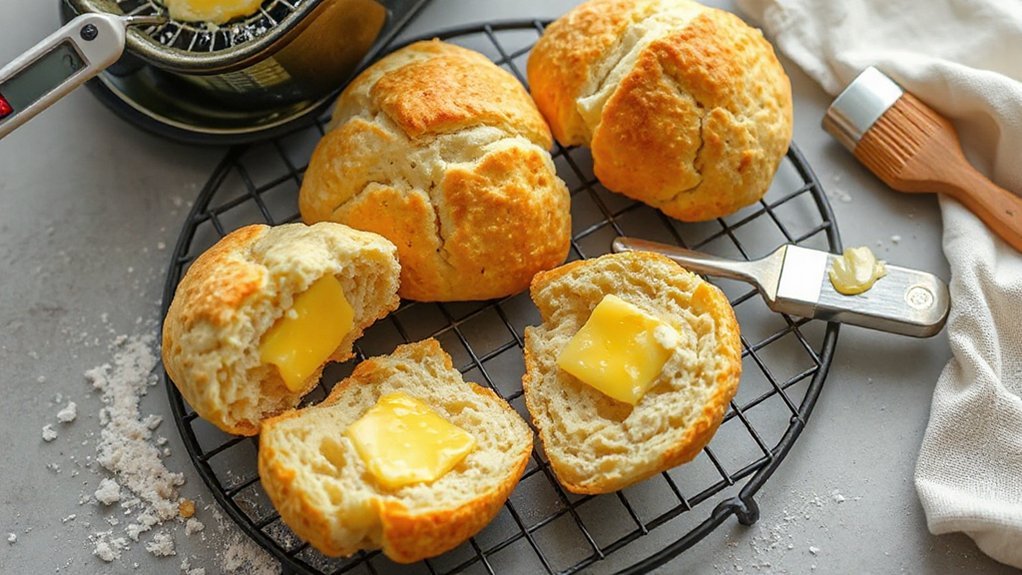
Trust visual cues: golden edges and a skewer coming out clean mean you’re done; cool slightly, then serve warm with jam.
Troubleshooting and Pro Tips
You’ll troubleshoot why your scones turn out dense or crumbly and how to correct uneven browning. Check your flour measuring and mixing—don’t overwork the dough, use cold butter, and give the dough a short chill to keep it tender and flaky. For even color, rotate the basket halfway, lower the temperature and extend time if needed, and try a light egg wash or coating spray for a prettier finish.
Dense or Crumbly Scones

Although scones can turn out dense or crumbly, you can usually save the batch by diagnosing a few common issues quickly. Your Texture Perception and Cultural Expectations shape whether you call them perfect—so aim for the crumb you prefer. Check these fixes and act fast:
- Overworking: Stop kneading once dough holds; too much gluten makes density.
- Incorrect fat ratio: Increase cold butter or cream for flakier lift; too little yields dryness and crumbling.
- Liquid temperature/amount: Use cold liquids and add gradually; too warm melts fat, too little dries dough.
Test after one adjustment to isolate the cause. Cut thicker rounds for tenderness, handle minimally, and cool briefly before splitting so scones keep structure without crumbling. You’ll soon nail your ideal scone.
Uneven Browning Fixes
Once you’ve sorted density and crumbliness, uneven browning is the next thing to tackle—it’s usually down to heat distribution, surface moisture, or placement in the basket. First, do a quick visual assessment mid-bake: open the basket briefly and note hot spots. Rotate the tray or flip scones to even exposure, and stagger them so air flows around each. If tops darken too fast, lower temperature by 10–20°F (5–10°C) and extend time; if bottoms burn, raise rack or add a thin foil layer under the basket. Brush tops with a light milk or egg wash for consistent sheen, but avoid wetting unevenly. Set clear color targets — golden top, pale bottom — and adjust technique next batch until you hit them. Measure and note changes.
Flavor Variations and Add‑Ins
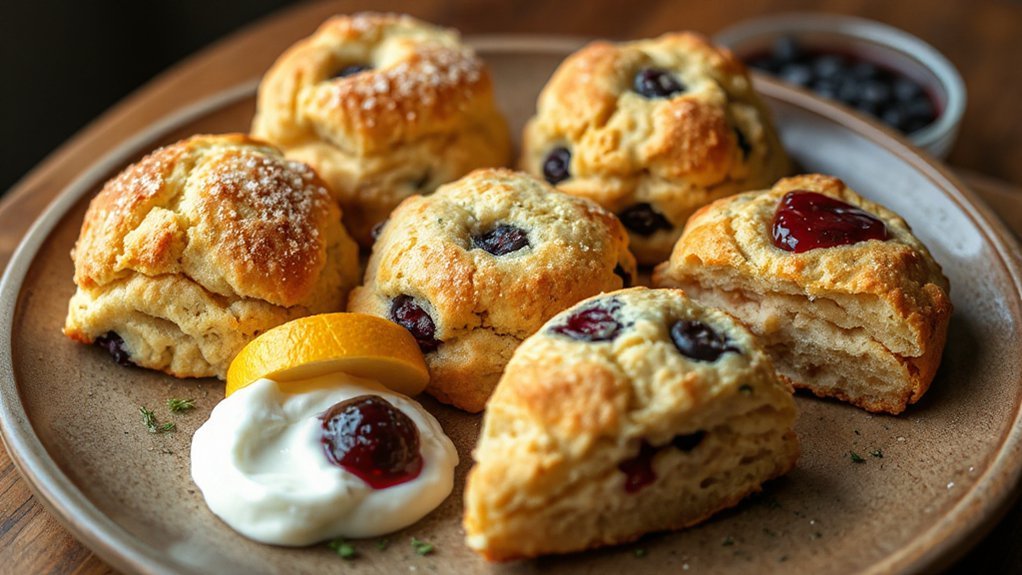
When you’re craving variety, air fryer scones make a perfect canvas for bold add‑ins and flavor twists—think lemon zest and blueberries, cheddar and chives, or brown sugar with cinnamon. You can mix in bright citrus, tart berries, savory cheese, or warm spices; Seasonal pairings help you match local produce to scone batter, while International inspirations bring unexpected combos like matcha and white chocolate or za’atar and feta. Keep add‑ins modest so scones rise well: fold gently, chill briefly, then shape. Try these quick ideas:
- Blueberry + lemon zest for sunny mornings.
- Aged cheddar + chives for savory tea.
- Brown sugar + cinnamon + pecans for cozy treats.
If you want texture, fold in whole berries or grated cheese; for uniform pockets, chop larger items small. You’ll enjoy experimenting—just keep balance in mind so each bake sings without overwhelming the buttery base, and delight your guests.
Serving, Storage, and Reheating
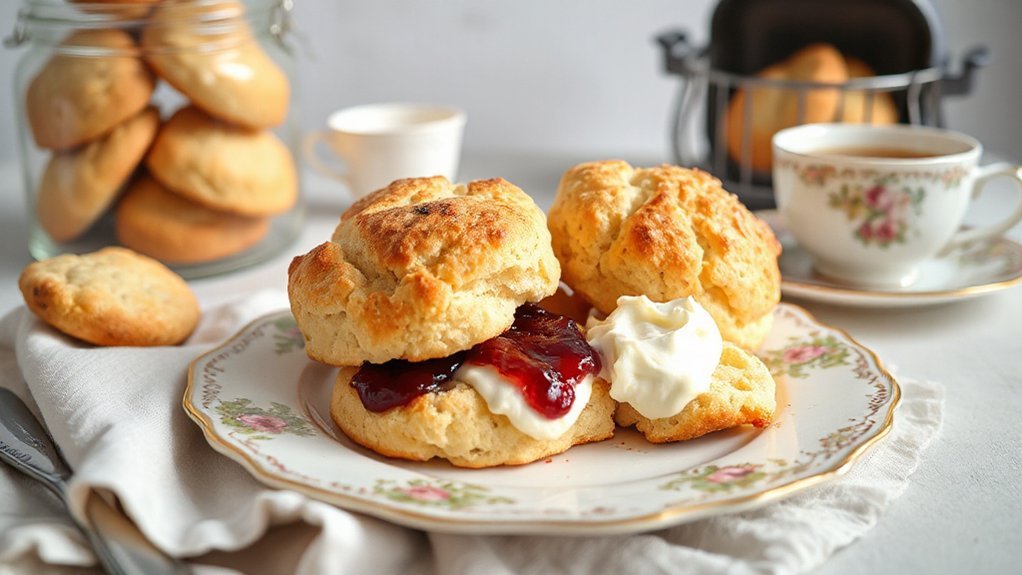
When it’s time to enjoy your air fryer scones, serve them warm with clotted cream, jam, or a simple lemon glaze to highlight the flaky texture. If you’re keeping them a day or two, store cooled scones in an airtight container at room temperature to preserve softness. To revive them, reheat briefly in the air fryer or oven until gently crisped—about 3–5 minutes—so they taste freshly baked.
Serving Suggestions
If you want your air fryer scones to shine, serve them warm with a smear of butter, jam, clotted cream, or a savory topping like herb butter or smoked salmon. For Tea pairings and Platter styling, pick pots of strong black tea, lighter green blends, and a sparkling option to cut the richness. Arrange scones with small bowls of condiments so guests help themselves.
- Warm butter and jam — classic and irresistible.
- Savory trio — herb butter, smoked salmon, chive crème.
- Shareable platter — mix sweet and savory for variety.
When reheating, brief blasts in the air fryer revive crisp edges without drying the crumb. You’ll impress guests and keep tea time lively with minimal fuss and maximum flavor every time.
Short-Term Storage
Because scones taste best fresh, you’ll want to store them so they keep their crisp edges and tender crumb. Cool completely on a rack, then wrap individual scones in parchment or wax paper to avoid sweating. Pop wrapped scones into an airtight container; add a paper towel to absorb moisture and practice condensation control—open the container briefly when you check them. Label the container with shelf life labeling: write the bake date and use-by within 2 days at room temp. If you need a short extension, refrigerate up to 4 days but expect slight texture changes; keep them sealed to prevent fridge odors. For serving within hours, a loosely covered basket preserves crust better than plastic sealed tight, and enjoy fresh, flaky scones daily.
Reheating Best Practices
Although scones taste best fresh, you can revive their crisp edges and tender crumb with the right reheating routine, and you’ll want to treat serving, storage, and reheating as a coordinated plan rather than separate chores. When you’re ready to serve, let refrigerated scones sit 15 minutes at room temp, then use your air fryer at low heat for even reheating. Focus on Moisture Retention: loose foil prevents drying, or spritz with a little water. Practice Temperature Monitoring with an instant-read thermometer; aim for 60–65°C (140–150°F). Use this quick checklist:
- Bring to room temp (15 min)
- Air fry 3–5 min at 160°C, foil optional
- Rest 2 min, check center temp
Serve warm with clotted cream and jam. You’ll impress guests every time, guaranteed period.
Conclusion
You’ve just mastered buttery air-fryer scones that’ll steal the show at tea time. Follow the steps, trust your instincts, and you’ll have warm, flaky bites faster than a kettle whistles. Don’t worry about perfection — tweak the mix, add berries or cheddar, and make the recipe yours. Store leftovers snugly and reheat briefly. Like a well-tuned clockwork, these scones bring comforting rhythm to your afternoon ritual. Invite friends, pour tea, and savor every golden, buttery mouthful.