
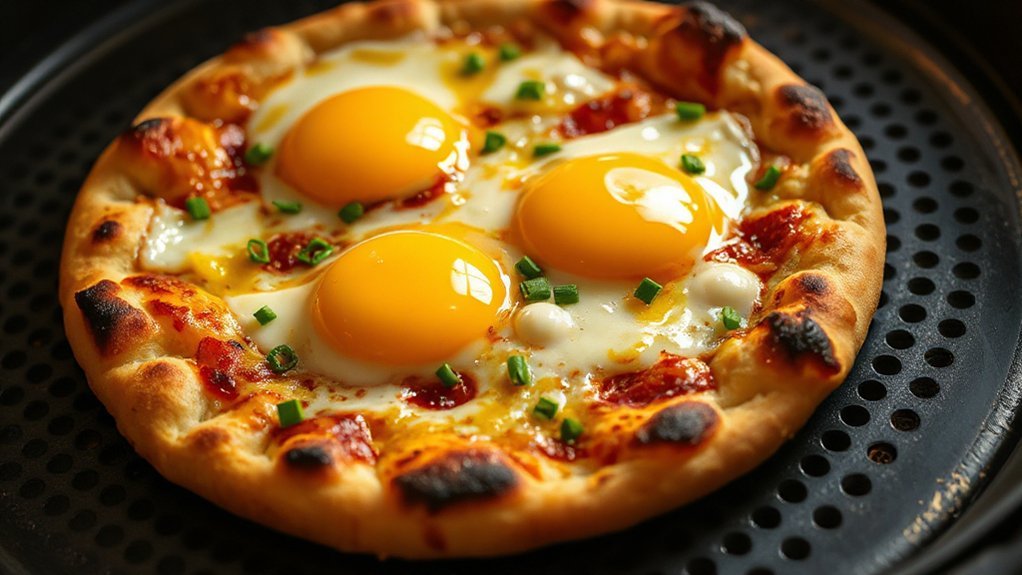
You’ll crisp a store-bought or homemade crust in the air fryer, pile on sauce, cheese and pre-cooked meats, then crack eggs into shallow wells so whites set while yolks stay runny. Preheat 375°F for 3–5 minutes, use a perforated pan, and check eggs at 6–8 minutes for jammy yolks. It’s fast, forgiving, and great for weekend crowds, and the tips below will help you customize, time, and troubleshoot like a pro with confidence every time.
Why This Air Fryer Breakfast Pizza Works Every Time
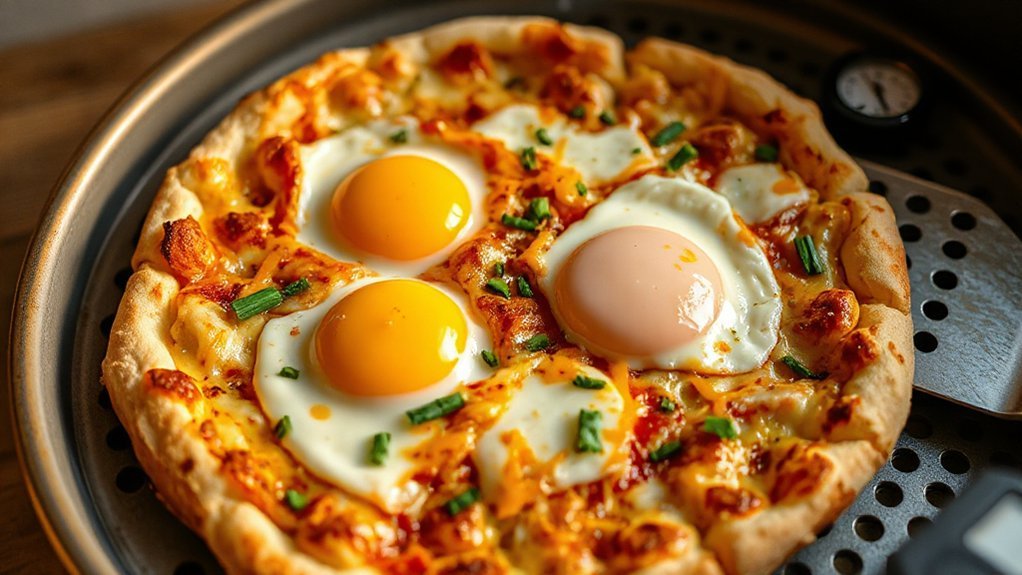
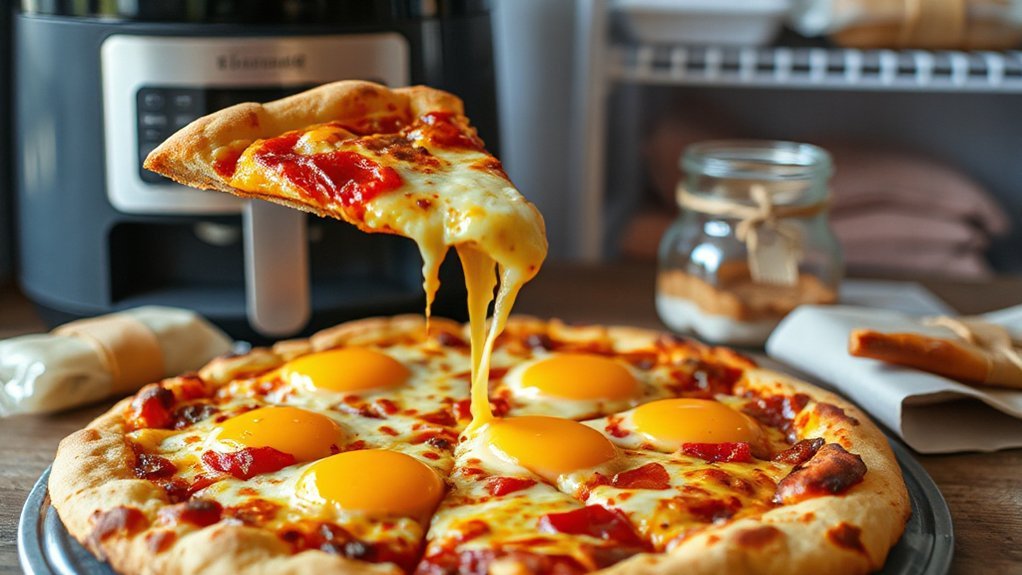
Almost every time this air fryer breakfast pizza comes out perfectly: the high, even heat crisps the crust while sealing in toppings and cooking eggs without sogginess, so you get a golden base, melty cheese, and set yolks in minutes. You’ll notice the air fryer’s rapid circulation gives consistent results, so you don’t babysit ovens or deal with uneven browning. You can customize toppings but the method stays reliable: preheat briefly, assemble compactly, and watch cook times closely. That predictability turns this into a weekend ritual—fast to start, fun to eat, and easy to repeat. Kids and adults love the quick turnaround, which explains its strong family appeal; you’ll serve hot slices that maintain texture and flavor. With minimal cleanup and forgiving timing, you’ll feel confident trying variations. Follow the simple rhythm and you’ll deliver breakfast pizzas that look impressive without extra effort, every single time. Guaranteed satisfaction.
Ingredients and Handy Substitutions
You’ll find quick egg options—scrambled, cracked whole and baked, egg-white-only, or vegan chickpea-flour “eggs” to suit any taste. Try different cheeses—mozzarella for melt, cheddar for punch, feta for tang, or a plant-based shred; grate or slice to control melt and salt. For crusts you can use store-bought dough, English muffins, tortillas, or a cauliflower crust for a gluten-free option.
Egg Options and Swaps
Choosing the right egg style can make or break your air fryer breakfast pizza, so think about texture and cook time before you start. You can crack whole eggs into wells for runny yolks, scramble for even coverage, or pour a beaten egg base to set quickly. If you want vegan or allergy-friendly swaps, mix Chia eggs, Silken tofu and a pinch of kala namak for eggy flavor, or use chickpea flour batter for a firmer bite. For quicker meals, precook and slice hard-cooked eggs to reheat on top. If you love custardy centers, use low heat and cover briefly. Test one pie to find your favorite combo; adjustments are simple and satisfying. Swap herbs and spices to tailor the flavor easily without fuss.
Cheese Alternatives and Tips
Since egg choice changes how much moisture your pizza holds and how long it cooks, pick cheeses that play well with your egg style. If you want gooey melt, go with mozzarella or Monterey Jack; they brown nicely without getting greasy. For punchy flavor, grate aged cheddar or Parmesan after cooking so eggs stay tender. If you’re dairy-free, try Vegan Cheeses that melt—look for cashew-based or coconut-oil blends labeled sticky-melt; if you need Nut Free options, choose soy or tapioca-based vegan cheeses, and confirm packaging says Nut Free. Sprinkle a little feta or goat for tang, but add sparingly to avoid drying eggs. Always pat wet toppings, and scatter cheese in thin layers for even melting and quick air-fry results. Finish with fresh herbs.
Crust and Dough Swaps
How thin or chewy do you want your breakfast pizza to be? You can swap crusts fast: use pre-made dough, naan, or cauliflower crusts depending on time and texture. For sourdough depth, use Fermentation Techniques for tang—plan ahead. If you’re short on time, Store bought Comparisons favor pizza dough or pre-baked shells. Try whole wheat for nuttiness or biscuit dough for pillowy edges. Below are quick swaps to guide you:
| Swap | Result |
|---|---|
| Naan | Thin, crisp base |
| Cauliflower | Gluten-free, tender |
| Biscuit dough | Thick, fluffy crust |
Pick swaps that match toppings and air fryer size; press, dock, and pre-bake lightly for best results. Experiment: crisp thinner bases at higher temps, chewy thicker crusts with lower heat and a bit more oil for golden edges every time.
Equipment and Air Fryer Tips
Before you load your pizza, make sure your air fryer and tools are ready so everything cooks evenly and crisply. Use a sturdy perforated pan or pizza rack that fits your basket; it promotes airflow and crisping. Bring an oven-safe skillet or cake pan for deeper toppings, and keep tongs or a spatula handy for safe removal. Spray or brush a light coat of oil to prevent sticking and encourage browning. Preheat briefly so the crust hits hot air immediately. Cook one pizza at a time; overcrowding kills crispness. Flip or rotate halfway if your model has hot spots, and check early—the egg will set faster than you think.
Pick a model with good noise reduction and energy efficiency so weekend breakfasts feel calm and eco-friendly. Clean the basket and tray after each batch to avoid burnt residue. Use a quick thermometer check to verify doneness without overcooking.
Prep Steps Before You Assemble
First, gather your ingredients and tools so everything’s within reach. Preheat your air fryer so it’s ready while you chop toppings and handle the eggs. Trim and slice meats and veggies, grate cheese, and whisk or lightly fry eggs to your liking before you assemble.
Gather Ingredients and Tools
Once you’ve cleared a bit of counter space, gather everything you’ll need so assembly and cooking go smoothly. Lay out your crusts, eggs, cheese, and any toppings — think bacon, spinach, or cherry tomatoes. Use budget planning to pick affordable options, and consider seasonal sourcing for the freshest produce. Get tools ready: a small bowl for eggs, a whisk, and a spoon for spreading sauce. Keep oven mitts handy for safety.
- Pizza crusts or flatbreads
- Eggs, shredded cheese, and sauce
- Toppings (meats, veggies) prepped and portioned
- Tools: bowl, whisk, spoon, tongs, parchment
You’ll move quickly once everything’s within reach, and the meal will come together with zero stress. Double-check portions so no one argues for the final slice please.
Preheat Air Fryer
If you want a crisp crust, heat your air fryer to 375°F (190°C) for about 3–5 minutes so it’s evenly hot when you slide your pizza in. While it warms, check rack position and wipe any crumbs so heat circulates freely. Preheating reduces cook time and helps set a golden edge without overcooking the eggs.
| Step | Time | Tip |
|---|---|---|
| Preheat | 3–5 min | Use medium fan |
| Check | 0–1 min | Remove debris |
| Monitor | 0–5 min | Watch energy consumption |
If your model has smart connectivity, preheat remotely to save time. You’ll get reliable results faster and avoid surprises. Tip: let the basket reach temperature before adding dough, and use a quick thermometer check if you’re unsure; that small step improves texture and consistency every time, trust me now.
Prep Toppings and Eggs


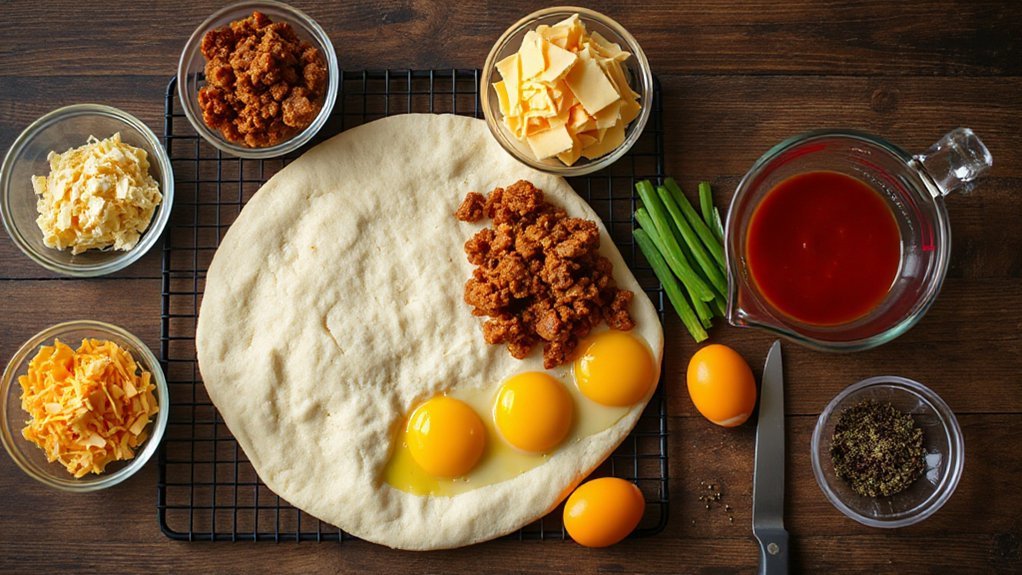
While you’re preheating the air fryer, chop and portion your toppings and get the eggs ready so assembly goes fast: slice veggies thin for even cooking, grate or shred cheese into a bowl, and fully cook and crumble any bacon or sausage (drain and blot to avoid soggy crust). Use confident Knife skills to keep slices uniform, which speeds cooking and improves Visual plating. Whisk eggs gently if you’re making scrambled pockets, or crack individually for sunny-side-up placement. Keep ingredients organized so you can build quickly.
- Sliced peppers/onions — thin
- Meats — crisped and drained
- Cheese — grated
- Eggs — prepped to style
Work briskly; your assembly will feel effortless. Serve immediately for best texture and eye-catching presentation every time.
Assembling the Pizza for Perfect Eggs
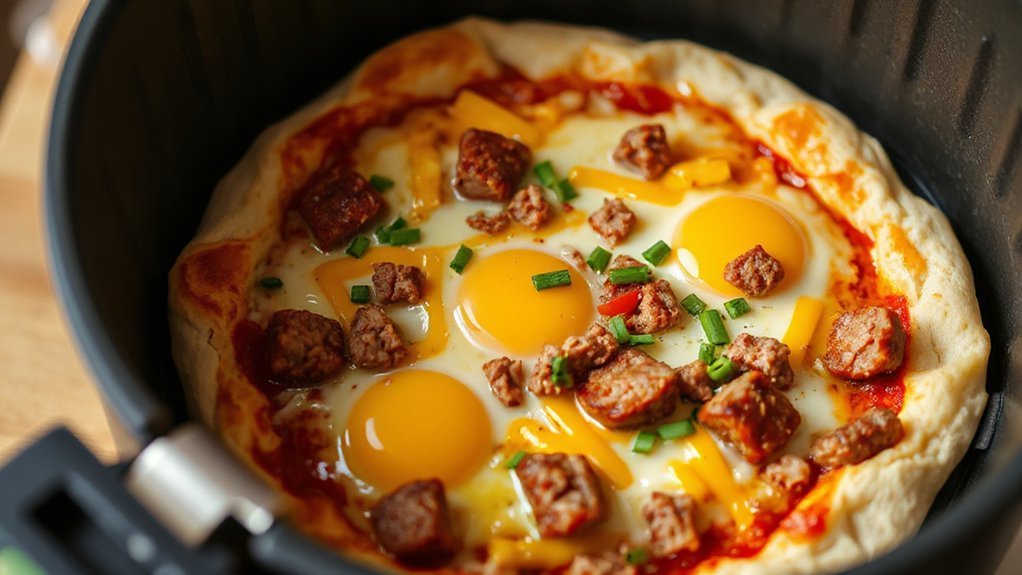
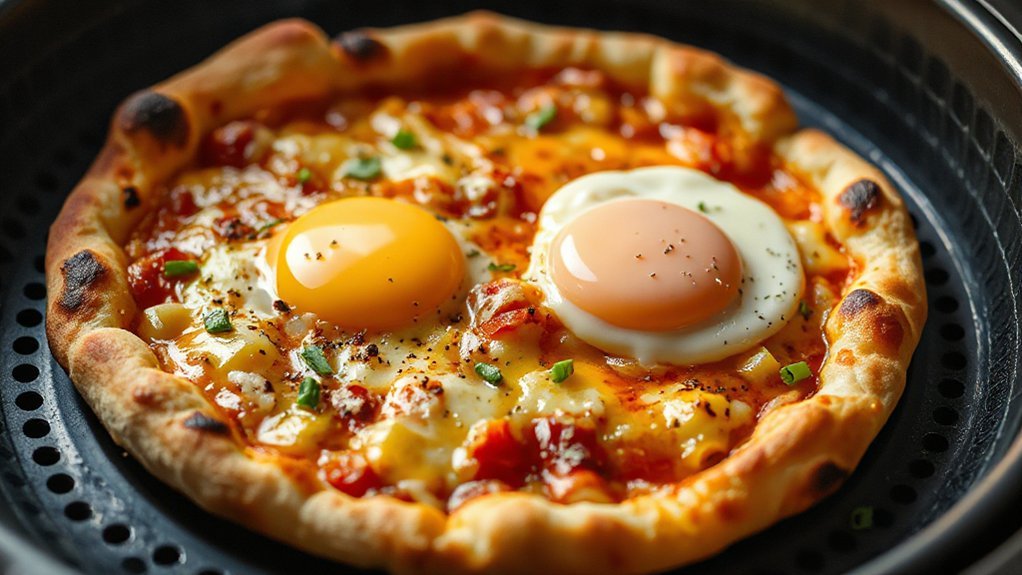
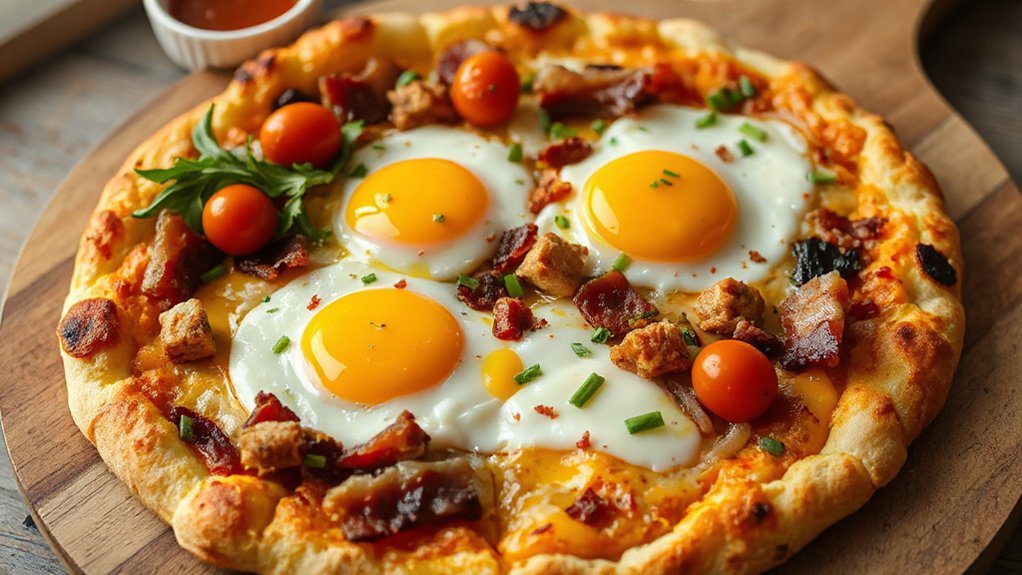
Because the eggs cook quickly, you’ll want to arrange your toppings and make little wells on the sauce-covered crust before you crack them in. Work: press toppings down so they won’t slide, leave a thin cheese border for neat edge crimping, and reserve space for two or three yolk wells depending on size. Use a spoon to carve shallow depressions in the cheese and sauce—deep enough to cradle yolks but shallow enough to let whites spread and set. Scatter bacon, sautéed peppers, or thinly sliced mushrooms around those wells, not on top, to avoid burying the eggs. Season each well with a pinch of salt and pepper, then gently crack an egg into center. If you want runny yolks, keep them elevated by a ring of cheese; for firmer yolks, press the whites a touch to flatten. Finish with a light sprinkle of herbs before moving on now.
Air Frying Times and Temperature Guide
Before you pop the pizza in, preheat the air fryer and set a timer so cooking begins evenly. Lower temps (about 350°F) suit thin or delicate crusts, while heartier crusts crisp up nicely at 375–400°F. Watch the eggs closely — roughly 4–6 minutes for runny yolks, 7–9 for jammy, and 10+ for fully set, adjusting for your air fryer’s quirks.
Preheat and Timing
If you want a crisp crust and evenly melted cheese, preheating your air fryer and getting the timing right makes all the difference. Don’t fall for preheat myths—short preheat (3–5 minutes) usually wakes the unit and avoids soggy bottoms. Use simple timer etiquette: start from when the pizza goes in, check early, and adjust a minute or two for your model. Follow these quick steps:
- Preheat 3–5 minutes.
- Place pizza in center basket.
- Cook 6–9 minutes, checking at 5.
- Rest 1–2 minutes before slicing.
You’ll get consistent results by watching the first run, jotting times, and tweaking. Trust your air fryer; small adjustments make big tasty differences. Keep notes and you’ll master timing for perfect breakfast pizzas every weekend consistently.
Temperature by Crust Type
Wondering which temperature works best for your crust? You’ll pick settings based on crust thickness and material—thin crust crisps quickly, thick or stuffed crusts need lower temps longer so interiors cook without burning edges. Consider thermal conductivity and heat retention: metal pans transfer heat faster, stone holds warmth. Aim for 375°F for medium crusts, 400°F for thin, 350°F for thick or stuffed, adjusting by pan type.
| Crust Type | Suggested Temp |
|---|---|
| Thin | 400°F |
| Medium | 375°F |
| Thick | 350°F |
| Stuffed/Deep-dish | 340°F |
Test once, then tweak timing; you’ll get consistent, bubbly cheese and a perfect crust every weekend. If you use a rack or stone, expect surface browning sooner; lower temperature plus extra minutes prevents overbrowning while allowing the center to heat through evenly and preserves moisture better.
Egg Doneness Times
How do you get the exact yolk texture you want in an air fryer? You’ll dial in time and temp based on Doneness terminology—soft, jammy, set—and simple Safety thresholds for eggs. Preheat to 350°F, place pizza with eggs on middle rack, and watch closely.
- Soft-runny: 5–6 min — yolk barely set, ideal for dipping.
- Jammy: 7–8 min — slightly thickened, glossy center.
- Mostly-set: 9–10 min — slice holds shape, still moist.
- Fully-set: 11–12 min — firm yolk and whites cooked through.
Adjust ±1 minute for higher altitudes or stronger air fryers. Use an instant-read thermometer if concerned—165°F is your safety threshold for fully cooked eggs. Start conservative, check early, and you’ll avoid overcooking while keeping flavors brilliant every single time.
Topping Ideas and Flavor Variations
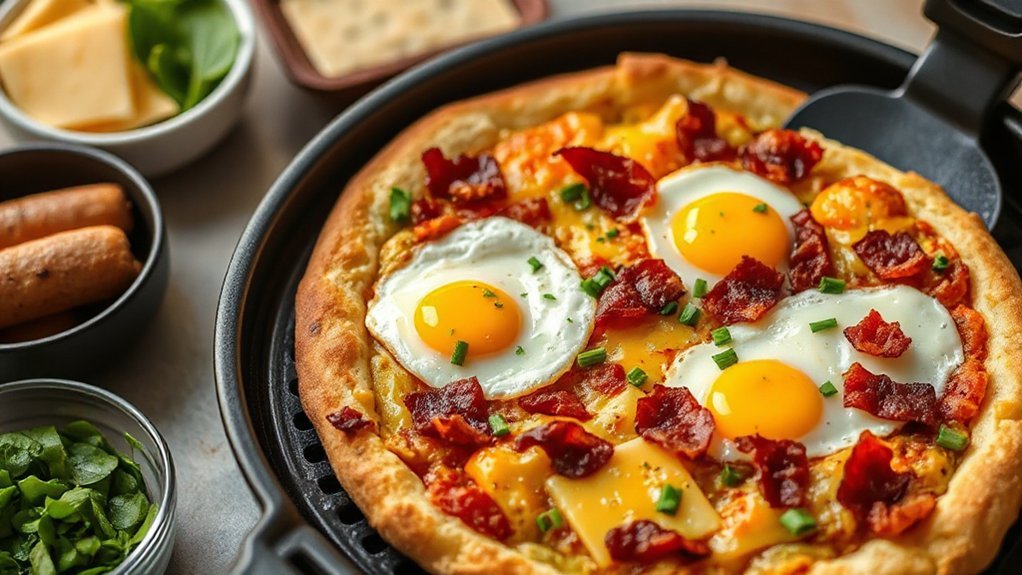
What toppings make an air fryer breakfast pizza irresistible? You’ll want a mix of textures and bold flavors: crisp bacon or spicy chorizo, melty cheddar or creamy ricotta, and bright herbs. Lean on Seasonal produce, like blistered cherry tomatoes and sautéed asparagus in spring or caramelized onions and roasted squash in fall, to keep it fresh. For a lighter bite, add spinach, arugula, or thinly sliced mushrooms that finish quickly in the air fryer. Don’t forget finishing touches—crumbled feta, a drizzle of hot honey, or cracked black pepper lift every slice. If you love Global inspirations, try za’atar and labneh, Mexican chorizo with cotija, or a simple pesto and burrata twist. Mix and match proteins, cheeses, and vegetables to create balanced combos. Keep ingredients prepped to the same size so everything cooks evenly, and you’ll have creative, craveable breakfast pizzas every weekend. Swap flavors based on your mood.
Serving Suggestions and Pairings

Once you’ve picked your toppings, think about how you’ll present and pair the pizza to round out the meal. Serve slices on warm plates, garnish with fresh herbs, and offer simple condiments—hot sauce, salsa, or a lemony crema. For balance, add bright Side Salads: a crisp arugula with Parmesan and lemon, or a tomato-cucumber mix with vinaigrette.
Consider Beverage Pairings that match the richness: a light-bodied white wine, cold brew coffee, or sparkling water with citrus. If kids are around, fruity kombucha or milk works great.
- Fresh herb garnish and lemon wedges
- Arugula or mixed-greens Side Salads
- Sparkling water, cold brew, or light white (Beverage Pairings)
- Condiments: hot sauce, salsa, crema
Arrange everything family-style so people customize their slices. That keeps the meal relaxed, fun, and full of flavor. You’ll love how quick it is to mix and match flavors for every appetite today.
Make-Ahead and Storage Tips
If you’re prepping ahead, you can save time without sacrificing flavor by par-baking the crust and keeping toppings separate until assembly. Cool crusts fully, then stack with parchment between and wrap. Store cooked toppings like sausage and vegetables in airtight containers, and keep cheese and eggs separate. Follow Labeling Guidelines: mark contents and date so you rotate items. For longer storage, try Vacuum Sealing cooked components and freeze up to two months.
| Item | Storage Tip |
|---|---|
| Crust | Par-baked, wrapped, fridge three days |
| Toppings | Airtight, fridge three to four days |
| Long-term | Vacuum Sealing, freezer six to eight weeks |
When ready, assemble chilled pizza and air fry at moderate heat until warmed and eggs set. You’ll have fresh-tasting breakfast fast. If you thaw vacuum-sealed portions, move them to the fridge overnight to preserve texture and flavor. Reheat gently in the air fryer to keep crust crisp and cheese melty every time.
Troubleshooting Common Issues
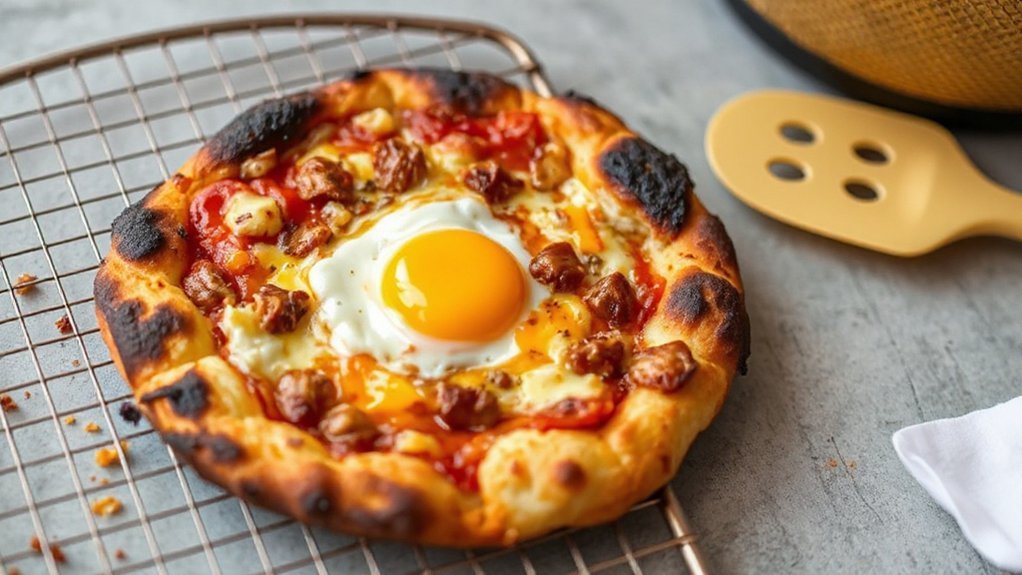
When your breakfast pizza doesn’t turn out as planned, don’t panic — you’ll usually fix it with a few simple tweaks. First, check doneness: if the crust is soggy, air‑fry a bit longer at 375°F and avoid overloading toppings. If eggs are runny but crust’s browned, lower temp and extend time so eggs set without burning. For flavor imbalance, tweak seasoning—add salt, pepper, or red pepper flakes to brighten. If cheese won’t melt evenly, distribute smaller pieces and tent with foil briefly.
- Soggy crust: increase temp briefly.
- Undercooked eggs: lower temp, longer time.
- Overbrowned top: tent with foil.
- Messy cleanup: soak basket immediately to prevent stubborn cleanup.
You’ll get consistent results by adjusting time, temp, and topping size. Keep notes on your adjustments so you can repeat wins—every air fryer heats differently, and small tweaks quickly turn a messy trial into a weekend favorite.
Conclusion
You’ll smile when your kitchen fills with that cheesy, eggy aroma and you realize, by coincidence, a childhood Saturday morning played back in your head. You didn’t plan nostalgia, but it shows up anyway—warm, unexpected, perfect. You pull slices from the air fryer, they wobble slightly, and you laugh because it tastes even better than you imagined. Keep this recipe handy; you’ll make memories as easily as you make breakfast—and share them often, always together.


