You’ll get reliably crispy Air Fryer Chicken Parmesan by pounding breasts to 1/2 inch, briefly brining, rinsing and patting them tacky-dry, then dredging in flour, egg wash and a pressed panko–Parmesan mix. Preheat the air fryer, space pieces single-layer, lightly mist oil, flip once and cook until 165°F for 8–14 minutes depending on thickness. Spoon warm marinara and shredded mozzarella, finish 1–2 minutes under broil or in the air fryer to melt. More tips follow.
Why an Air Fryer Is Ideal for Chicken Parmesan
Because it circulates hot air rapidly, an air fryer gives you that golden, crunchy crust on Chicken Parmesan without drowning the cutlets in oil. You get crisp breadcrumbs and melty cheese while keeping the interior juicy, thanks to efficient Air Circulation and Rapid Heat that lock in moisture. You’ll notice shorter cook times, less mess, and a consistent result from batch to batch; the fan-driven environment browns evenly, so you won’t chase hot spots or soggy patches. You’ll also save oil and calories without sacrificing texture, and reheating leftovers won’t turn the crust into cardboard like a microwave does. Use a light mist of oil and a shallow layer of sauce after frying to keep the topping crisp while the cheese bubbles. With straightforward timing and predictable outcomes, you can confidently serve restaurant-style Chicken Parmesan on weeknights or for guests, and spend less time fussing in the kitchen.
Choosing the Right Chicken Cut and Thickness
For Chicken Parmesan you can use boneless skinless breasts for a classic lean cut or thighs if you want juicier, more forgiving results. Whichever you pick, pound or slice the meat so each piece is about 1/2 inch thick for even cooking and a crisp, golden crust. You’ll get the best air-fryer finish when thickness is consistent, so aim for uniform pieces rather than mixed sizes.
Breasts Vs Thighs
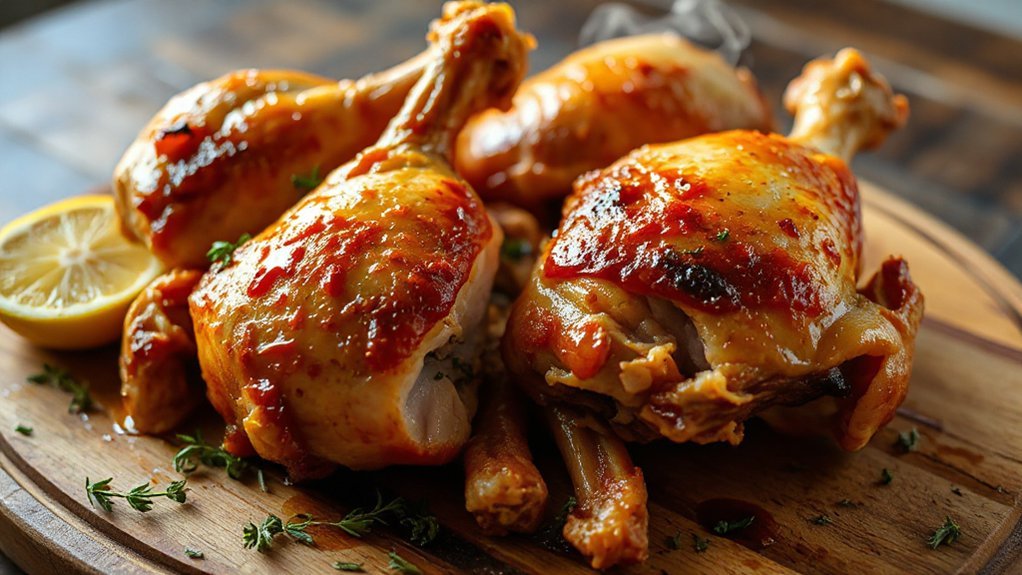
While breasts give you a lean, even canvas, thighs stay juicier and forgive a little overcooking, so pick based on whether you want a cleaner cut or more forgiving flavor — and remember thickness matters: thinner, evenly pounded pieces crisp faster and cook more evenly in the air fryer. You’ll notice clear flavor differences: breasts are milder and let marinades and cheese shine, thighs bring richer, more savory notes that pair great with bold seasoning. For a quick nutritional comparison, breasts are lower in fat and calories while thighs offer more iron and flavor density. Choose breasts when you want a lighter, tidy bite; pick thighs when you want resilience and juiciness under high heat. Either way, adjust seasoning and timing to taste, precisely.
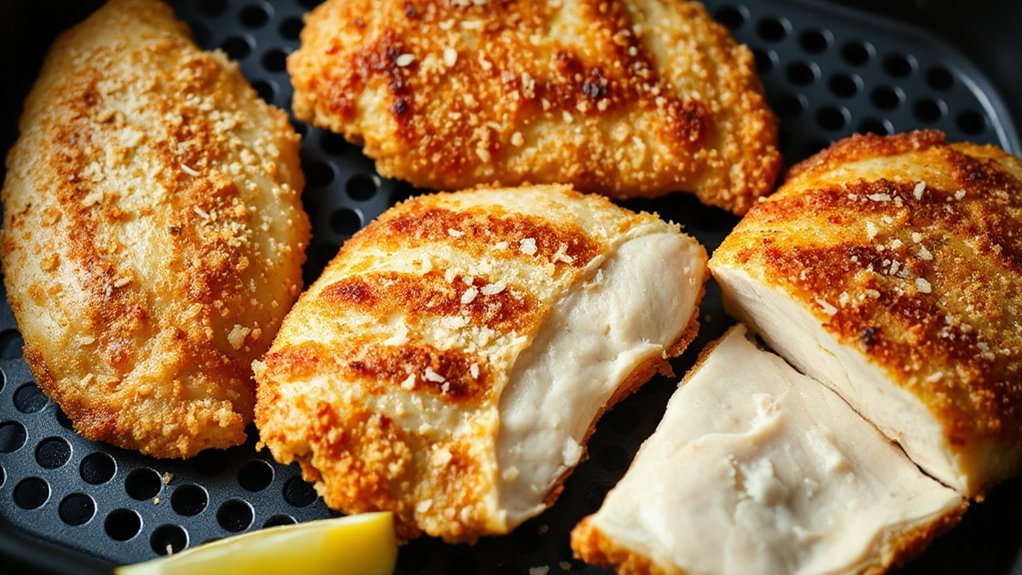
Best Thickness 1/2 Inch
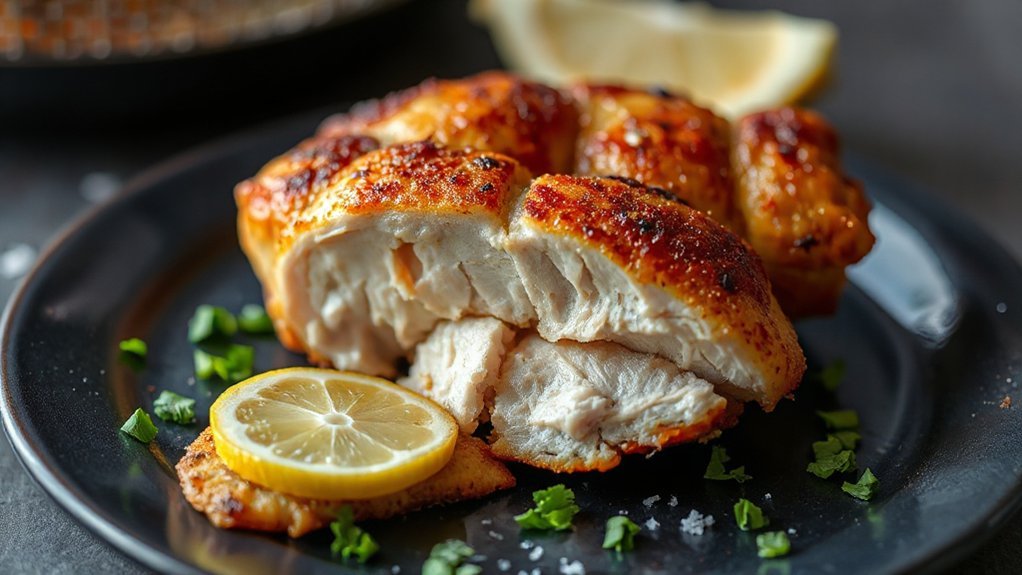
1/2 inch is the sweet spot: it cooks through quickly, crisps evenly, and keeps the chicken juicy without overcooking the exterior. When you pound or slice breasts to this thickness, you get predictable timing and a reliably crunchy crust. Use simple portion control — two modest cutlets per person or one large one — to match appetites and cook times. Good knife skills make the difference: steady, even slices or a gentle butterflying keeps pieces uniform so the air fryer can do its job.
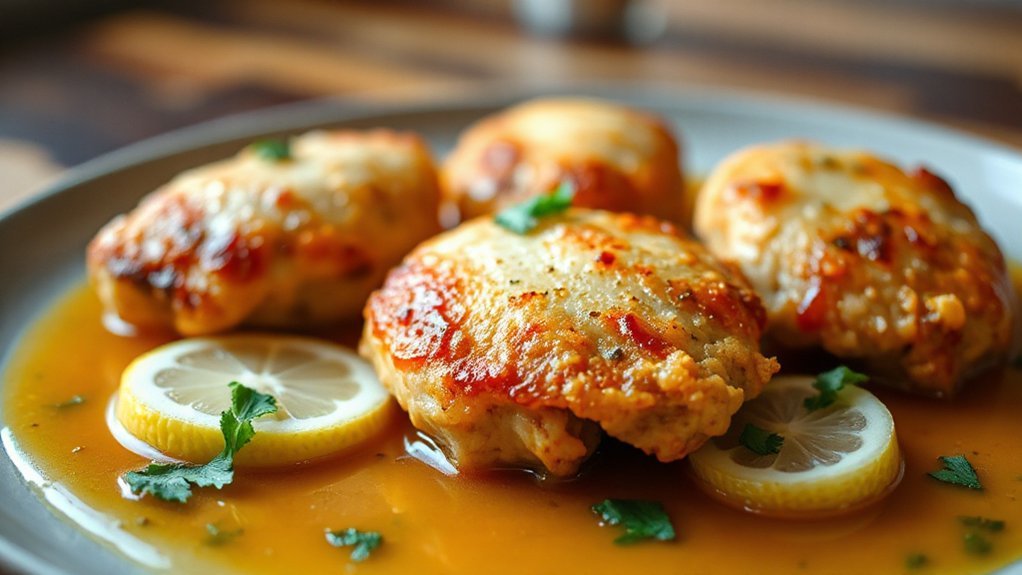
Trim fat, pat dry, and bread evenly; consistent thickness prevents soggy spots and undercooking. Stick to 1/2 inch and you’ll nail texture, timing, and presentation every time. Serve immediately with sauce and a squeeze of lemon for brightness and parsley.
Brining and Patting Dry for Maximum Crisp
Start with a quick salt brine—15–30 minutes is enough to season and lock in juiciness. Rinse it off, then pat the chicken very dry so your breading won’t steam. Chill the pieces briefly in the fridge before breading so the coating adheres and gets extra-crispy in the air fryer.
Quick Salt Brine
Why brine? You want juicy, seasoned chicken without fuss — a quick salt brine delivers that. In minutes the brine chemistry breaks down proteins just enough for better texture while driving flavor infusion deeper than surface salting. Make a simple mix: about 1 tablespoon kosher salt per cup water, add a pinch of sugar, crushed garlic, and a bay leaf if you like. Submerge thin cutlets in a zip-top bag or shallow dish for 15–30 minutes; thicker pieces can take up to an hour. Patience here pays off: you’ll get consistent seasoning and moisture retention that helps breading adhere and crisp in the air fryer. Try it once and you’ll never skip it again.
Rinse, Then Pat Dry
Rinsing the brine off briefly helps you avoid over-salty edges while keeping the interior seasoned, so don’t soak the cutlets — a quick rinse under cool running water is enough. After rinsing, pat each cutlet dry with paper towels until the surface feels tacky, not wet. Removing surface moisture prevents oil-steam traps that cause soggy breading and helps crumbs adhere evenly. Be efficient: a single thorough pat uses less paper and avoids unnecessary water waste, and avoids flavor dilution from over-rinsing. If you want extra crisp, press gently to flatten uneven spots so the coating seats uniformly. You’ll get consistent browning in the air fryer and a crunchy exterior that actually stays crisp bite after bite. Serve immediately for best texture and full satisfaction.
Chill Before Breading
Once you’ve patted the cutlets dry, chill them in the fridge for 15–30 minutes (or up to a few hours) so the surface firms and any remaining moisture tightens—this makes the coating stick better and reduces steam that can soggy your crust. You’ll notice drier edges and a firmer texture that take breading and egg wash without slipping. Respect chill timing: shorter for thin cuts, longer for thicker pieces or after a light brine. Keep fridge hygiene in mind—cover or place cutlets on a tray to prevent cross-contamination and avoid lingering odors that affect flavor. When you pull them, the coating adheres cleanly and the air fryer delivers crispness, not steam-softened soggy breading. Ready to dredge. Proceed confidently and enjoy that crunchy, saucy payoff.
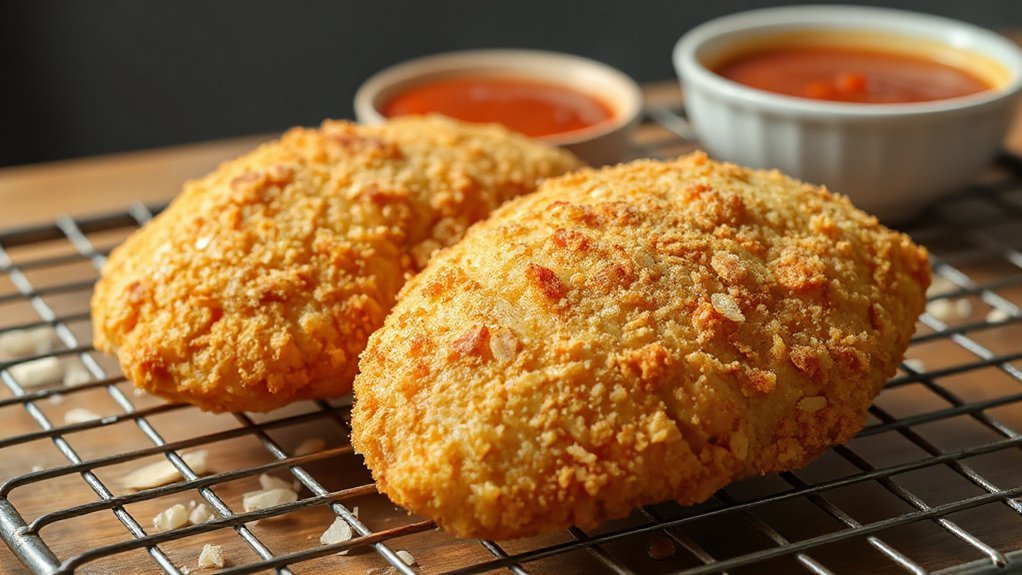
The Foolproof Breading Technique

Getting the breading right starts with prepping the chicken so it cooks evenly and crisps up fast: pound your cutlets to an even thickness, season them, dust lightly with flour, dip in beaten egg, then press into a mixture of panko and grated Parmesan. From there, let the breaded pieces rest on a wire rack — this firms the crust so it won’t slump during cooking. Give each piece a spritz of oil or a light brush; that’s what produces golden crunch in the air fryer. If you need gluten free options, swap the flour and panko for rice flour and gluten-free crumbs; for keto substitutions use almond flour and crushed pork rinds. Don’t overcrowd the basket; work in batches so air circulates. Flip once halfway for even color. Follow this routine and you’ll get reliably crispy, not soggy, chicken pockets of crunchy bliss every time — delicious results.
Seasoned Panko and Parmesan Coating
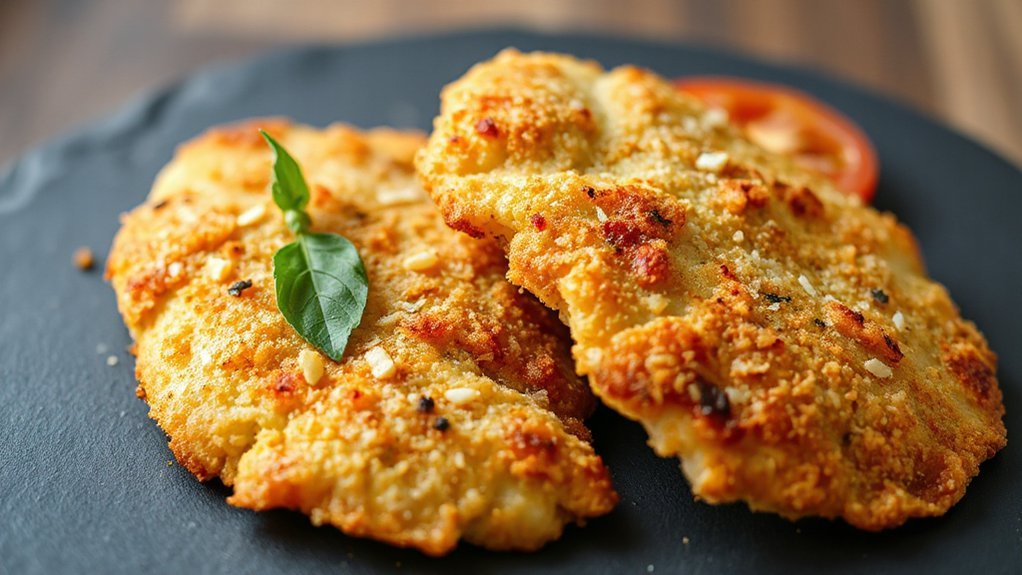
You’ll want a crispy mix—aim for about 3:1 panko to finely grated Parmesan so the crumbs stay light but cheesy. Season that blend with a bright herb and spice mix (oregano, basil, garlic powder, and a pinch of red pepper) to boost flavor. Pat your cutlets dry, press the coating firmly onto the meat, and let them rest briefly so the crust sets before air frying.
Panko-to-Parmesan Ratio
A good rule of thumb is a 3:1 panko-to-Parmesan ratio—three parts flaky panko to one part finely grated Parmesan—which gives you maximum crunch with a noticeable cheesy hit without weighing the crust down. Stick with that texture balance and you’ll get crisp, airy crust without a greasy feel; the panko creates lift while the Parmesan adds flavor and browning. If you want more savory punch, nudge Parmesan up to 2:1, but expect a denser crust. For budget-minded cooks, the 3:1 mix also wins in cost comparison: panko is cheaper per cup, so you get generous coating for less. You can tweak ratios to taste, but start with 3:1 and then refine.
Herb and Spice Blend
Why not wake up that panko-parmesan mix with a bright, well-balanced herb and spice blend? You want herbs that sing—dried oregano for Italian backbone, basil for sweet lift, and a hit of lemon zest for brightness. Think about historical origins: oregano and basil trace to Mediterranean kitchens, while black pepper traveled trade routes. If you grow herbs, garden cultivation gives the freshest aroma; snip and pat dry before chopping.
Use this simple guide to build layers:
- Dried oregano + basil + thyme for depth.
- Lemon zest + garlic powder + fine salt for lift.
- Fresh parsley + cracked pepper + grated parmesan for finishing.
Mix evenly, taste, then coat crisply. You’ll notice crunch and bright flavor in every bite, immediately guaranteed.
Drying and Pressing Steps
Once you’ve blended the panko, grated Parmesan and herb mix, give the crumbs a quick dry-toast in a warm skillet or the oven to pull out any lingering moisture so they’ll crisp up instead of going soggy. You’ll keep crumbs light and ready to bind, which helps fiber restructuring in the chicken and prevents clumps. Pat your cutlets dry, then press crumbs firmly so they adhere — don’t be shy; pressure makes a barrier that fries up crunchy. Maintain surface sanitation by using clean hands or tongs between steps. Let coated pieces rest on a rack for 10 minutes to set. Quick checklist:
| Step | Tool | Time |
|---|---|---|
| Dry-toast crumbs | Skillet/oven | 3–5 min |
| Pat & press | Paper towel | 1–2 min |
| Rest | Rack | 10 min |
You’re ready.
Egg Wash, Milk, and Batter Alternatives
If you’re skipping the classic egg-and-milk dip, don’t worry—you’ve got plenty of swaps that still deliver crisp, golden results. You can use vegan substitutes like aquafaba or store-bought nut milks to mimic binding without flavor overload. Or try a light batter that clings and crisps without sogginess.
- Whisked aquafaba: binds well, gives a light crust.
- Nut milks + a touch of mustard: thin, flavorful adhesive.
- Yogurt or plant yogurt thinned with water: thicker cling, extra tang.
Use a dry dredge of panko mixed with grated Parmesan and a little cornmeal to improve crunch; press crumbs firmly so they adhere. If you use batter, keep it thin and shake off excess before air frying. Let coated cutlets rest briefly so the coating bonds. These swaps keep things totally crispy while accommodating eggs and dairy-free diets, and they’re easy to adjust to taste. Enjoy the crunchy results.
Air Fryer Temperature, Timing, and Basket Tips
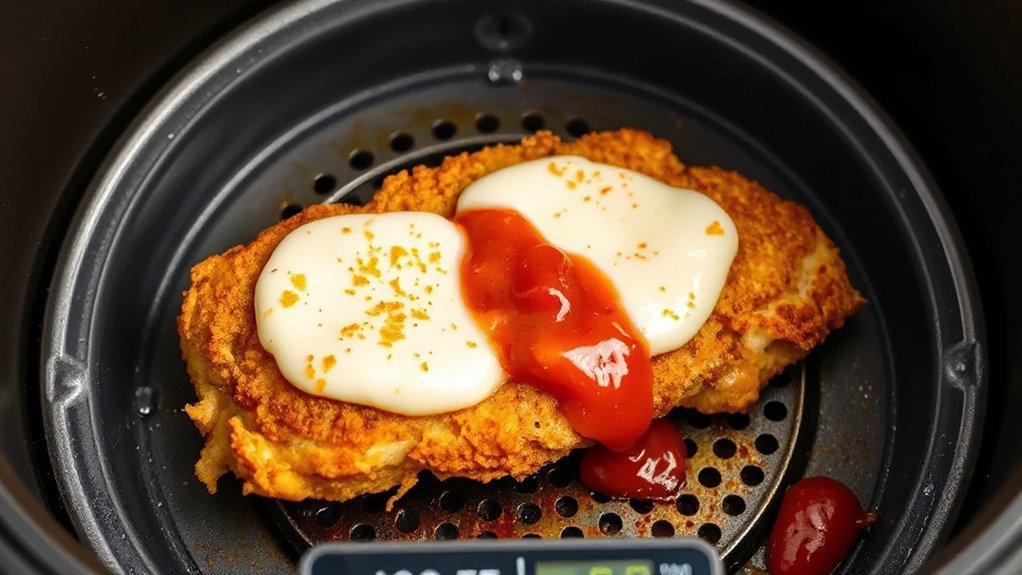
Now that your cutlets have had a moment for the coating to set, you’ll want to get temperature and timing right so the crust stays crisp and the inside reaches 165°F without drying. Preheat importance can’t be overstated: let the air fryer run empty for 3–5 minutes so the basket hits the target and circulation starts. Aim for 375°F for medium-thin cutlets; 380–400°F works if they’re thicker, but check early. Use a probe or instant-read to verify internal doneness — temperature calibration guarantees your readings match heat. Arrange cutlets in a single layer, spaced for airflow; overcrowding forces longer cooks and uneven browning. Flip once halfway to brown both sides and maintain crisp edges. If your basket has hot spots, rotate pieces during the flip. Expect cooks of 8–14 minutes depending on thickness; adjust by a minute or two rather than sweeping changes. Trust the thermometer, not time.
How to Prevent Soggy Breading Every Time
Keeping breading crisp starts before anything hits the basket: pat your cutlets completely dry, dust them lightly with flour (or cornstarch) before the egg wash, and press on a dry, coarse breadcrumb like panko so you get texture that resists steam. You’ll also want to preheat the air fryer and spray sparingly — too much oil pools and softens crust. After cooking, transfer cutlets to a Cooling Rack so air circulates underneath; stacking or resting on paper towels traps moisture. Pay attention to Humidity Control: don’t cover hot chicken and avoid wrapping it while it cools. Quick tips to visualize the process:
Pat cutlets dry, dust with flour then panko, preheat and spray sparingly, then cool on a rack for crisp breading
- Space cutlets, don’t crowd the basket.
- Use a thermometer; remove at done temp, not by time alone.
- Rest briefly on a rack, not in a closed container.
These steps cut steam, keep texture, and help get crisp chicken every time without soggy breading.
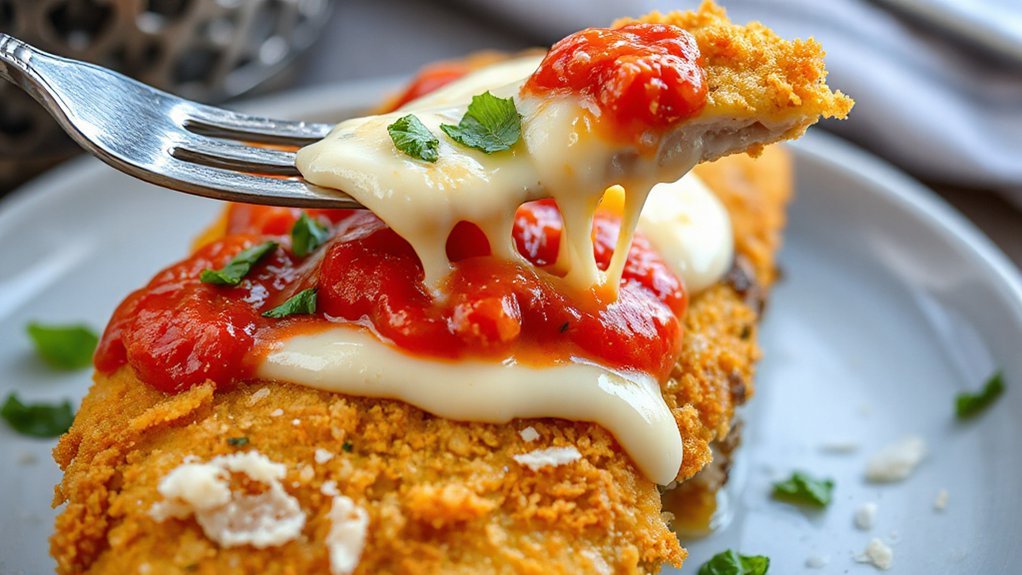
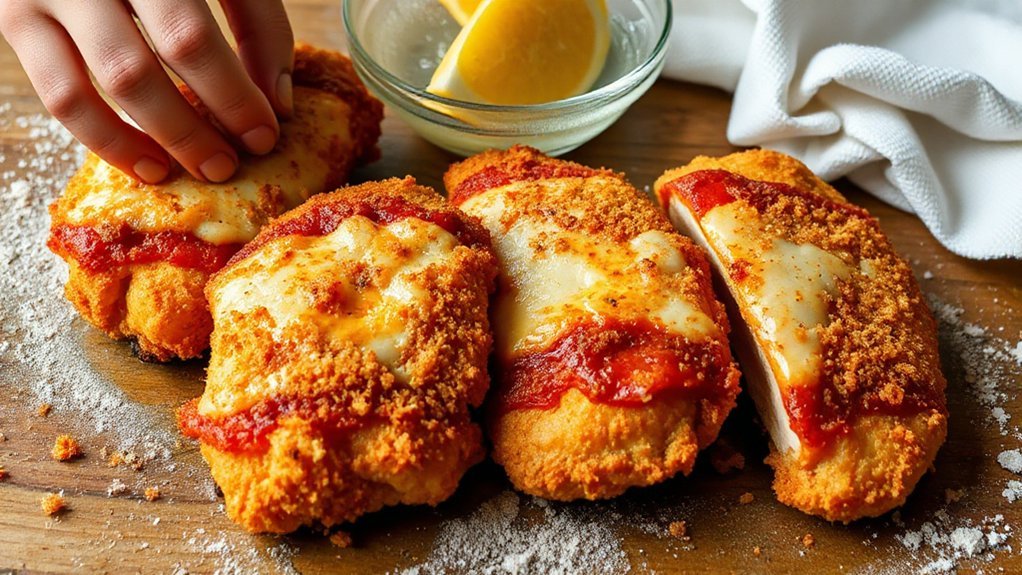
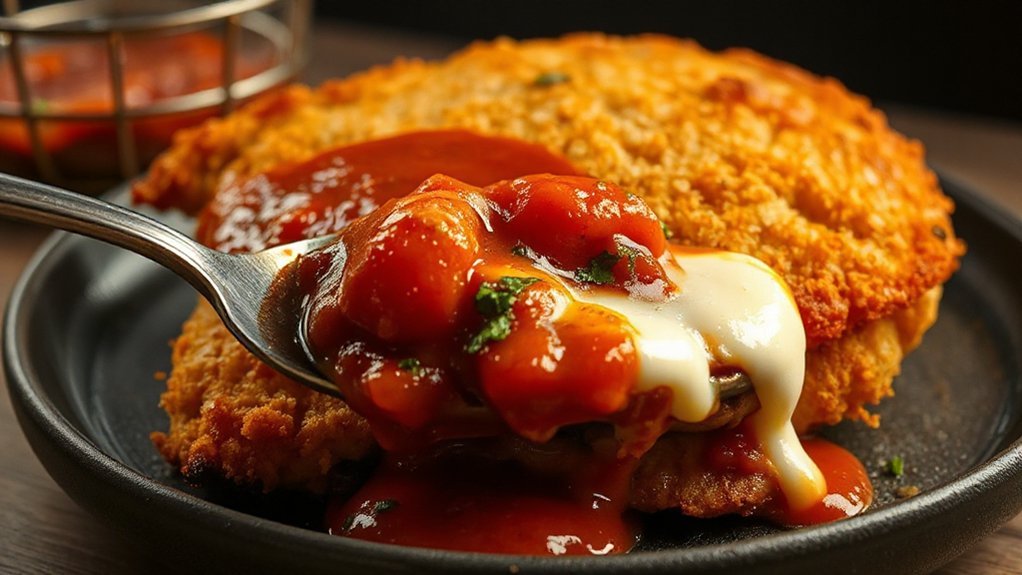
Finishing With Sauce and Melted Cheese
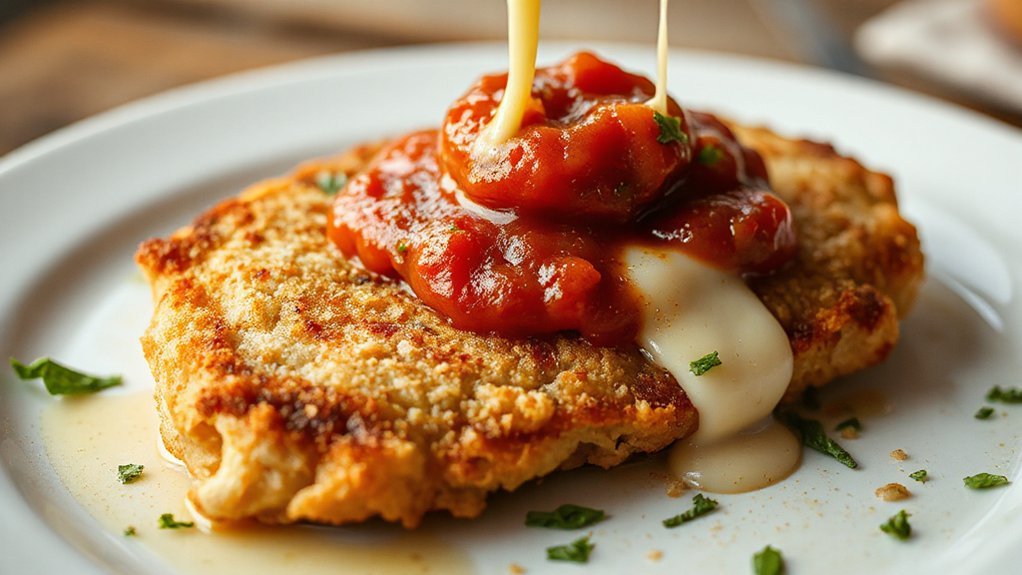
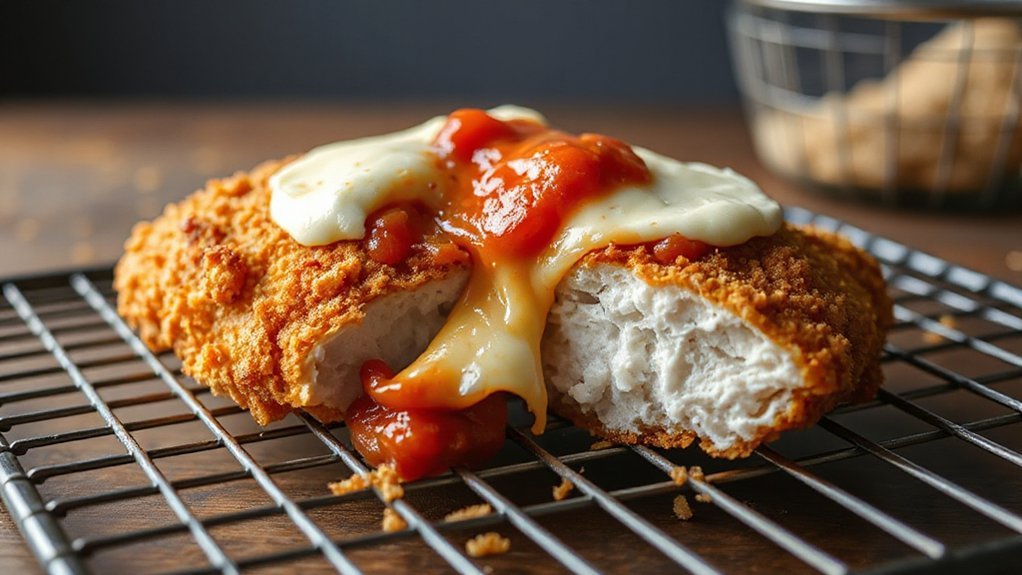
Once your cutlets are crisp and rested, spoon a thin layer of warm marinara over each one so you don’t swamp the crust, then top with shredded mozzarella and a dusting of Parmesan for even melting and bright flavor. Let the residual heat start the melt, then pop the tray back into the air fryer or under a broiler for one to two minutes—watch so cheese goes gooey, not burned. Aim for a balance: a glossy sauce texture that clings without sliding, and cheese that stretches, revealing your crisp edge. For neat presentation techniques, wipe plate rims, stagger cutlets for height, and add basil or microgreens. If your sauce is too thin, simmer briefly to concentrate; if too chunky, pulse to smooth. These tweaks keep the crust crisp and top visually inviting while preserving the textural contrast that makes air fryer Chicken Parmesan sing for immediate crunchy cheesy bliss.
Serving Ideas and Storage for Leftovers
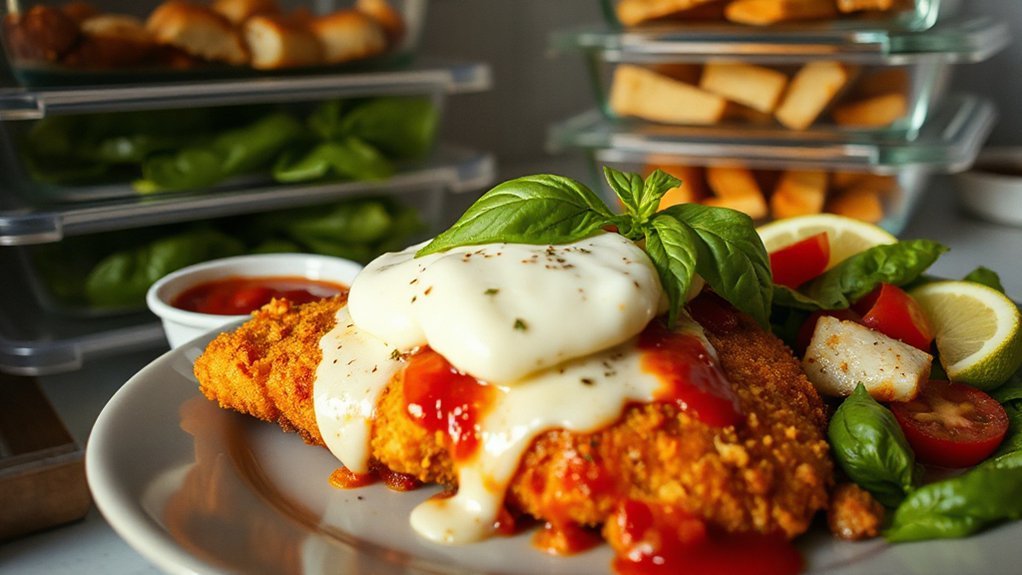
If you want to keep the dish exciting beyond the first meal, serve your chicken Parmesan a few different ways—over spaghetti or zucchini noodles, sliced on a green salad, tucked into a crusty roll for a hearty sandwich, or chopped onto pizza for a quick weeknight twist—and pair it with simple sides like roasted vegetables or garlic mashed potatoes. Keep Sauce Pairings simple: classic marinara, spicy arrabbiata, or a basil pesto drizzle; each changes the mood instantly. For Leftover Recipes, reheat gently to preserve crisp: oven at 350°F for 10–12 minutes or air fry 5–6 minutes. If you prefer cold, slice and add to salads or sandwiches. Pack leftovers in airtight containers, separating sauce to avoid sogginess. Quick tips:
- Reheat in oven or air fryer for crisp.
- Freeze individual portions flat for easy thawing.
- Store sauce separately in small jars.
You’ll enjoy crisp, flavorful leftovers.
Conclusion
You’ve turned ordinary chicken into golden, crackling clouds of comfort that sing with sauce and melted cheese. Keep using the brine, the crisp panko-parmesan hug, and the hot, fast air-fryer blast — they’re your shortcut to non-soggy bliss. Let the basket breathe, resist early sauce, and you’ll reward yourself with crunch that snaps like daylight. Store leftovers cold, reheat crisp, and keep making this recipe until it becomes your weeknight legend and everyone will cheer.